ads1

Sunday, December 9, 2012

Eggless No-Bake Oreo Cheesecake Recipe | No-Bake Cheesecakes

My eggless no-bake Mango Cheesecake recipe has been received well by everyone. A lot of you tried it, loved it, and shared pictures with me. But one thing that a few people complained about was that the cheesecake recipe has gelatine in it and gelatine is not apt for vegetarians. So here's an eggless cheesecake that has crushed Oreos in it (yum?!) and no eggs or gelatine. Win? Win!

Eggless No-Bake Oreo Cheesecake Recipe | Eggless Cheesecakes

I'd been meaning to make an Orea cheesecake (also called Cookies and Cream cheesecake) for ages and wanted to experiment a bit with making a no-bake, eggless cheesecake with no gelatine and no agar agar either. This recipe right here? This is the answer. Deliciously creamy no-egg, no-bake Orea cheesecake that comes together in about 15 mins and all it needs is some chilling time in the refrigerator before serving.

Eggless No-Bake Oreo Cheesecake Recipe | Eggless Cheesecakes

While serving cheesecake in glasses or jars is a great idea and pretty too, I wanted to get individual mini cheesecakes. I fished out a dessert ring I had bought a couple of years back and never used (picture below). That worked out perfect to get the cheesecake you see in the above picture. Erm... it's kinda lonely because I have only one dessert ring!

Eggless No-Bake Oreo Cheesecake Recipe

Preparation time: 15 minutes
Chilliing time: 5-6 hours
Serves 4-6
Recipe adapted from: Bakers Royale

Ingredients:
20 Oreo cookies
1 cup of cream cheese
2 tbsp of sour cream (optional)
1/3 cup of thick cream
1 tsp of lime juice
1/3 cup of sugar
1/2 tsp of vanilla extract
1/4 tsp of salt
2-3 tbsp of melted butter + more for greasing (if required)

How to make Oreo Cheesecake:

1. Blend 10 Oreo cookies and the melted butter into a fine-ish powder. Press this firmly into the base of your glass or cheesecake tin. Refrigerate until needed.
Eggless No-Bake Oreo Cheesecake Recipe | Eggless Cheesecakes

2. Using an electric beater, beat the cream until soft peaks form. No need to beat it stiff.
Eggless No-Bake Oreo Cheesecake Recipe | Eggless Cheesecakes

3. In another bowl. beat the cream cheese, sour cream (if using), lime juice, sugar, salt, and vanilla together until soft and fluffy (about 3 mins). Add the cream to this mixture and beat again to combine.
4. Crush the remaining Oreo cookies coarsely and fold into the cream cheese mixture. Gently layer on top of the biscuit base that you refrigerated. Some of the cream will stick to the sides of the glass but no worries. Once done filling up to the level you like, wipe the edges clean with the tip of a paper napkin.
Eggless No-Bake Oreo Cheesecake Recipe | Eggless Cheesecakes

Refrigerate for at least 5-6 hours and serve chilled. Since we haven't added any thickening agens to the cream cheese, the cheesecake will start melting soon after being taken out. That's fine, it's still delicious!

Eggless No-Bake Oreo Cheesecake Recipe

How to make individual cheesecakes using a dessert ring:

Grease the inside of the dessert ring generously with butter. This is important! Place it firmly on a plate and add the biscuit base, press firmly, and refrigerate.
Eggless No-Bake Oreo Cheesecake Recipe | Eggless Cheesecakes

Pile on the filling when it's ready. Level it out as much as possible. That's all there is to it, really. I kept this in the freezer for a bit before moving it down to the refrigerator.

Garnish with crushed Oreos or mini Oreos before serving.
Eggless No-Bake Oreo Cheesecake Recipe | Eggless Cheesecakes

Remove the ring and voila! Perfectly shaped mini cheesecakes! You can also use a generously greased springform pan for a large, single cheesecake which you can slice and serve.

Eggless No-Bake Oreo Cheesecake Recipe

Notes:

- I have used my own proportions for the cream cheese portion of this cheesecake recipe. You can experiment with it too. Adding some mascarpone to it will be a great idea.

- If you want a firmer cheesecake that holds its shape for longer, add some gelatine mixed with warm water to the cream cheese mixture.

- I used a mix of graham crackers and Oreo cookies for the base. You can use a graham cracker base for this too, entirely up to you.

Thursday, December 6, 2012

How to Make Curd (Dahi-Thayir-Yogurt) Homemade Indian Curd

Homemade curd or yogurt - It's interesting how my curd consumption has changed after marriage. Particularly, after marrying an Iyer boy. He eats curd with everything. When I say everything, I mean everything. With dosa, chapati, idli, noodles (ok, only sometimes with noodles), rice, roti, paratha, you name it and it's been eaten with curd.

I quickly realised I need to master the art of how to make curd at home because buying those Nestle curd cartons from the store was not working out very well for our wallets.

How to Make Curd-Dahi-Yogurt (Homemade Indian Curd Recipe)

Also, there's something special about homemade curd. Although you are not really doing anything special, it feels a bit magical to heat up some milk, add some curd in there, mix, set it aside, and magically have it harden up and taste awesome after a few hours. That's really all there is to homemade curd or yogurt. Indian lassi like mango lassi or strawberry lassi drinkstaste way better when you use homemade yogurt to make them too.

How to Make Curd-Dahi-Yogurt (Homemade Curd Recipe)

However, there are a few things to keep in mind while making curd at home. I learnt most of it by trial and error and I finally feel ready to share it with you all.

Homemade Indian Curd Recipe

Preparation time: 6 hours
Makes 500 ml set curds

Ingredients for making curd:
500 ml of milk (see notes below)
1.5 tsp of curd

How to make Curd:

1. Bring the milk to boil and set aside to cool. The temperature to which it needs to cool is important. It should be warm - not lukewarm, not hot. A good test is to insert your (clean!) finger in the milk and see if you can hold it there for 10 seconds without needing to pull it out because it's too hot or feeling too comfortable because it's too cold.

How to Make Curd-Dahi-Yogurt (Homemade Curd Recipe)

2. Transfer the milk to the container you want to set the curds in.

How to Make Curd-Dahi-Yogurt (Homemade Curd Recipe)

3. Add the curds to the milk. Yes, to make curd you need curd as a starter. The bacteria in our starter then acts on the rest of the milk and turns it all to curd. How cool is that, eh?

How to Make Curd-Dahi-Yogurt (Homemade Curd Recipe)

4. Mix the curd and the milk well together. This step is important. The better they are mixed, the quicker and better the curd will set. Using a whisk is a great idea too.

How to Make Curd-Dahi-Yogurt (Homemade Curd Recipe)

5. Once mixed, keep loosely covered in a warm place. Once the milk has completely cooled down, you can close the lid tighter (even airtight) but this is not necessary.

How to Make Curd-Dahi-Yogurt (Homemade Curd Recipe)

6. After about 6-8 hours, tadaaa! :)

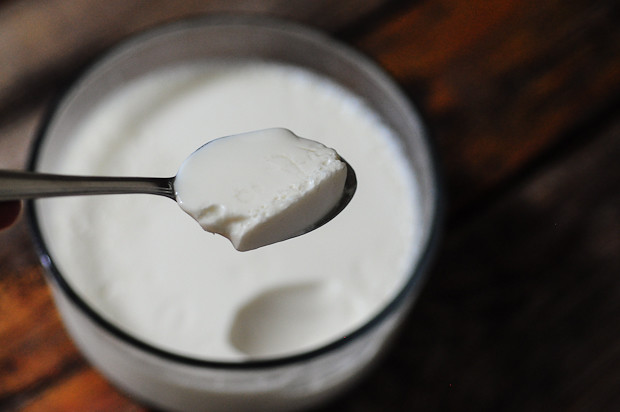
How to Make Curd-Dahi-Yogurt (Homemade Curd Recipe)

Although I have been making curd at home for more than 4 years now, I still feel great when I see a perfectly set batch of homemade curd.

How to Make Curd-Dahi-Yogurt (Homemade Curd Recipe)

One of my favourite "quick snack" as a kid was to eat freshly made dahi with some sugar.

Notes:

- The type of milk you use for making curd impacts the outcome largely. Amma buys directly from a local milkman so her curd turns sour in a matter of hours. She makes fresh curd every day.

- I use the UHT (ultra-heat treated) milk available in cartons in Singapore. I have tried pretty much every brand and find that the Fair Price full cream milk gives me the best results. You can see a picture of it in the 'how to make paneer' post. Fresh milk works too but the more the fat content, the thicker your yogurt.

- The temperature and humidity of the place you live in plays a major part too. Since Singapore is warm through the year and quite humid, I can leave the curds to set pretty much anywhere and still turn up with great results. If you live in a cold place, I would recommend the oven light technique that we discussed in the idli batter recipe post. Just leave the curd to set in your oven with the light turned on for warmth.

- If your curd is stringy and gooey, that means the temperature of the milk was not right - either it was too hot or too cold. You will have to experiment a bit with this to get it right for the place you live in.

- If the curd hasn't set even after 6-8 hours (or 10 hours!), it's possible you used too little starter curd amount, the milk was not warm enough or the temperature is not warm enough.

- What type of vessel should you use to set curd? I am told stainless works out the best but have found out that it doesn't matter that much. I use pyrex glass bowls and love the convenience. Having an airtight lid to close it once the milk has cooled down helps the setting process for curd.

- Try to use the starter curd at room temperature so it doesn't bring down the temperature of the milk too much. This is not a make or break situation but no harm in being careful.

- To make curd without curd as a starter, try adding a couple of dry red chillies (with stalk if possible) into the heated milk. I haven't tried this but a friend of mine said this works as did Sreelu who said it makes curd set faster and thicker in the US.

I think I've covered most of the things that could go wrong with making curd at home, but let me know if you have other questions.

Tuesday, December 4, 2012

Mixed Vegetable Curry, Chettinad Vegetable Curry Recipe

Recipe for simple mixed vegetable curry - Amma makes different kinds of Mixed Vegetable Curries. Some of them use coconut or coconut milk and will be a South Indian Kurma style (recipe coming soon), some vegetables curries will be without coconut and just use very simple masala or spices that is usually served along with roti or chapati.

Mixed Vegetable Curry | Mixed Vegetables Recipe

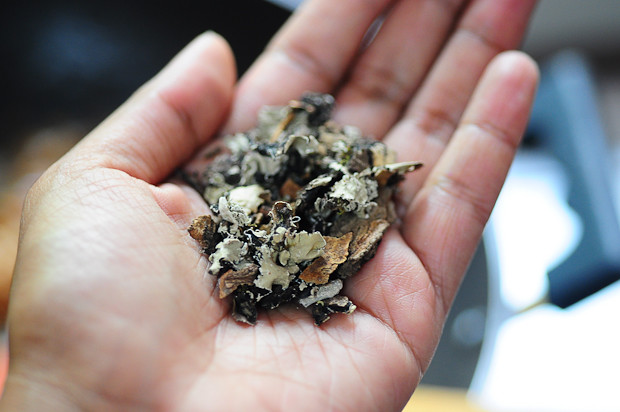
A couple of years back, she discovered Kalpasi. I searched online but didn't find more info on this spice called Kalpasi that's used extensively in Chettinad recipes and cooking.

Mixed Vegetable Curry | Mixed Vegetables Recipe
Kalpasi - A popular Chettinad Spice used in most Chettinad Recipes
It has a bark-like appearance but is spongy and doesn't have much flavour on its own if you smell it. But add it to a mixed vegetable curry and you have a terrific restaurant-style (Chettinad-style too!) mixed vegetable curry that needs no other spices or masala. Amma buys this from Trichy or Nagercoil when she visits family so it's definitely available in Tamil Nadu.

More info on Kalpasi or Dagad Phool: A bunch of you awesome people recognised Kalpasi and left notes in the comments section. I am moving some snippets here so others can benefit. Arundati says "Its called Dagad Phool in urdu. Extensively used in hyderabadi food and its a kind of lichen. Called Stone flower in english.... has a lovely woody fragrance and smoky aroma". Prathibha says "dagad phool is used in many Maharashtrian and Konkani recipes too".

If Kalpasi is not available where you live, you can, of course, add garam masala as a substitute. If you like Chettinad Recipes, you may also like this Chettinad-style Mushroom Masala Recipe.

Also check out: mixed vegetable kurma recipe, paneer korma, soya chunks kurma.

Mixed Vegetable Curry - Vegetable Curry Recipe - Chettinad-Style

Preparation time: 2 hours
Cooking time: 20 minutes
Serves 4 people as a side dish for roti / chapati
Recipe source: Amma

Ingredients for Mixed Vegetable Curry:
2 onions, sliced
4 cups of mixed vegetables (carrot, potato, beans, cauliflower, cabbage, peas, capsicum, etc)
2 green chillies, slit lenghtwise
1/4 cup of cow peas or black-eyed peas, soaked overnight (optional)
2 tomatoes, chopped
1 tsp of red chilli powder (adjust to taste)
1/4 tsp of turmeric powder
A generous pinch of kalpasi (dagad phool)
1 strand of curry leaves
A small bunch of coriander leaves
2 tsp of salt (adjust to taste)
1 tsp of ginger-garlic paste
2 tbsp of oil
1/2 tsp of sugar (optional)

How to make Mixed Vegetable Curry (Chettinad-Style):

1. Cut all the vegetables you are using into bite-sized pieces. You can use whatever you have in hand but capsicum (bell pepper), potato, and carrots are recommended.
Mixed Vegetable Curry | Mixed Vegetables Recipe

2. Add the vegetables, soaked cow peas (if using), salt and green chillies to a pressure cooker pan along with 1/2 cup water and pressure cook for one whistle.
Mixed Vegetable Curry | Mixed Vegetables Recipe

3. Meanwhile, heat oil and add the sliced onions (the oil quantity in the picture looks like a lot because amma was cooking for 12 people that day. I am giving the scaled measurement here). Fry the onions until golden brown and add the ginger garlic paste and kalpasi (or garam masala).
Mixed Vegetable Curry | Mixed Vegetables RecipeMixed Vegetable Curry | Mixed Vegetables Recipe

4. Fry this mixture for 2 mins and add the chopped tomatoes. Saute until the tomates are cooked and mushy. Then add the red chilli powder and turmeric powder. Fry for another minute.
Mixed Vegetable Curry | Mixed Vegetables Recipe

5. Cool this mixture, transfer to a small mixer and grind to a smooth paste. Set aside.
Mixed Vegetable Curry | Mixed Vegetables Recipe

6. I hope you kept an eye on the pressure cooker with our vegetables! One whistle is usually enough to cook the vegetables but they still maintain their shape. Transfer the vegetables into the same pan used before and add the ground paste. Add water if required. Bring to boil. Adjust salt, add sugar and the curry leaves and chopped coriander leaves. Mix well and remove from fire.
Mixed Vegetable Curry | Mixed Vegetables Recipe

Serve hot with hot phulkas / rotis / chapati for a delicious and balanced dinner.

Mixed Vegetable Curry | Mixed Vegetables Recipe

I love mixed vegetable curries of any sort simply because the flavours from any one vegetable doesn't dominate. Amma makes this Chettinad-style mixed vegetable curry very often since it's easy to make in large batches and tastes delicious with minimum spices and masala.


Monday, December 3, 2012

Paneer Makhani~Paneer Makhani Recipe~Microwave Method

The restaurant-style Paneer Butter Masala (which has "inspired" a lot of people, actually) is one of the most popular paneer recipes in this site. While I have made it countless times mostly for guests, the addition of cream, which truly makes the recipe restaurant-style, does add some unwanted calories from fat too.

Paneer Butter Masala Recipe

I didn't let that bother me too much, because this is Paneer Butter Masala and some dishes are meant to be eaten without thinking of calories. Then I came across this Nita Mehta book in the library called 101 Microwave Recipes and found a Paneer Makhani recipe in that! I took a picture of the recipe page on my phone, came home, and promptly made it.

Now, before I go any further, I must say that I don't care much for cooking in the microwave. I like cooking with fire, turning it up or simmering it down and stirring and frying and tapping the ladle against the wok, etc. All that is an essential part of cooking for me.

Paneer Butter Masala (Paneer Makhani) Recipe~Microwave Method

When you cook in the microwave, how does it go? You put something in a (microwaveable, of course) pan, put inside microwave, shut it, turn the knob and wait. Then you take it out, stir, and repeat the above steps. What a boring way to cook.

Now the million dollar question is why did I make this Paneer Butter Masala in the microwave then? Simply because I wanted to give the Microwave a shot and also because I'd been meaning to try these white melon seeds (mogaz) that I brought back from Delhi. They are used primarily to thicken gravies and really gives dishes a restaurant-style feel without the added calories.

Ok, I've talked a LOT. It's time to check out how to make Paneer Makhani.

Paneer Makhani (Paneer Butter Masala) made in a Microwave

Preparation time: 2 minutes
Cooking time: 25 minutes
Serves 2 as a side dish for roti or nan
Adapted from: Nita Mehta's 101 Microwave Recipes

Ingredients for Paneer Makhani:
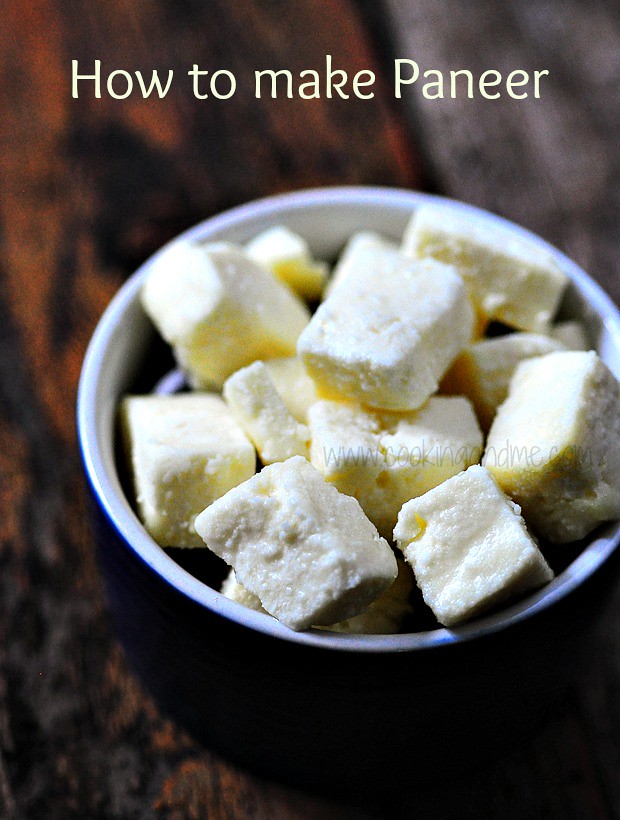
1 cup of cubed paneer (check out how to make paneer at home)
1 large tomato, cut into small pieces
1" piece of ginger, chopped roughly
1 tsp of butter or ghee
1 tsp of oil
A pinch of green cardamom powder
3/4 tsp of red chilli powder (I used Kashmiri Chilli powder), adjust to taste
1 tsp of salt
1/2 tsp of sugar
1 tsp of garam masala
1 tsp of tomato ketchup or sauce
1 tbsp of white melon seeds (magaz) or 10 cashewnuts, soaked in warm water
A generous pinch of kasuri methi (dry fenugreek leaves)
1/2 cup of milk

How to Make Paneer Makhani:

1. Soak the magaz (white melon seeds) or cashewnuts, or even a mix of the two in some warm water.

30-Min Microwave Paneer Butter Masala Recipe

2. Place the chopped tomatoes and ginger in a microwave-safe bowl along with 1/4 cup water. I don't use plastic in the microwave, only glass, so I used this Pyrex container that works great. Microwave on medium-high heat for 5 mins, stirring it after every 2 mins. My MW is a very basic one and it only has two knobs. Use your judgement on what setting to use in yours. Ideally, heat should be medium-high. After 5mins, the tomates will be mushy and the ginger will be soft. Transfer to a plate and once cool, puree to a smooth paste.
30-Min Microwave Paneer Butter Masala Recipe

3. In the same bowl. heat the ghee + oil for 1 min. Add the salt, sugar, chilli powder, garam masala, and cardamom powder. Mix well. To this, add the tomato puree and ketchup or sauce. Mix well again.
30-Min Microwave Paneer Butter Masala Recipe

4. Return to the microwave and cook for 8 mins, mixing after every 2-min interval. At this point, it will start smelling like tomato soup and I was really tempted to add some pepper powder and call it a day but trust me on this and trudge onwards to the Paneer Makhani. Really, trust me.

So while the tomato mixture is cooking, grind the soaked magaz (or cashew nuts) to a smooth paste using some water. Add this to the cooked tomato along with the kasuri methi.
30-Min Microwave Paneer Butter Masala Recipe

5. Mix well and return to the microwave and cook for 5 mins, stirring after every 2 mins. The mixture will turn quite thick and smell delicious, and not like tomato soup anymore.

Add the paneer cubes (no frying of paneer, etc, needed) and enough milk until your desired thickness is reached. I kept it relatively thick so only added about 1/4 cup of milk.
30-Min Microwave Paneer Butter Masala Recipe

6. Microwave again for 3-4 mins. I closed the bowl this time because the tomato mixture splatters and it's painful to clean it up later. Make sure the lid is microwave safe too.
30-Min Microwave Paneer Butter Masala Recipe

That's it we are done! Check for salt levels and add more if required. The Paneer Makhani gravy does get a bit thicker on keeping so add more milk than you think is necessary.

Paneer Butter Masala Recipe

I used homemade paneer so the pieces were super soft and moist and we totally enjoyed a no-so-indulgent Paneer Makhani for lunch yesterday with some Kerala Parotta. My first venture into making Indian dishes in a microwave is thus deemed a success :)