ads1

Showing posts with label Basics Of Indian Cooking. Show all posts

Sunday, November 17, 2013

How to Make Chapati Dough (Roti Dough) in a Food Processor

I have been using my Kitchenaid stand mixer for making roti dough for a couple years now and would argue that buying one just for this is probably worth it. One of my least favourite activities in the kitchen is making chapati dough from scratch and anyway, I am all for technology taking over to make our lives simpler. Recently, I did a poll on my Facebook Page to see what people thought of a food processor and whether I really needed one. An overwhelming number of 'ayes' later, I am now a few hundred dollars poorer and richer by one Magimix. The review of the food processor itself is for another post but today let's look at how to make chapati dough in a food processor.
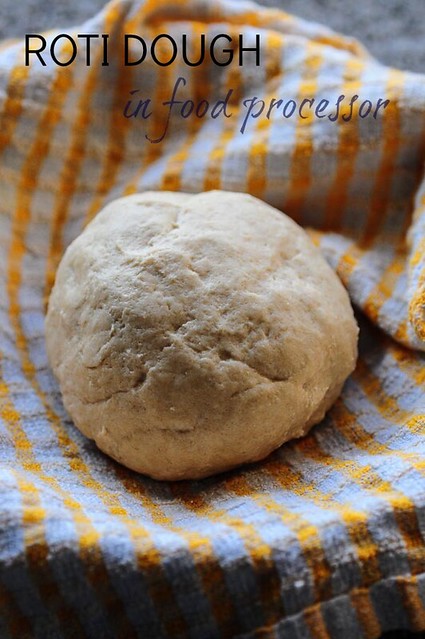
how to make roti dough in food processor

A few things before we start:

  • It's important to have a powerful enough motor to be able to knead dough since it's a 'tough' job for a machine. Make sure you check manufacturer's manual to make sure if you can make dough in your food processor
  • Keep all ingredients ready before you begin
  • I usually add a bit more water to the dough than needed, for smoother kneading, and then dust more flour and finish the final knead by hand

HOW TO MAKE CHAPATI DOUGH IN FOOD PROCESSOR

Preparation time: 10 minutes
Makes enough dough for 7 chapatis

INGREDIENTS:
1.5 cups of atta / Indian whole wheat flour
~ 1/3 cup of water
1/2 tsp of salt (or to taste)
2 tsp of oil, ghee, or butter

INSTRUCTIONS:

1. Make sure your food processor comes with a dough blade. It will have blunt edges but will look the same as your regular chopping blade.
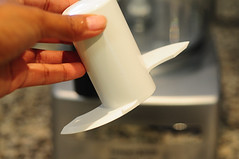
how to make roti dough in food processor

2. Add the atta + salt to the largest bowl in your processor (in case it comes with multiple bowls - mine has three).
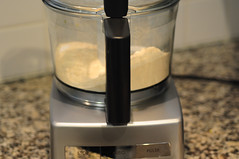
how to make roti dough in food processor-2

3. Close the lid and start the machine. If there are speed settings, start at the lowest speed to make sure the salt is mixed properly with the flour. With the machine running, add water in a slow trickle through the opening on the lid. Adjust water according to how much you need. This depends on the flour quality, consistency, humidity where you live, etc.
how to make roti dough in food processor-3

You will start to see the dough forming slowly as you add water. Stop and go so you are able to control the dough consistency. It's very easy to add more water so be careful!
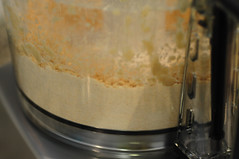
how to make roti dough in food processor-4

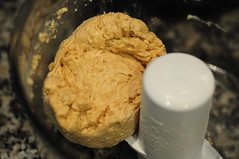
4. Soon you will find the dough forming into a ball and 'cleaning' up the sides of the bowl. Add oil at this stage and let it run for a minute longer.
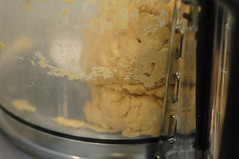
how to make roti dough in food processor-5

Done! The dough will be a bit sticky if you'd added the right amount of water. Take out, punch down, dust more flour if required, and let it rest for about 30 mins before proceeding to make chapati, roti, paratha, etc.
how to make roti dough in food processor-6

You can make pizza dough, bread dough, and even pie crust in your food processor. The method is pretty much the same, except that you would add the ingredients as necessary for what you are making. I plan to try pizza dough next and will update you on how that went.

You can also scale the quantities according to the capacity of your food processor bowl to make chapati / roti dough in bulk and store it in refrigerator up to 2 days for later use.

PS: Join my Facebook Page if you want to be part of future discussions on kitchen items, equipment I use, and short reviews.

Sunday, July 7, 2013

How to Make Coconut Milk - Fresh Homemade Coconut Milk Recipe

My mom can make coconut milk in her sleep. She rarely, if ever, buys canned coconut milk or powder since coconut is available most abundantly in Kerala, often from relatives and friends who have coconut trees in their backyard. So making coconut milk is part of every day cooking, much like slicing onions or making tamarind extract. We made ada pradhaman the other day using fresh coconut milk so I thought I'll document the process for those who don't know how to make coconut milk and want to learn. Coconut milk is widely used in Kerala Payasam Recipes and some of my favourites like coconut milk rasam and Kerala potato stew.

how to make coconut milk

Most recipes in this site call for thick or thin (and sometimes both) coconut milk. In malayalam, coconut milk is always referred to as onnam paal (literally meaning first milk), rendaam paal (second milk), etc. The lighter coconut milk is used to simmer ingredients in and the first milk is added in the end just before turning off the heat - it should never be boiled.

how to make coconut milk

Amma being the ever-resourceful person she is, also extracts moonnam paal (or third coconut milk) by just mixing the squeezed coconut shreds with some warm water in the end, without blending. This gives a very thin coconut milk but her view is that it's still better to use this than cooking the base ingredients in water. True that!

how to make coconut milk
Homemade Coconut Milk in increasing order of thickness, top to bottom

HOMEMADE COCONUT MILK RECIPE

Preparation time: 20 minutes
Ingredients:

4 cups of packed fresh grated (shredded) coconut
6-8 cups of warm water

How to Make Coconut Milk:

1. You will need to blend the coconut in batches for best results. First, blend a small batch of coconut so that the shreds become smaller.

2. Add about 1 cup warm water to this and blend well.

3. Transfer this to a wide bowl and repeat with the rest of the coconut.
How to Make Coconut Milk - Fresh Homemade Coconut Milk Recipe

4. Gently mix the coconut + water mixture with your fingertips, take a handful and squeeze well.

5. Add the coconut shreds back into the mixer or blender. Repeat until you have around 1.5 cups thick coconut milk.

6. Add more warm water to the coconut shreds and blend again.
how to make coconut milk

7. Take a handful of the blended coconut + water mixture and pass the milk through a sieve, pressing down into the sieve as you go. We need to be more thorogh while extracting the 2nd milk.

8. Pass all the coconut through the sieve like this, extracting the milk as you go. Add the remaining coconut shreds to another bowl. Now, our 2nd round of coconut milk is ready.
how to make coconut milk

9. Generally, you can discard the shreds now but amma mixes some water with this and swirls it around, passing it through a sieve in the end to extract the 3rd round of coconut milk.

As mentioned, the thinner coconut milk is used to boil and simmer your vegetables, ada, etc in and the thick milk is added in the end to the hot gravy or payasam. Never boil thick coconut milk.

Sunday, June 2, 2013

How to Make Cake in a Pressure Cooker - Step by Step Pictures

"How do I bake a cake in a pressure cooker?" This is the most often asked question in comments, emails, and messages on this blog. I postponed baking in a pressure cooker because, frankly, I was scared to try it. I vaguely remember my aunt cautioning me against it when I was a child and I have read on quite a few blogs that, yes, you can definitely bake a cake in the pressure cooker but it's not very good for your cooker and it may compromise its safety.

pressure cooker cake-how to make cake in pressure cooker (no oven cake)
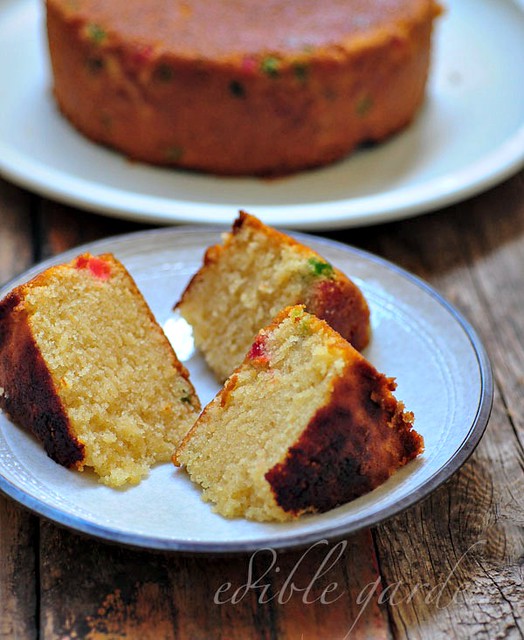
Eggless Vanilla Cake with Tutti Frutti - made in a Pressure Cooker

Technically, I didn't see what the issue was but I did have this (probably) irrational fear of making a cake in a pressure cooker, especially since I had a perfectly functioning and good oven. But I ventured forth last weekend and made a cake from scratch in a pressure cooker, and let me tell you, there's really nothing to fear, just a few things to remember. So here goes.

HOW TO BAKE CAKE IN A PRESSURE COOKER

1. Decide on a good, uncomplicated recipe for your pressure cooker cake. I will share the recipe of the cake in the picture above very soon but I would guess that pretty much all cake recipes will work well in a pressure cooker too. Prepare the batter and set aside.

2. Use a pressure cooker that's at least 3 litres, but 5 litres is a good size and what I would recommend.

3. Remove the gasket (the rubber insulation thing) on the lid of your pressure cooker. This is an important step. You also do NOT need the whistle.

pressure cooker cake-how to make cake in a pressure cooker

4. My pressure cooker came with this stand that goes at the bottom of the cooker pan. It distributes heat more evenly and is especially useful when baking in the pressure cooker. If you don't have, try to find a substitute. Maybe a small, thick steel plate would do the job as well.

pressure cooker cake-how to make cake in a pressure cooker (no oven cake recipe)

It's better not to have the cake pan touch the bottom of the pressure cooker directly since that may cause the bottom of the cake to cook more rapidly. Another option is to place the pressure cooker on a flat griddle or tawa and cook the cake. It's just an insulation between the flame and the bottom of the cooker to protect the cake.

pressure cooker cake-how to make cake in a pressure cooker (no oven cake recipe)

5. Another important thing to remember is, do NOT add any water to the pressure cooker pan for baking a cake. If you do, you will be steaming the cake (which is fine to do - here's my method of steaming a cake) but here we are trying to create an oven-like environment using a pressure cooker, as much as possible. The heat generated in the pressure cooker wil be enough to cook/bake the cake.

6. Before starting to bake the cake, you need to pre-heat the pressure cooker. For this, just place the lid (without gasket) on the pressure cooker (which should contain no water) and cook on high heat for 2 mins.


7. Now you can put the cake batter in. Make sure to use a cake pan that fits comfortably in the pressure cooker without the sides touching. Use a pot-holder since the cooker will be hot because of the pre-heating.

pressure cooker cake-how to make cake in a pressure cooker (no oven cake recipe)

After placing the batter in, close the lid and cook on medium heat for 5 minutes and then lower the flame to just a simmer. The cake, depending on the size of your cake pan and pressure cooker, will take anywhere between 45 minutes to 1 hour to bake.

pressure cooker cake-how to make cake in a pressure cooker (no oven cake recipe)

IMPORTANT NOTES:
  1. A pressure cooker is not meant for baking or using in the manner described above so consider that before using it to make a cake.
  2. I don't expect it will burst into pieces while cooking (I was very worried about this though, without reason) but it may compromise the quality of the safety valve on the lid and the high heat may cause the handle and other parts to deteriorate a bit.
  3. Using your pressure cooker to bake once or twice a year is probably okay but not regularly. If you bake anything more than once a month, I recommend buying an oven. It will be worth it and your options are much wider than using a pressure cooker to bake.
  4. Always check manufacturers instructions to make sure your make and model of pressure cooker can handle this. I am not sure how a steel pressure cooker will behave, mine is a basic 5 litre aluminium one. It's probably best not to do this in a non-stick pressure cooker since dry-heating a non-stick surface without water or oil is not advised.

All that aside, I baked an eggless vanilla cake with tutti frutti in pressure cooker and it turned out moist and delicious. Recipe coming soon! Recipe linked above.

To learn How to Make Pressure Cooker Cake in Hindi, Marathi, Urdu, Tamil, Telugu, etc, please use the Google translate button in the right sidebar. Thanks!

Tuesday, January 8, 2013

How to Cook Rice for Biryani, Fried Rice, Pulao

There are so many different ways you can cook rice. This mostly depends on the type of rice you are using and what you plan to do with it - serve with curries, make into a mixed rice dish, add to a dessert, roll into a sushi, etc. When making mixed rice recipes, especially like mushroom fried rice or vegetable pulao, it's important to get the right consistency of cooked rice before you mix it in. This post will hopefully help you achieve that.

In my home, we have always cooked rice in an open pot of boiling water and drained the excess water off once the rice is cooked. This helps in removing the excess starch in rice (the resulting kanji vellam is used to starch clothes) and the grains remain separate, the way we like it.

How to Cook Rice for Biryani, Fried Rice, Pulao

My in-laws consume raw rice which is cooked in a pressure cooker or rice cooker, always. The consistency is more sticky and this works well for the kind of rasam and kuzhambu the rice is served with, not to mention pongal and other dishes made with this rice.


How to Cook Rice for Biryani, Fried Rice, Pulao
Seeraga Samba Rice
I use ponni par-boiled rice on a daily basis in Singapore (available in Fairprice in 5kg bags and all stores in Little India) and Basmati or Seeraga Samba rice for Biryani, Pulao, and other one-pot mixed rices.

While I use my rice cooker for the every day rice, I cook rice for biryani, pulao, differently and wanted to share the method with you. I get a lot of comments on my pulao posts asking how the rice grains remain separate after making the dish and the answer is - being able to control how much your rice gets cooked helps you get that consistency in biryani and pulao.

How to Cook Rice for Biryani, Fried Rice, Pulao

Preparation time: 30 minutes
Cooking time: 10 minutes
Makes 2.5 cups cooked rice

Ingredients:
1 cup of basmati rice or seeraga samba rice
3 cups of water
1 tsp of salt

How to Cook the Rice:

1. Wash and soak the rice in enough water to cover it for 30 mins.
How to Cook Rice for Biryani, Fried Rice, Pulao

2. After 30 mins, drain the water completely, add 3 cups of fresh water (or enough to cover the rice by 2-3 inches) and place on the stove on medium flame.
How to Cook Rice for Biryani, Fried Rice, Pulao

3. Add salt and bring to boil.
How to Cook Rice for Biryani, Fried Rice, Pulao

How to Cook Rice for Biryani, Fried Rice, Pulao

4. Once the water is boiling, lower flame and let the rice cook in the open pot for 10-12 mins. You will see the rice getting enlarged and the water level going down.
How to Cook Rice for Biryani, Fried Rice, Pulao

5. After 10 mins, check the grains to see if it's cooked. Generally I pinch a grain or rice between my thumb and forefinger and see if it smushes smoothly. Or, just put some grains of rice in your mouth and bite into them to see if they are hard inside. It's done when the rice is soft yet not mushy. It's better to leave it a bit underdone than overdone if you are in doubt.
How to Cook Rice for Biryani, Fried Rice, Pulao

6. Switch off flame and immediately drain the rice in a colander. Let it sit on an uneven platform for 30 mins or so. You can fluff it with a fork midway so that the water drains out completely.

How to Cook Rice for Biryani, Fried Rice, Pulao

That's it! You can use this rice for making biryani, pualo, fried rice, or any mixed rice variety. The grains will remain separate and the flavours will be nicely incorporated once you are done.

Tip: You can add a few drops of oil to the boiling water if you want. I sometimes do this but it's not really super necessary.

Tip from a reader, Lakshmi: Add a few drops of lemon juice to the cooked rice when it's hot and mix well. The colour of the rice will be super white.

Thursday, December 6, 2012

How to Make Curd (Dahi-Thayir-Yogurt) Homemade Indian Curd

Homemade curd or yogurt - It's interesting how my curd consumption has changed after marriage. Particularly, after marrying an Iyer boy. He eats curd with everything. When I say everything, I mean everything. With dosa, chapati, idli, noodles (ok, only sometimes with noodles), rice, roti, paratha, you name it and it's been eaten with curd.

I quickly realised I need to master the art of how to make curd at home because buying those Nestle curd cartons from the store was not working out very well for our wallets.

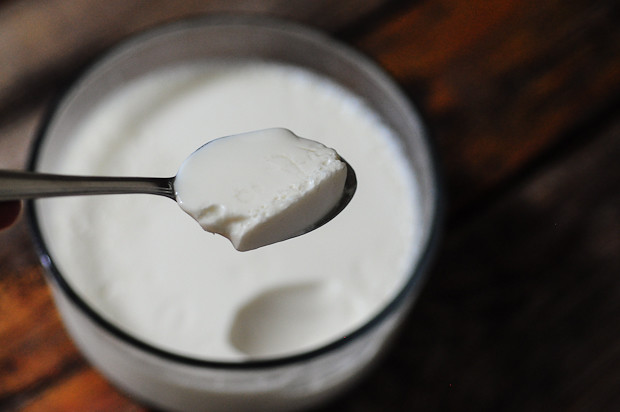
How to Make Curd-Dahi-Yogurt (Homemade Indian Curd Recipe)

Also, there's something special about homemade curd. Although you are not really doing anything special, it feels a bit magical to heat up some milk, add some curd in there, mix, set it aside, and magically have it harden up and taste awesome after a few hours. That's really all there is to homemade curd or yogurt. Indian lassi like mango lassi or strawberry lassi drinkstaste way better when you use homemade yogurt to make them too.

How to Make Curd-Dahi-Yogurt (Homemade Curd Recipe)

However, there are a few things to keep in mind while making curd at home. I learnt most of it by trial and error and I finally feel ready to share it with you all.

Homemade Indian Curd Recipe

Preparation time: 6 hours
Makes 500 ml set curds

Ingredients for making curd:
500 ml of milk (see notes below)
1.5 tsp of curd

How to make Curd:

1. Bring the milk to boil and set aside to cool. The temperature to which it needs to cool is important. It should be warm - not lukewarm, not hot. A good test is to insert your (clean!) finger in the milk and see if you can hold it there for 10 seconds without needing to pull it out because it's too hot or feeling too comfortable because it's too cold.

How to Make Curd-Dahi-Yogurt (Homemade Curd Recipe)

2. Transfer the milk to the container you want to set the curds in.

How to Make Curd-Dahi-Yogurt (Homemade Curd Recipe)

3. Add the curds to the milk. Yes, to make curd you need curd as a starter. The bacteria in our starter then acts on the rest of the milk and turns it all to curd. How cool is that, eh?

How to Make Curd-Dahi-Yogurt (Homemade Curd Recipe)

4. Mix the curd and the milk well together. This step is important. The better they are mixed, the quicker and better the curd will set. Using a whisk is a great idea too.

How to Make Curd-Dahi-Yogurt (Homemade Curd Recipe)

5. Once mixed, keep loosely covered in a warm place. Once the milk has completely cooled down, you can close the lid tighter (even airtight) but this is not necessary.

How to Make Curd-Dahi-Yogurt (Homemade Curd Recipe)

6. After about 6-8 hours, tadaaa! :)

How to Make Curd-Dahi-Yogurt (Homemade Curd Recipe)

Although I have been making curd at home for more than 4 years now, I still feel great when I see a perfectly set batch of homemade curd.

How to Make Curd-Dahi-Yogurt (Homemade Curd Recipe)

One of my favourite "quick snack" as a kid was to eat freshly made dahi with some sugar.

Notes:

- The type of milk you use for making curd impacts the outcome largely. Amma buys directly from a local milkman so her curd turns sour in a matter of hours. She makes fresh curd every day.

- I use the UHT (ultra-heat treated) milk available in cartons in Singapore. I have tried pretty much every brand and find that the Fair Price full cream milk gives me the best results. You can see a picture of it in the 'how to make paneer' post. Fresh milk works too but the more the fat content, the thicker your yogurt.

- The temperature and humidity of the place you live in plays a major part too. Since Singapore is warm through the year and quite humid, I can leave the curds to set pretty much anywhere and still turn up with great results. If you live in a cold place, I would recommend the oven light technique that we discussed in the idli batter recipe post. Just leave the curd to set in your oven with the light turned on for warmth.

- If your curd is stringy and gooey, that means the temperature of the milk was not right - either it was too hot or too cold. You will have to experiment a bit with this to get it right for the place you live in.

- If the curd hasn't set even after 6-8 hours (or 10 hours!), it's possible you used too little starter curd amount, the milk was not warm enough or the temperature is not warm enough.

- What type of vessel should you use to set curd? I am told stainless works out the best but have found out that it doesn't matter that much. I use pyrex glass bowls and love the convenience. Having an airtight lid to close it once the milk has cooled down helps the setting process for curd.

- Try to use the starter curd at room temperature so it doesn't bring down the temperature of the milk too much. This is not a make or break situation but no harm in being careful.

- To make curd without curd as a starter, try adding a couple of dry red chillies (with stalk if possible) into the heated milk. I haven't tried this but a friend of mine said this works as did Sreelu who said it makes curd set faster and thicker in the US.

I think I've covered most of the things that could go wrong with making curd at home, but let me know if you have other questions.

Monday, October 15, 2012

Ghee Recipe-How to Make Ghee-Clarified Butter

Before I start off on how to make your own ghee in 15 mins, let me wish all of you celebrating a wonderful Navaratri Festival Season. Check out Navarathri Recipes on Edible Garden (complete with different types of sundal and payasam and snacks for navaratri).

========================================================================

A lot of my Indian recipes, especially pulao and biryani and some sweets, call for ghee or clarified butter. Ghee almost unites all of India food-wise because there are very few foods consumed all over India with the same amount of gusto as ghee! Although many brands sell different versions, nothing beats the simple and aromatic ghee made at home from butter.
Ghee Recipe-How to Make Ghee-Clarified Butter
Ghee is another one of my maternal grandmom's specialty. She was so in love with the whole process of boiling the milk, saving the cream on top, churning it to make butter, and then finally making ghee out of it, that she earned the nickname nei-chatti (ghee pan, when translated loosely) from some of her naughty grandchildren. No, definitely not me! :D Very little else gave her as much pleasure as making ghee from scratch at home, one would think. Amma still follows the same method because we are still lucky enough to be getting milk directly from the... err.. cow. She gets so much better from it that she ends up giving away bottles and bottles to lucky neighbours, friends, and relatives.


Although this is nothing like the 'real deal' I grew up eating, I make some ghee now and then from butter. It's easy, quick, and since ghee stores well, I can it up for a good 2 months before I need another batch. Store-bought ghee doesn't have half the flavour or aroma of this quick ghee made from butter.

Homemade Ghee Recipe


Preparation time: 3 minutes
Cooking time: 10 minutes
Makes 1/2 cup

Ingredients:
200 gm of good quality, unsalted butter
1 strand of curry leaves (optional but highly recommended)

How I Made It:

1. Start with softening the butter to room temperature. This allows uniform 'cooking'. Use unsalted butter, that's important. Salty ghee can't be pleasant.

Ghee Recipe-How to Make Ghee-Clarified Butter
2. Keep a heavy-bottomed pan on very low low heat and dump the butter in. I am not sure if it will make any difference if you used a non-stick pan here, I used a stainless steel sauce pan.
Ghee Recipe-How to Make Ghee-Clarified Butter
Continue to simmer on low heat as the butter bubbles up and turns aromatic.
Ghee Recipe-How to Make Ghee-Clarified Butter
In about 5-10 mins, depending on the amount of water in your butter and the temperature, the butter will turn a golden brown and some of the fat solids will crust at the bottom of the pan. Don't over-scrape it, just gently mix the butter as it cooks.

3. Once it starts crusting around the edges, as in the picture above, add the strand of curry leaves (washed clean and dried). Let it cook in there for a minute or two and then remove from fire.
Ghee Recipe-How to Make Ghee-Clarified Butter
Let it cook in there for a minute or two and then remove from fire. By this time, the butter will not sizzle and bubble as much as before and the edges will be browner. It's time! Remove from fire and set aside to cool.
Ghee Recipe-How to Make Ghee-Clarified Butter
4. Once it's warm. strain into a clean (preferably glass) container and store at room temperature if you plan it use it up within 2-3 weeks or in the refrigerator for longer storage. As it ghee cools down, it will solidify so do the straining process when it's warm and not completely cooled.
Ghee Recipe-How to Make Ghee-Clarified Butter
That's it! Use in all your favourite recipes and sweets and enjoy the fresh aroma of home made ghee. As Diwali is coming up, I am guessing you guys will be using up a fair amount of ghee for the Diwali Sweets Recipes. Hope this recipe comes in handy then!

Notes:

- the curry leaves add a lovely aroma to the ghee, making it smell more nuttier than it inherently is. You can still use this ghee for all kinds of sweets, so don't let that bother you. You can skip the curry leaves if you really want to.

- I will say this one more time, just in case - use unsalted butter!

- When the water content in the butter is higher (like in homemade butter), the cooking time will be much higher. In either case, keep a close eye on the pan otherwise the ghee will burn.

- I have cooked my ghee a bit longer than it needs, in the pics above. The aroma was out of this world! You can stop a bit earlier if you prefer.

- When in the refrigerator, the ghee will harden and be a lighter colour than when liquid. Leave out for some time before using.

- Ghee is the preferred "fuel" for lighting diyas and lamps during pujas and festivals in India. It's believed that the light emitted from a ghee lamp (nei vilakku) is brighter and emits more positive energy than any other oil, although sesame oil comes a close second and more affordable to all.

Tuesday, October 9, 2012

Idli Batter for Soft Idli - Idli Recipe, Tips for Soft Idli | Step by Step

Wondering how to make soft idli with homemade idli batter? Look no further for the perfect formula and tips for making soft idlis!
Idli and dosa is a staple meal for Reddiars in Kerala. We always have the batter ready in our fridge and amma is always prepared to feed multiple people for breakfast or dinner at minutes' notice, thanks to this.

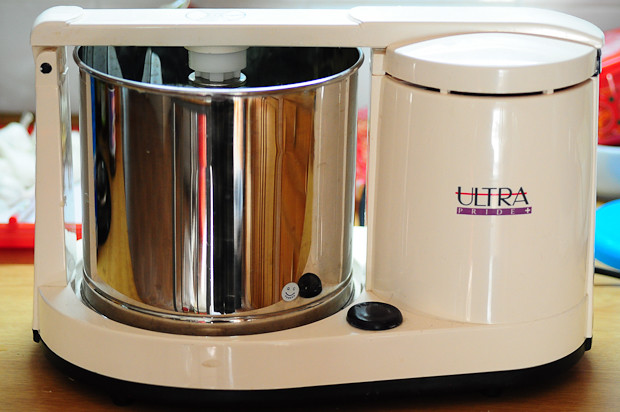
Amma has a large, old-fashioned grinder which we've had ever since I can remember. In my childhood, we moved houses 6 times and this grinder came with us from house to house, year by year, doing it's job as expected. Ok, I will stop now, don't want to jinx it!

Idli Batter for Soft Idli-Idli Recipe

So yeah, back to idli and dosa. My maternal grand mom, as long as she was able, oversaw the grinding of the idli-dosa batter and she did it with a hawk-eye. The help will handle the measuring and soaking and actual grinding and the heavy-lifting (quite literally) of using the stone insert in the middle of the grinder, and finally the onerous task of cleaning the thing once the batter is ground. Needless to say, except for passing by a couple of times and wondering how it would feel to dip my finger into the creamy batter, I have had nothing to do with this grinding business.

Idli Batter for Soft Idli-Idli Recipe

When I moved to Hyderabad for my first job, I started buying the batter. Making idlis with store-bought batter is a bad idea. I have tried a few times always knowing it will fail and it always has. Making dosa is easier since it's more forgiving. But idlis are demanding. For all this, I am not even that fond of them!

Once I got married and moved to Singapore, I was ready to grow up and start making my own batter. I brought back a small, table-top wet grinder from back home (Trichy, to be exact) and it was a proud day I ground my first batch of idli batter.

Idli Batter for Soft Idli-Idli Recipe

It was a disaster! The batter didn't ferment at all and I should have taken that as a sign but it smelled fermented so I impatiently brought out the idli moulds and went the whole way. The idlis were rock hard. Dosas the next day turned out fine but the soft, pillowy idlis of my childhood had evaded me the first time and I was determined to not let that happen again.

But it did. I got it wrong about 3-4 more times. I did get marginally better at it each time but the idlis were nowhere near soft and barely edible if not dunked in litres of sambar.

I changed everything I could - the urad dal (I brought back a kilo from amma's stash), the rice, adding salt at different times, fermenting spot, everything!

Then I realised the answer was really simple. It's water. Yes, water. Not the kind of water but the amount. I was not adding enough. It was a revelation when I realised this and since then, there has been no looking back. I make idli batter every 2 weeks and steam batches of idlis and either chill them or freeze them for later use during those weekend mornings and too-tired-to-cook weeknights.

Also check out the Murugan Idli Kadai Idli Recipe

Idli Batter for Soft Idli {Recipe and Learnings}


Preparation time: 3 hours
Cooking time: 10 minutes
Makes ~ 30 idlis

Ingredients:
1 cup of whole, skinned urad dal / ulutham paruppu / uzhunnu parippu
4 cups of idli rice
Salt

Step by Step Pictures to Make Idli:

1. Wash the rice until the water runs clear. Soak in enough water to cover it by 3 inches and leave aside for 3-4 hours.
Idli Batter for Soft Idli-Idli Recipe
2. Once the rice has been soaking for 2.5 to 3 hours, wash the urad dal and soak it for 30 mins or so. Amma tells me soaking urad dal for too long is not necessary and it may lose its "potency". Make sure there's enough water for it to absorb and swell - the urad dal requires more water than the rice.
Idli Batter for Soft Idli-Idli Recipe
3. Wash and prepare your grinder. Add the soaked urad dal...
Idli Batter for Soft Idli-Idli Recipe
... and a generous amount of water to get it started. I usually add about 1 cup and see how that goes but this will totally depend on the quality of urad dal you use. My recurrent mistake was always not adding enough water to grind the urad dal.

It will take about 15 mins for the urad dal to be ground smooth. When you take a little batter and rub between fingers, it should be smooth and flowy. As the urad dal grinds, it will rise and turn fluffy. This is perfect.
Idli Batter for Soft Idli-Idli Recipe
4. Transfer the urad dal batter to a large enough container and set aside. You don't have to wipe the grinder clean of the batter. When you grind rice, it will automatically get 'cleaner'.
Idli Batter for Soft Idli-Idli Recipe
5. In goes the soaked rice next.
Idli Batter for Soft Idli-Idli Recipe
Rice doesn't need as much water as the dal so add about 1 to 1.5 cups and see if it gets thick as you grind. When rice grinds, it will absorb the water so test in between and keep adding water as you go, a little at a time. Grind rice to a smooth pate too and this takes me around 25 mins or so in my grinder.
Idli Batter for Soft Idli-Idli Recipe
6. Once done, add this to the urad dal batter and top off with some salt. Mix gently so that the rice and dal get combined well.
Idli Batter for Soft Idli-Idli Recipe
The consistency should be fluffy and the batter should fall down easily from your spoon as you mix it.
Idli Batter for Soft Idli-Idli Recipe
Set aside this batter in a container that is only filled halfway with the batter to allow room for rising during fermentation. Singapore is warm enough for us to leave it aside in the kitchen and it will ferment in about 6-8 hours. In colder places, you can either leave it inside the microwave (don't turn it on!), or inside the oven with the oven light on. This is how most people I know in the US do it.

Once fermented and risen, mix very gently to combine. The urad dal would have risen to the top leaving the heavier rice batter at the bottom so you need to mix it uniformly before making idlis.

Pour into greased (I use gingelly oil) idli moulds and steam for 10-12 mins for super soft and spongy idlis.
Idli Batter for Soft Idli-Idli Recipe
A few tips, notes, and learnings from me:

- I can't stress the importance of adding enough water while grind the dal and rice. This is the single most important thing that separates you from soft idlis.

- You can add some fenugreek seeds / methi seeds when soaking the rice. It gives a nice fragrance to the batter.

- I have tried soaking and grinding the rice and dal together (because I get immensely lazy sometimes). I got mixed results. Sometimes it worked ok and sometimes not. Again, dosa always turns out fine so if you don't intend to make idlis, you can take this shortcut. Jey follows the same method but adds poha to the batter. I want to try that once too. Will update here once I have.

- Once you have scraped out all the rice batter, wash the grinder with little water and collect this in a separate bowl. After a few hours, the batter in the water will sink leaving almost-clear water on top. I add this to the batter before making dosa because for dosa we need to water down the batter anyway. My grand mom was very frugal when it came to cooking and she would do this so that we don't even waste the batter sticking to the grinder.

- Always use a wet spoon to remove idlis from the mould and do it after the idlis have cooled down a bit.

- Once the batter is fermented and you have made idlis, store the batter in the refrigerator. You can make dosas from day 2 onwards by diluting the batter to the right pouring consistency. On day 4 and 5, if I still have batter left, I make masala kuzhi paniyaram.

- I make idlis in bulk and store in them steel containers in the chiller (if I plan to use them within the week) or in the freezer (for longer storage). Before serving, the best thing to do is to re-steam them for a quick 5 mins but if you don't want to do that, re-heat them in the microwave with some water sprinkled on top. These have to be served immediately, otherwise they will turn hard and rubbery.

- If using a mixie or blender for grinding idli-dosa batter, remember that it won't get you the same results as a wet grinder. Also, reduce the quantity of rice:dal and use 3:1. I use my rice cooker cup to measure, you can use any cup or tumbler as long as you use the same one to measure both rice and dal.

- If your idlis are too flat, it could be due to two reasons. One, there's too much urad dal in the batter and two, the batter is too watery. Even if you end up adding too much urad, if your batter is thick, the idlis will be fine but too much water will create flat idlis and there's really no way to fix this. The idlis will still turn out soft in most cases though.

- UPDATE: If any of you are using a mixie or mixer-grinder to grind your idli-dosa batter, then here's a note from Vini who does the same in her Preethi mixer-grinder. The proportions are as I mentioned, 3:1 rice:urad dal  but see how important the addition of enough water is. Read her note below. For anyone wondering "can you grind idli-dosa batter in a mixie or mixie-grinder?"Here's your answer.

"Hey Nags,

I am glad I came across this post! I have only a mixer ever since I shifted to the US. The ladies of my house gave me several tips to make idli-dosa batter in a mixie including 3:1rice dal, mixing with hands, switching on then oven light but no one ever told me the importance of adding enough water! I always used to get ok-ok idlis and I blamed it on the mixie and was waiting to ge a grinder soon. But but I saw this awesome post and immediately soaked rice and dal..made sure I added sufficient water while grinding..the batter fermented beautifully and voila my idles where super soft just like how mom makes it back home :):) I jumped in joy when hubby told they were the best idles he had eaten since he came to the US :) Thank you so much for this important tip which no other blog post on idlis stressed about. And you can tell everyone that soft idles are possible with preethi mixer grinder :)"

How do you make idli-dosa batter at home? What do you do differently and what has worked? Please leave a comment with your idli and dosa tips please!