ads1

Showing posts with label Snacks and Appetisers. Show all posts

Sunday, April 12, 2015

Avocado Feta Smash on Toast, step by step Recipe .


avocado feta smash on toast recipe

Avocado and feta mashed together with a little lime juice, pepper and salt. It really doesn't get simpler than this but this sandwich, which can either be served open-faced or otherwise, is a very popular brunch item in Australia. Although very good quality feta cheese was available in Sydney and avocados were fabulous when in season, I never made avocado feta smash for our weekend toast in my entire year in Australia.

I love cooking with avocado, especially after the doctor recommended a moderate portion of it in both TH's and my diet to bring up the levels of good cholesterol. We both love guacamole but I have found other ways to add avocados in our diet, including:

avocado mango milkshake
grilled guacamole cheese sandwiches
avocado egg salad sandwiches
avocado milkshake
and these delicious eggless chocolate cupcakes using avocado

Avocados have more potassium than bananas and are very high in good fats and fibre, both of which are helpful for balancing your diet. Now, the marketer in me knows that a lot of this info has been forced on us to increase the sales and export of avocados but I liken this to how the coconut oil made a comeback in recent times and now there are so many recipes incorporating them, whereas generations of Malayalis (among others in South East Asia) always knew this and reaped the benefits. So yes, I am a fan of avocados and love its buttery texture and versatility.

avocado feta smash on toast recipe

After the move back to Singapore, I went in search of good avocado during one of my more nostalgic moments (in case you live in Singapore, the hard kind you see in Fairprice supermarket is a no-go for this recipe, or any avocado recipe for that matter). When picking avocados for a dish, make sure it gives in to gentle pressure and is a darker brown/black colour. Also, when picking out feta cheese to make this sandwich, make sure it's unflavoured. Fresh Greek feta works well or the one from Lemnos brand will do in a pinch too. Both lime or lemon juice work well but I personally prefer using lime juice.

AVOCADO FETA SMASH ON TOAST

Preparation time: 5 minutes
Cooking time: 8 minutes
Serves 2

INGREDIENTS:
1 ripe avocado
1/2 cup of feta cheese
1-2 tsp of lime or lemon juice
1/2 tsp of freshly cracked black pepper
1 tbsp of butter (optional), for the toast

INSTRUCTIONS:

Place the feta cheese in a bowl and crumble it until fine, with a fork or your fingers.

Cut open the avocado and scoop out the flesh. Add it to the feta cheese.
avocado feta smash on toast recipe-2

Add in the lime juice. I love the sourness of lime and always add more than required so use your judgement here.
avocado feta smash on toast recipe-3

Using a fork, smash the ingredients together thoroughly until well blended. The feta cheese tends to be quite salty so I didn't add any more but do a taste test and see if you'd like to add some salt to this. If not, set aside and prepare the toast.
avocado feta smash on toast recipe-4

Heat an iron or non-stick pan and thrown in some butter. This is optional, I didn't use any butter but it definitely tastes better if you do use some.

A few words on the bread I used. In Singapore, there are local coffee shops or Kopitiams that serve tea/coffee, soft boiled eggs, and toast with kaya butter. The bread they use for this toast is what I have used there. They are crustless, longer than normal, and incredibly soft. On toasting, they turn very crisp and really delicious.
avocado feta smash on toast recipe

If you don't have access to this, you can use any bread you have handy. Rye bread is said to taste great with avocado feta piled on as well.

Ok so toast the bread golden brown and then add as much topping as you'd like. Sprinkle black pepper on top, to taste.
avocado feta smash on toast recipe-5

You can serve these sandwiches open-faced or place another toasted slice of bread on top and go for it. A great brunch or breakfast item if you are looking to start your day on the right note.

If you try this avocado feta smash recipe, do share a picture with me on my Facebook page. I'd love to feature it. Thanks!

Sunday, February 8, 2015

Bhel Puri Recipe, How to Make Bhel Poori Step by Step


bhel puri recipe, how to make bhel poori

Bhel puri (or bhel poori, bhelpuri) is no doubt the most common chaat on the streets of Mumbai alongside the popular pav bhaji. In fact, I first had my taste of Bhel Puri in Chennai Marina Beach where a vendor mixed it up and put them in newspaper cones for curious 8-year-old me. While it was probably not as authentic as the Bhel Puri you find in Mumbai, I was hooked! How can a simple fistful of ingredients and sauces create something so delicious, I wondered. Well, I guess I now know that there's nothing very simple about the flavours incorporated into the chaat chutneys and the quick mix of ingredients that make up this delicious snack - Bhel Poori.

bhel puri recipe, how to make bhel poori

For the longest time, I have been wanting to make my own papdi to make papdi chaat at home (my favourite). It just never happened so one day I picked up a packet of papdi from the Indian store in Singapore. It tasted very average and even a bit stale. Duly distressed, I decided to use them up in bhel poori instead, choosing to use less papads and more sev (which were delicious, in spite of being store-bought) and lots of crunchy onions and such. The idea worked! This bhel poori not only masked the average quality of the papad, but was also wolfed down in no time

bhel puri recipe, how to make bhel poori

On another note, making chaat at home is really not necessary (in my opinion) if you get good chaat where you live. Singapore is a bit tricky that way. I keep getting referred to Kailash Parbat for chaat in Singapore but my experience there has been above average at best. I get a good chaat fix during my whirlwind work trips to Mumbai and Delhi and that makes it harder to settle on average chaat in Singapore.

Also, I always make pav bhaji at home and rarely order it outside anymore. I even took a stab at how to make pav at home but have since only made it once or so. It's way quicker to buy it outside and focus on making delicious bhaji at home. You may also want to try these ragda patties and Mumbai vada pav recipes.

Before you start assembling bhel puri, you need to have the following ingredients cooked and ready:
boiled potatoes
green chutney for chaat
date tamarind sweet chutney

BHEL PURI RECIPE

Preparation time: 15 minutes
Serves 4-6

INGREDIENTS:
1 cup of puffed rice
1/4 cup of finely chopped, deseeded ripe tomatos
1/2 cup of finely chopped onions
1/4 cup of boiled, roughly mashed potatoes
1 tsp of grated ginger
1 cup of crushed chaat papdi (papad)
1.5 cups of nylon sev
3-4 tbsp of green chutney
2-3 tbsp of red chutney
1/2 tsp of black salt (or to taste)
1/2 tsp of garam masala or chaat masala
1/4 cup of roasted peanuts (salted or unsalted)
1/4 cup of chopped coriander leaves
1 tbsp of lemon juice (more or less to taste)

INSTRUCTIONS:

Prepare the chutneys first. You can do this a few days before and store them in the refrigerator too.

For green chutney, grind together mint leaves, coriander leaves, cumin seeds, chaat masala, lemon juice, and rest of ingredients to a smooth paste with water. You can find detailed recipe for green chutney here.

Here are the detailed instructions for sweet date tamarind chutney.

Once you have the chutneys ready and have boiled the potatoes, putting together the bhel puri is a breeze.

To assemble the bhel puri:

Reserve half a cup of sev and add all other ingredients to a wide bowl.

Give it a good mix and taste test to see if the sour vs sweet vs spicy is good and suits your taste. Adjust the ingredients (add more sweet chutney, salt, etc) to make it perfect.

You can serve in paper cones or simple bowls with generous amounts of sev and coriander leaves for garnish.

Step by Step Pictures to Make Bhel Poori at Home:

1. Set aside 1/2 cup sev and add all other ingredients to a wide bowl.
bhel puri recipe, how to make bhel poori recipe-6

2. Using a wide spoon or spatula, mix thoroughly until all ingredients are combined fully. The most important step is right after this - taste testing! Adjust ingredients according to how spicy, sour, sweet you want your bhel puri to be.
bhel puri recipe, how to make bhel poori recipe-3

3. Finally, add the reserved sev and garnish with chopped coriander leaves. I love sev so I use a generous hand when garnishing my bhel puri.
bhel puri recipe, how to make bhel poori recipe-2

Serve immediately, otherwise the bhel puri will get soggy. If making for a large group, mix the ingredients in batches to ensure freshness and crispness of the sev and puffed rice.

Note: you can also use crushed golgappa (puri used for pani poori) instead of papad for a slightly different texture in your bhel puri.

For Bhel Puri recipe in Hindi, Marathi, Urdu, Tamil, Telugu, etc, please use the Google translate button in the sidebar.

Wednesday, August 27, 2014

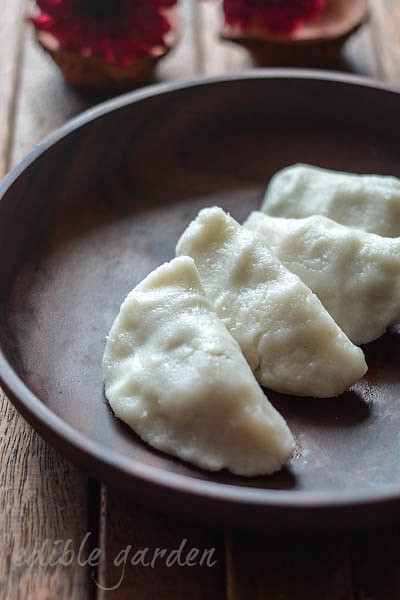
Uppu Kozhukattai, Ulundu Kozhukattai Recipe for Ganesh Chaturthi, Step by Step

uppu kozhukattai-ulundu kozhukattai-ganesh chaturthi recipe-15

Kozhukattai (Modak, Modakam) and Lord Ganesh go hand in hand quite literally, we know that. When Ganesh Chaturthi rolls around every year, I try to make some modak the week before and get it as perfect as possible because, and I won't lie you guys, making the perfect kozhukattai is not easy. Or maybe it's me just needing more practice because my mom and grandmom seem to need no effort, measurements, or recipes on the internet to churn out gorgeous vella kozhukattai by the dozens, Ganesh Chaturthi or not.

Uppu or Ulundu Kozhukattai is the salty, savoury counterpart to the sticky sweet modaks which are probably more popular. But life is all about balance and so it's a good idea to make some of these salty kozhukattai to serve along with the sweet ones, I'd say.

uppu kozhukattai-ulundu kozhukattai-ganesh chaturthi recipe-2-2

Going back to making kozhukattai and practise - if you've ever attempted them before you'd know that the fillings are usually very easy and it's a good idea to make them first and keep them cooled and ready. The covering, now that's the tricky part and I'd be the first to admit that mine bombed so badly the first 3 times I made them for this post. They had nice fluted edges and stuff but they tasted terrible. So what you see in the pictures here are my fourth attempt at making ulundu kozhukattai and while the edges are impatiently stuck together with my fingers, they tasted near-perfect. Goes to prove it can be done because as I generally like to say, if I can cook something, anyone can.

Here's a list of Ganesh Chaturthi recipes I compiled last year. You can bookmark and refer back during the festival to get going with your offerings to the Lord.

Now, on to the step by step uppu kozhukattai recipe.

UPPU (ULUNDU) KOZHUKATTAI RECIPE

Preparation time: 30 minutes
Cooking time: 10 minutes
Makes ~ 8 kozhukattai

INGREDIENTS:

For the filling:
1/4 cup of whole white urad dal
1 of green chilli
2 tsp of oil
1/4 tsp of black mustard seeds
A pinch of hing / asafoetida / perungayam
A few curry leaves
2 tbsp of grated coconut (I used desiccated coconut)
For the covering:
1 cup of rice flour or idiyappam flour
1 and 1/4 cup of boiling water, more or less
2 tsp of ghee or oil

INSTRUCTIONS:

We'll make the filling or poornam first.

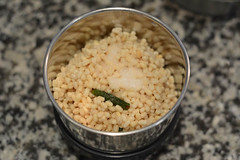
Soak the urad dal (ulutham paruppu) for one hour. Drain well and grind coarsely with the green chilli and some salt. Don't add water at this stage otherwise the urad dal will turn into paste.
uppu kozhukattai-ulundu kozhukattai-ganesh chaturthi recipe

Make lime-sized balls of this urad dal mixture and steam for about 5 mins on low flame.
uppu kozhukattai-ulundu kozhukattai-ganesh chaturthi recipe-3

When cool enough to handle, crumble the steamed balls with fingertips into a fine, breadcrumb-like mixture and set aside.
uppu kozhukattai-ulundu kozhukattai-ganesh chaturthi recipe-6

Heat oil and add the mustard seeds, curry leaves, and hing.
uppu kozhukattai-ulundu kozhukattai-ganesh chaturthi recipe-7

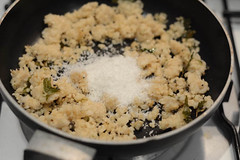
Add the urad dal crumbs and continue to cook on low flame until the oil has coated it well. Add the grated or desiccated coconut and mix well.
uppu kozhukattai-ulundu kozhukattai-ganesh chaturthi recipe-8

Test for salt and add more if required. Switch off and set aside to cool.
uppu kozhukattai-ulundu kozhukattai-ganesh chaturthi recipe-9

Now we'll make the rice flour coating. Mix the rice flour and some salt in a bowl. Boil water and add it a little at a time to the rice flour, mixing it immediately. You are partially cooking the rice flour at this stage with the heat of the water so a thorough mixing is very important.
uppu kozhukattai-ulundu kozhukattai-ganesh chaturthi recipe-16

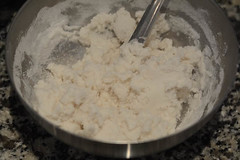
When the mixture begins to look like below, stop adding water and combine well with the tail end of a ladle (it will be too hot to use your hands). When the mixture cools down a bit, use your fingetips to knead properly.
uppu kozhukattai-ulundu kozhukattai-ganesh chaturthi recipe-17

Make a lime-sized ball of the flour mixture with hands greased with ghee or oil. Pat it flat with the other palm and add a bit of the cooled ulundu filling.
uppu kozhukattai-ulundu kozhukattai-ganesh chaturthi recipe-10
uppu kozhukattai-ulundu kozhukattai-ganesh chaturthi recipe-11

Close it into a semi-circle and pinch the ends together. Proceed with the remaining rice flour covering and filling. There may some of either leftover, it's hard to get the quantities perfect.
uppu kozhukattai-ulundu kozhukattai-ganesh chaturthi recipe-12

Prepare your steamed by adding water to the base and bringing it to a boil. Place the kozhukattai gently on the steamer plate and steam for not more than 10 minutes. Mine were done in about 8 minutes. The outer covering will turn glossy when done.
uppu kozhukattai-ulundu kozhukattai-ganesh chaturthi recipe-14

Serve warm. Kozhukattai are best eaten fresh and on the same day of preparing them.

Have a wonderful Ganesh Chaturthi 2014, dear reader!

For uppu kozhukattai recipe in Tamil please use the Google translate button in the sidebar.

If you found this post useful, do share, like, and pin it. Thanks for that motivation :)

Thursday, July 10, 2014

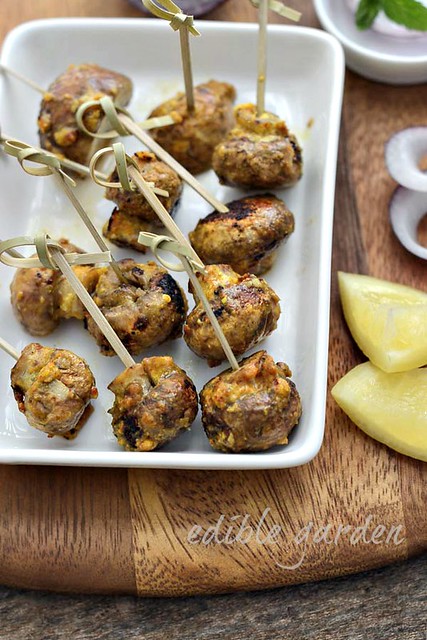
Mushroom Tikka Recipe - Grilled Mushroom Tikka, an Easy Appetizer

Learn how to make mushroom tikka, an easy starter or appetizer recipe with mushrooms that you can make in less than thirty minutes. Mushroom tikka shouldn't be confused with the delicious mushroom tikkis though, something I tend to make quite often for its ease of making and serving.

mushroom tikka-mushroom tikka recipe

I love having people over for a meal and spend an inordinate amount of time planning the menu, adjusting the ingredients and dishes so there's something for everyone, and everything goes well together. Mushrooms are not a usual addition to my menu because I find that not many people love its texture and meatiness like TH and I do. If cooked right, mushrooms play really well with Indian spices and this mushroom tikka is a great example of that.


Mushroom tikka is very easy to put together and unlike paneer tikka, it doesn't need a lot of marinating time. I used super fresh shiitake mushrooms we got from the Orange Grove markets, one of my favourite farmers markets in Sydney. You can also use fresh button mushrooms to make this, make sure to pick small sized ones so they cook evenly.

MUSHROOM TIKKA RECIPE

Preparation time: 10 minutes
Cooking time: 10 minutes
Serves 2

INGREDIENTS:
15 small fresh mushrooms
2 tbsp plain curd
1/2 tsp red chilli powder (adjust to taste)
1/4 tsp roasted jeera powder
1/2 tsp garam masala or chaat masala
1-2 tbsp besan (gram flour)
1/2 tsp garlic paste
1/4 tsp ginger paste (optional)
4 tbsp oil
Salt

INSTRUCTIONS:

1. In Sydney, when you buy mushrooms, they give them in paper bags that have instructions on how to clean them. Apparently washing mushrooms makes them mushy when cooked so the best way to clean them is by brushing lightly to remove the dirt and dust. This is the method I use now to clean mushrooms. Do the same with whichever mushrooms you are using. Choose small, whole ones.
mushroom tikka-mushroom tikka recipe-2

2. Add the remaining ingredients (except oil) to the above mushrooms and mix gently by hand.
mushroom tikka-mushroom tikka recipe

3. Set aside for a few minutes. I have even cooked them immediately with good results but for best results, leave this aside for about 30 mins to an hour.
mushroom tikka-mushroom tikka recipe-3

4. Heat the oil in a large pan (preferably cast iron) and either string the mushrooms on kebab sticks and roast grill them until browned or add as individual pieces until nicely grilled.
mushroom tikka-mushroom tikka recipe-5
mushroom tikka-mushroom tikka recipe-6

5. Stick toothpicks through the mushrooms and serve with green chutney, raw onions, and lemon pieces.

Thursday, May 22, 2014

Vada Pav Recipe - How to Make Mumbai Vada Pav (Batata Pav)

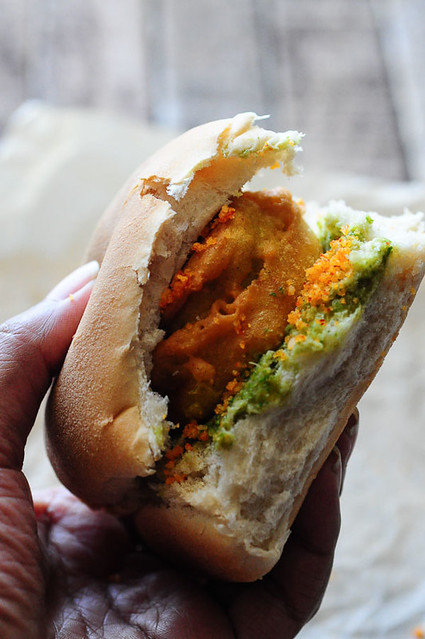
Vada Pav is often likened to an Indian-style burger. While a vada pav does resemble a burger in the way it's assembled, a well-made vada pav couldn't be more different in taste to a burger. Even when you make vada pav at home with burger buns like I did because you don't live in a country where pav is available in a nearby store and of course, making pav at home is not always an option, is it?

{For vada pav recipe in Hindi, Marathi, Gujarati, Urdu, Tamil, Telugu, Kannada, etc, please use the Google Translate button in the sidebar}.


It's time for a confession now. Although I am as Indian as they come, I hadn't eaten my first vada pav until I had moved to Singapore. There's a restaurant called Makan Mumbai that sells a mean vada pav and we'd get them to cater Diwali parties at work where vada pav would be the centre-table snack along with a large thermos of masala chai.


One of the striking things and my favourite part of a vada pav is the spicy dry garlic chutney it comes with. It's a necessary accompaniment so sprinkle a generous amount while you assemble your vada pav. You also need some green chaat chutney so get started on that too. Both of these can be made ahead if you are cooking for a larger group.

vada pav recipe-mumbai vada pav recipe-3

While vada pav is popular as a roadside snack, we had ours for lunch one Saturday. A good generous portion with large batata vadas (potato vada), soft buns, green chutney, and of course the red garlic chutney. What a treat!

Also check out how to make pav at home, recipe for pav bhaji, and some spicy tawa pulao if you are in the mood for some Mumabi-style street food.

MUMBAI VADA PAV RECIPE

Preparation time: 15 minutes
Cooking time: 45 minutes
Makes 6 vada pav

To make the batata vada or potato vada:

1. Boil or steam 2 potatoes until tender. A fork inserted should go in easily.
vada pav recipe-mumbai vada pav recipe-4

2. Set aside to cool and then mash without any big lumps.
vada pav recipe-mumbai vada pav recipe-6

3. Grind together - 2 green chillies, 2 cloves of garlic, and a small piece of ginger to a coarse paste.
vada pav recipe-mumbai vada pav recipe-5

4. Heat 2 tsp oil and add 1/2 tsp black mustard seeds and a few curry leaves. When the mustard seeds splutter, add the chilli-garlic-ginger paste and fry for 30 seconds until fragrant.
vada pav recipe-mumbai vada pav recipe-7

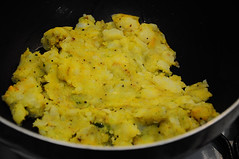
5. Then, add the mashed potatoes, 1/4 tsp turmeric powder, a pinch of hing or asafoetida, and salt to taste.
vada pav recipe-mumbai vada pav recipe-8

6. Turn off flame and mix well until the mixture is well combined. Don't add any water, the batata vada mixture should be thick.
vada pav recipe-mumbai vada pav recipe-9

7. Now we make the outer coating for the batata vada. Place 1 cup besan (gram flour), 1/4 tsp turmeric powder, 1/4 tsp red chilli powder, a pinch of baking soda, and some salt in a bowl. Mix well to combine.
vada pav recipe-mumbai vada pav recipe-10

8. Add enough water to make a thick paste as seen below.
vada pav recipe-mumbai vada pav recipe-11

9. Divide the cooled potato mixture into 6 equal balls and coat in the prepared batter.
vada pav recipe-mumbai vada pav recipe-12

10. Heat enough oil in a kadai or wok to deep fry the vada. When the oil reaches smoking point, gently drop the batata vada into it. Some besan coating will go astray and that's ok, because I say so.
vada pav recipe-mumbai vada pav recipe-13

Once the vada is golden brown, drain and set aside on kitchen napkins.
vada pav recipe-mumbai vada pav recipe-14

You can also fry some green chillies to serve alongside, in true Mumbai vada pav fashion. Take care though, fresh chilies tend to burst in hot oil.
vada pav recipe-mumbai vada pav recipe-15

To assemble the vada pav:

Place a generous amount of green chutney on one side of the pav or burger bun. Place a batata vada over it and top off with a generous sprinkle of garlic chutney.

Serve with fried green chillies for those who want an extra spice kick. Some ketchup would go well with vada pav too.

Note: I have tried to write this recipe in a different style by not adding a list of ingredients in the beginning but rather, mentioning the ingredients and quantities with the instructions. I feel this is useful for me personally as I follow a recipe as I cook and I have heard this feedback from some of you too. Let me know if you miss the ingredients list though!


Wednesday, May 14, 2014

Mushroom Tikki Recipe - Veg Mushroom Tikkis or Cutlets

TH and I have vegetarian burgers for dinner occasionally and I also make the vegetable patties for burger the same way more or less. It's a tried and tested recipe and we like it. However, I recently tried a new mushroom tikki recipe and it turned out really fab so the next time we make vegetable burgers, I may just make larger mushroom patties with this recipe and try it instead - they were that good!


These mushroom tikkis were adapted from a recipe in the new Anjum Anand book I was sent a copy of - Anjum's Quick and Easy Indian - which incidentally has one of the prettiest covers on a cookbook I have seen. I leafed through all the recipes so here's a mini review.

The Good:
  • The recipes are all very easy and I didn't see anything that will take longer than 30 mins, true to the title of the book
  • Most of the recipes have an image to go with it which is a big deal for me since I like to visually see how a finished dish looks like
  • The book is sturdy but not heavy so its easy to use in the kitchen and carry it around
  • The section on Indian tapas is my favourite and the idea to use Vietnamese rice paper rolls with Indian masala dosa filling? Brilliant!

The Not-So-Good
  • A majority of the recipes are not vegetarian so if you are vegetarian, then this book may not be for you. You can adapt and vegetarianise, of course
  • The ingredients used may not be easily and cheaply available in India and in many cases, you don't need to use these shortcuts if you live in India so I'd say this book is best for NRIs that want quick and easy shortcuts to cook Indian food

mushroom tikkis-how to make mushroom cutlet recipe

All that said, these mushroom tikkis didn't take long to put together and they turned out quite good. If you and your guests like mushrooms, it's great as a party food or an appetizer for a lunch or dinner party you host at home. In fact, this book has a number of recipes to help you in these situations.


Looking for more party-friendly food? Check out 10 snack recipes under 15 minutes and more mushroom recipes too if you love cooking with them as much as I do.

MUSHROOM TIKKI RECIPE

Preparation time: 20 minutes
Cooking time: 10 minutes
Makes ~10 small tikkis
Adapted from: Anjum's Quick and Easy Indian

INGREDIENTS:
1 cup finely chopped oyster mushrooms
1 cup finely chopped shitake mushrooms
2 tbsp plain yogurt
1/2 tsp grated ginger
1/2 tsp minced garlic
1/2 tsp red chilli powder or 1 green chilli, minced
2 tbsp minced coriander leaves (cilantro)
1/2 tsp garam masala or Kitchen King masala
1/4 tsp roasted cumin powder (jeera)
A sprinkle of freshly cracked black pepper (optional)
2-3 tbsp gram flour (besan)
1/2 cup bread crumbs
Salt to taste
Oil for shallow frying

INSTRUCTIONS:
1. Add 1 tsp oil to a pan and add the mushrooms and some salt. Saute until the mushrooms let out water and the water evaporates. Adding salt brings out the moisture from the mushrooms so when we fry the tikkis, it won't be moist and absorb too much oil
mushroom tikkis-how to make mushroom cutlet recipe-3

2. Add the ginger and garlic and saute for another 30 seconds until fragrant. Remove and transfer this to a bowl.
mushroom tikkis-how to make mushroom cutlet recipe-4

3. In a small dry skillet, dry roast 3 tbsp gram flour (besan) until it turns a slightly darker shade (not more than 3-4 mins)
mushroom tikkis-how to make mushroom cutlet recipe-5

4. Add 2 tbsp of the gram flour to the mushroom mixture and mix well. We can add the remaining later if we need it (I did).
mushroom tikkis-how to make mushroom cutlet recipe-6

5. Now add all the remaining ingredients except breadcrumbs and mix thoroughly.
mushroom tikkis-how to make mushroom cutlet recipe-7

The resultant mixture should not be too wet or moist and you should be able to easily shape small tikkis or cutlets. I found mine to be too moist so I added the remaining gram flour and also about 3 tbsp of breadcrumbs.
mushroom tikkis-how to make mushroom cutlet recipe-8

6. Heat enough oil in a skillet to submerge your tikkis halfway. Shape the tikkis into whatever size you prefer, coat generously with bread crumbs, and fry in the oil until golden brown.
mushroom tikkis-how to make mushroom cutlet recipe-10

Serve hot with mint coriander green chutney or ketchup.
mushroom tikkis-how to make mushroom cutlet recipe-11

Notes:
- You can use any type of mushrooms you prefer but shitake is a good addition due to its meaty texture. Button mushrooms have too much moisture so they will really cook down a lot in the first step, take care to use enough
- Dipping the tikkis in bread crumbs and then frying resulted in some of the coating getting into the oil. This annoyed me so I added bread crumbs to the mixture itself, shaped, fried directly. This worked better for me
- Bits of green chillies in our tikkis annoy us so I used red chilli powder but the choice is up to you
- If your curd is slightly sour, that works better since it gives more of a sour tinge to the tikkis

Disclaimer: this is not a sponsored post. I did receive a copy of the cookbook but all opinions, burnt tikkis, and typos are my own.