
Showing posts with label Andhra Recipes. Show all posts
Showing posts with label Andhra Recipes. Show all posts
Wednesday, May 6, 2015

Tuesday, September 17, 2013
Peanut Mint Chutney Recipe - Peanut Chutney with Mint for Rice, Idli
I like peanut chutney as a change in my normal chutney routine, so adding some mint to it and kicking it up a notch seemed like a no-brainer. Although in Andhra I have seen peanut chutney being served with tiffin like idli and dosa, I love it with rice, especially since it's a no-coconut chutney recipe. I have a version of peanut chutney recipe here already but this is more minty and watery, perfect with rice, rasam, and a poriyal. I also love how the mint in the chutney makes it more flavourful and pretty to look at.
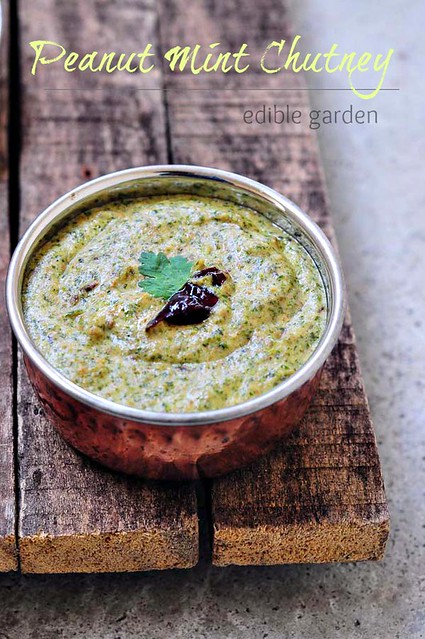
I feel like chutneys are so easy to prepare for lunch and you feel like there are lots of side dishes by adding a simple chutney to your lunch menu. It seems a bit like cheating but if the chutney is delicious and goes fabulous with rice, why not?
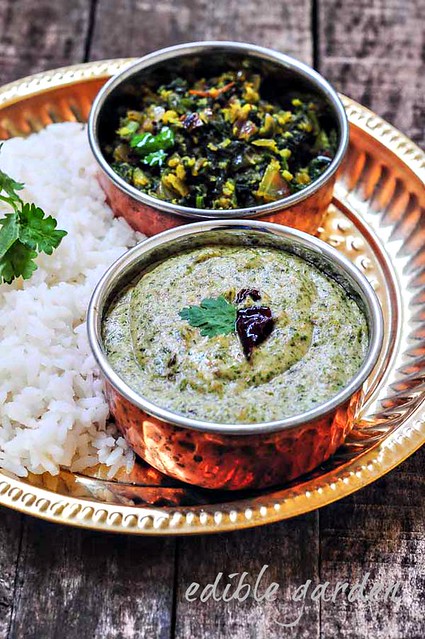
As I was cleaning out the fridge to prepare for our relocation, a whole bag of peanuts jumped out at me and I started adding them to everything in excess - like puliyogare, lemon rice, even simple vegetable rice.
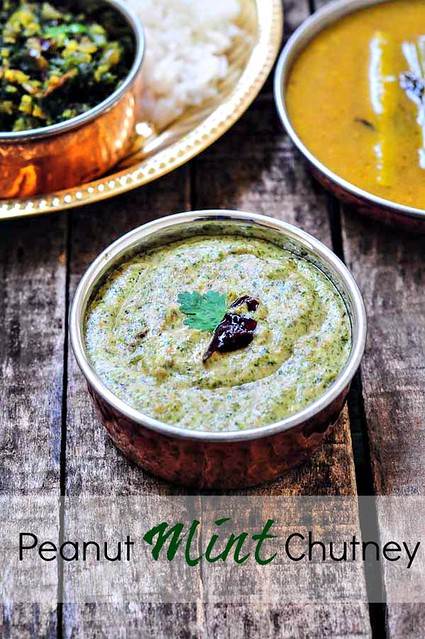
Pair it with a tangy rasam like the drumstick rasam, and a mild vegetable curry like keerai poriyal and you have yourself a wonderful South Indian lunch menu to enjoy with little effort. Check out this list of Chutney Recipes to browse through some of my favourites. For rice, I really love paruppu thogayal and chow chow chutney.
Cooking time: 5 minutes
Serves 2
Adpated from: Siri
INGREDIENTS:
1 cup of raw, unsalted peanuts with skins
2 tbsp of white sesame seeds
1/2 cup of mint leaves, packed
2 green chillies
A small piece of tamarind
2 tsp of oil
1/2 tsp of black mustard seeds
1 red chilli, halved
1/2 tsp of split urad dal
A pinch of hing or asafoetida
INSTRUCTIONS:
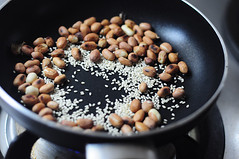
1. Dry roast the peanuts and sesame seeds in a pan until charred or browned. You can add the sesame seeds a bit later since peanuts take longer to roast. Set aside to cool.
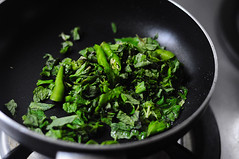
2. Heat 1 tsp oil in the same pan and add the green chillies, mint leaves, and some salt. Saute until the leaves wilt and turn soft. Set side to cool.
3. Once cool. transfer the peanut mixture and mint leaves to a grinder and add a small piece of tamarind or 1/2 tsp tamarind pulp (to your taste).
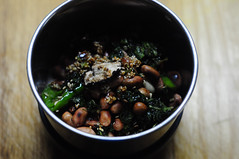
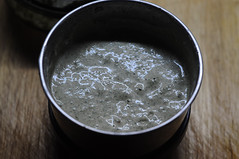
4. Grind this to a smooth paste using water.
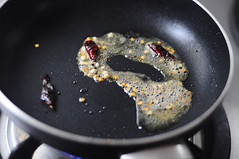
5. Heat the remaining 1 tsp oil and add the mustard seeds. When they pop, add the red chilli, urad dal, and hing.
6. When the dal turns a golden brown, add the ground chutney and mix well. Adjust salt as required.

Serve Peanut Mint Chutney with rice and curry. Yum!
For Peanut Chutney recipe in Telugu, Tamil, Hindi, Marathi, Urdu, please use the Google Translate bar in the top right sidebar of this site.
I feel like chutneys are so easy to prepare for lunch and you feel like there are lots of side dishes by adding a simple chutney to your lunch menu. It seems a bit like cheating but if the chutney is delicious and goes fabulous with rice, why not?
As I was cleaning out the fridge to prepare for our relocation, a whole bag of peanuts jumped out at me and I started adding them to everything in excess - like puliyogare, lemon rice, even simple vegetable rice.
Pair it with a tangy rasam like the drumstick rasam, and a mild vegetable curry like keerai poriyal and you have yourself a wonderful South Indian lunch menu to enjoy with little effort. Check out this list of Chutney Recipes to browse through some of my favourites. For rice, I really love paruppu thogayal and chow chow chutney.
PEANUT MINT CHUTNEY RECIPE (NO COCONUT)
Preparation time: 10 minutesCooking time: 5 minutes
Serves 2
Adpated from: Siri
INGREDIENTS:
1 cup of raw, unsalted peanuts with skins
2 tbsp of white sesame seeds
1/2 cup of mint leaves, packed
2 green chillies
A small piece of tamarind
2 tsp of oil
1/2 tsp of black mustard seeds
1 red chilli, halved
1/2 tsp of split urad dal
A pinch of hing or asafoetida
INSTRUCTIONS:
1. Dry roast the peanuts and sesame seeds in a pan until charred or browned. You can add the sesame seeds a bit later since peanuts take longer to roast. Set aside to cool.
2. Heat 1 tsp oil in the same pan and add the green chillies, mint leaves, and some salt. Saute until the leaves wilt and turn soft. Set side to cool.
3. Once cool. transfer the peanut mixture and mint leaves to a grinder and add a small piece of tamarind or 1/2 tsp tamarind pulp (to your taste).
4. Grind this to a smooth paste using water.
5. Heat the remaining 1 tsp oil and add the mustard seeds. When they pop, add the red chilli, urad dal, and hing.
6. When the dal turns a golden brown, add the ground chutney and mix well. Adjust salt as required.
Serve Peanut Mint Chutney with rice and curry. Yum!
For Peanut Chutney recipe in Telugu, Tamil, Hindi, Marathi, Urdu, please use the Google Translate bar in the top right sidebar of this site.
Monday, August 26, 2013
Drumstick Rasam Recipe - Easy Andhra-Style Rasam with Drumsticks
Drumstick rasam is a beautiful thing, really. I have used freshly ground rasam powder to make it and very little else to keep the flavour solely focused on the drumsticks. The base of the recipe is an Andhra-style rasam the recipe of which came from a friend's mom.
There's a reason why I am posting the recipe for drumstick rasam today. I am going to terribly miss fresh drumsticks in my life because I just moved to Sydney. Yep, that's right. After 5 years and a few months of living in Sunny Singapore, TH and I took the plunge and took up this opportunity to relocate down under. We are very very excited and thrilled about it, especially about the 4 distinct seasons we will get to enjoy.

I have visited Sydney before and loved it each time which is one of the main reasons why we decided to just move. TH came along with me last time I was here on work and he really liked it too. We are both looking forward to exploring the city, finding a nice place to live, enjoying the amazing fresh food scene and outdoor activities here, and most of all, staying in one place for a few years now (an international relocation does take the wind out of you!).

Back to this gorgeous drumstick rasam I made during one of my last weeks in Singapore. I haven't cooked properly in many weeks now and towards the beginning of trying to clear off my fridge, I was especially desperate to use up all the coconut I had stashed away in the freezer. If you notice the picture above, all recipes in it use coconut ;)

I have quite a few easy rasam recipes in here but my all-time favourites now include this drumstick rasam, pepper rasam, tomato rasam, and Mysore rasam.
I paired the drumstick rasam with rice, keerai poriyal, and mint peanut chutney.
Cooking time: 20 minutes
INGREDIENTS:
INSTRUCTIONS:
1. Heat 1/2 tsp oil in a pan and add chana dal, jeera, red chillies and pepper. Roast for a minute until fragrant.

2. Add the coriander powder and some hing next. Roast for a few seconds.

3. Add the coconut (if using)

And roast until it just starts to brown. Do not over-roast it or the flavour of the rasam will change. Set aside to cool.

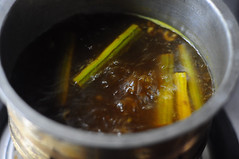
4. Extract the juice from the tamarind and add 2 cups of water to it. Throw in the chopped drumstick pieces, turmeric, and some salt.

5. Bring this mixture to a boil.
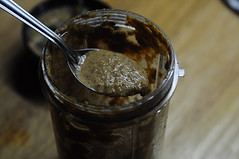
6. Meanwhile, grind the roasted spices with some water to a coarse paste.
7. Once the tamarind water has reduced to about half its original quantity, add the ground spice paste to it.
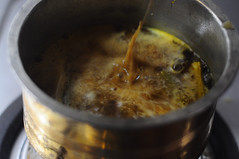
8. Bring to a boil again, add the jaggery and more salt if needed. Remove from fire and set aside.

9. Heat the ghee or oil for tempering and add the rest of the ingredients.

When the mustard pops, dunk the entire contents into the rasam.
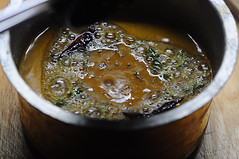
Set aside for about 30 mins to an hour for the flavours to mingle before serving.

Hot and delicious drumstick rasam is now ready!
There's a reason why I am posting the recipe for drumstick rasam today. I am going to terribly miss fresh drumsticks in my life because I just moved to Sydney. Yep, that's right. After 5 years and a few months of living in Sunny Singapore, TH and I took the plunge and took up this opportunity to relocate down under. We are very very excited and thrilled about it, especially about the 4 distinct seasons we will get to enjoy.
I have visited Sydney before and loved it each time which is one of the main reasons why we decided to just move. TH came along with me last time I was here on work and he really liked it too. We are both looking forward to exploring the city, finding a nice place to live, enjoying the amazing fresh food scene and outdoor activities here, and most of all, staying in one place for a few years now (an international relocation does take the wind out of you!).
Back to this gorgeous drumstick rasam I made during one of my last weeks in Singapore. I haven't cooked properly in many weeks now and towards the beginning of trying to clear off my fridge, I was especially desperate to use up all the coconut I had stashed away in the freezer. If you notice the picture above, all recipes in it use coconut ;)
I have quite a few easy rasam recipes in here but my all-time favourites now include this drumstick rasam, pepper rasam, tomato rasam, and Mysore rasam.
I paired the drumstick rasam with rice, keerai poriyal, and mint peanut chutney.
DRUMSTICK RASAM RECIPE
Preparation time: 10 minutesCooking time: 20 minutes
INGREDIENTS:
- 1 lime-sized ball of tamarind, soaked in 1 cup warm water
- 1 drumstick, cut into 3" pieces
- A few curry leaves
- 1/4 tsp of turmeric powder
- A fat pinch of powdered jaggery or brown sugar
- 1 tsp of oil
- 1 tbsp of chana dal
- 1/2 tsp of jeera or cumin seeds
- 1 tbsp of coriander powder (or 2 tsp coriander seeds)
- 1/4 tsp of hing or asafoetida
- 1/2 tsp of whole black pepper
- 1-2 of dry ed chillies
- 1/4 cup of grated coconut (optional)
- 1 tsp of ghee or oil
- 1/2 tsp of black mustard seeds
- A few curry leaves
- 1-2 red chillies (optional - adapt according to spice levels preferred)
INSTRUCTIONS:
1. Heat 1/2 tsp oil in a pan and add chana dal, jeera, red chillies and pepper. Roast for a minute until fragrant.
2. Add the coriander powder and some hing next. Roast for a few seconds.
3. Add the coconut (if using)
And roast until it just starts to brown. Do not over-roast it or the flavour of the rasam will change. Set aside to cool.
4. Extract the juice from the tamarind and add 2 cups of water to it. Throw in the chopped drumstick pieces, turmeric, and some salt.
5. Bring this mixture to a boil.
6. Meanwhile, grind the roasted spices with some water to a coarse paste.
7. Once the tamarind water has reduced to about half its original quantity, add the ground spice paste to it.
8. Bring to a boil again, add the jaggery and more salt if needed. Remove from fire and set aside.
9. Heat the ghee or oil for tempering and add the rest of the ingredients.
When the mustard pops, dunk the entire contents into the rasam.
Set aside for about 30 mins to an hour for the flavours to mingle before serving.
Hot and delicious drumstick rasam is now ready!
Tuesday, July 30, 2013
Mirchi Ka Salan Recipe - Hyderabadi Mirchi Ka Salan for Biryani

Mirchi ka Salan - if you asked me to pick one dish, and only one, that stood out to me during my 2.5 years of life in Hyderabad, it would be Mirchi ka Salan. There, I said it, it's not even the famous Hyderabadi Biryani but the underrated chilli based gravy that they serve with the biryani that stole my heart. I have tasted it in all kinds of places starting from the roadside biryani stalls to the really fancy restaurants. The wonderful thing about this seemingly humble side dish is that it looks very coy and innocent but is bursting with flavours. It's spicy, sweet, salty, and a tad bitter all at the same time and holds its own with a dish like the mighty biryani. Also check out my baingan ka salan recipe.

I had made Mirchi ka Salan once before and at that time, I felt it was amazing (although I do say so myself). Now that my culinary intuitions are much better, I decided to give it another go recently. I referred a bunch of recipes and decided to go with my reading buddy Preethi's recipe with a few minor changes from Vahchef and of my own. The pleasant surprise was that my Mirchi ka Salan was much thicker than the restaurant version and it went beautifully with plain rice, rotis, and even dosa. Since the gravy stores well for up to a week, this is definitely a win.
Mirchi ka Salan would go great with a simple Vegetable Biryani, Egg Biryani, Chicken Biryani, and even Vegetable Pulao. Also try with it with chapatis and idli or dosa for a change.
HYDERABADI MIRCHI KA SALAN RECIPE
Preparation time: 5 minutesCooking time: 30 minutes
Makes ~ 2 cups
Serves 6
Adapted from: The Meal Algorithm
INGREDIENTS:
- 4-6 large green chillies (use the kind that has lesser heat, the larger the better)
- 2 tbsp of gingelly oil (Indian sesame oil)
- 2 tbsp of white sesame seeds
- 3 tbsp of raw peanuts
- 2 tbsp of grated coconut (or use desiccated), optional
- 1/2 tsp of minced garlic
- 1/2 tsp of grated ginger
- 1 heaping tsp of coriander powder
- 1/2 tsp of jeera (cumin) powder
- 1/2 tsp of red chilli powder (adjust to taste)
- 1/2 tsp of black mustard seeds
- 1/4 tsp of fenugreek seeds (methi)
- 1/2 cup of sliced onions
- A few curry leaves
- A pinch of turmeric powder
- 1 tsp of tamarind extract
- 1 dry red chilli
- 3/4 tsp of powdered jaggery or dark brown sugar
INSTRUCTIONS:
1. Wash and pat dry the green chillies. Heat 1 tbsp oil in a wide pan and lightly fry the chillies until they are charred and start to look softer. Drain and set aside on paper towels.

2. Meanwhile, In a dry skillet, roast the coconut until golden brown (if using coconut). Desiccated coconut will brown much faster so keep an eye on it as you fry.

3. In the same pan used for the chillies, add the peanuts and sesame seeds and roast until a shade darker, keeping flame very low. Once they are done, add the roasted coconut and mix well. Switch off flame and remove to a plate to cool.

4. In the same pan (we like to minimise washing, remember?), add the remaining 1 tbsp oil and the mustard seeds+ fenugreek seeds. When the mustards pop, add the sliced onions and red chilli torn into half. Fry until onions turn golden brown.
5. Next, add the curry leaves, ginger, garlic, and turmeric. Saut� for 30 seconds until fragrant.

6. Then throw in the red chilli powder, coriander pwoder, jeera powder, and some salt. Roast for 10 seconds and add 2 cups of water. Bring to a slow boil.

7. Meanwhile, grind the roasted coconut + sesame + peanut mixture with some water to a smooth paste. Add it to the simmering curry and mix well. Continue to cook on a low flame.

8. When the mixture is a bit thicker and simmering, add the jaggery and the tamarind extract dissolved in 1/2 cup water.

9. Mix well and add the green chillies we had saut�ed and set aside. Cook covered on a low flame for 5-7 mins until the green chillies are soft. Add more salt if required.

10. If you find that the mixture is too watery, you can simmer longer, and if it's too thick, add more water or tamarind water as required. How much you want to cook it down is up to your preference. I like it on the thicker side soI cooked it down a bit.
Making a Mirchi ka Salan is not the quickest thing you can do and it does involve a lot more ingredients than the average dish. But trust me when I say it's worth it. The day I made this Mirchi ka Salan, I just made a Rice Cooker Vegetable Biryani so that I can fully focus on this dish. The combination along with a simple onion and cucumber salad was a winner!
For Mirchi Ka Salan recipe in Hindi, Tamil, Telugu, Urdu, please use the Google Translate button on the top right of this website.
Wednesday, July 10, 2013
Chicken Majestic - Andhra Style Indian Chicken Starter Recipe
I first tasted and even heard about Chicken Majestic at a friend's place where she served it as a starter. It tasted amazing and the highlight was how tender the chicken pieces were. Chicken Majestic is apparently a very popular starter with chicken particularly well known in Andhra. Although I lived in Hyderabad for a couple of years, I had never come across this particular dish, what a shame. While Chilli Chicken will always remain a personal favourite chicken starter, chicken majestic is a great variation and a welcome change from the usual dishes like chilli chicken or South Indian chicken 65.

There's a secret to why the chicken pieces are super tender - it's because they are marinated in buttermilk for a few hours. The recipe is also a nice blend of Indo-Chinese and Indian with Chinese sauces and Indian spices and curry leaves. You can adjust the the spice levels to your preference and while the preparation time may seem quite long, it's a great make-ahead recipe which makes an amazing chicken starter for your guests when you are entertaining.

Cooking time: 20 minutes
Serves 4-6
Recipe adapted from: Vahchef
Ingredients:
200 gm of chicken breast, cut into long strips
2 tsp of coriander powder
2 tbsp of corn flour
1/2 tsp of cumin powder
1/4 cup of buttermilk
1 egg
1.5 tsp of ginger garlic paste
3-4 green chillies
1 tsp of soya sauce
A fistful of curry leaves
1 small bunch of mint leaves (I didn't have any)
1 tsp + 1 tbsp of oil
3 tbsp of plain yogurt / curd
2 tsp of minced garlic
1/4 tsp of turmeric powder
How to Make Chicken Majestic:
1. Marinate the chicken pieces in buttermilk and salt for 4 hours. Leave it in the refrigerator while you marinate.
2. To the same bowl, add the egg, corn flour, ginger garlic paste, 1 tsp oil and leave it to marinate for another hour.

3. When ready to cook, heat the 1 tbsp oil in a pan and add the chicken pieces. Saute until the pieces brown nicely and get fried. The original recipe calls for deep frying but I found saut�ing is quite effective too since the chicken is very tender after marinating.
4. After the chicken is browned and fried, drain and set aside.
5. In the same pan, add the minced garlic and green chillies. Saute until lightly browned and add the curry leaves and mint leaves, if using.
6. When the curry leaves are wilted, add all the masala powders - chilli powder, coriander, jeera, and turmeric.

7. Saute for 5 seconds without burning and add the plain curd. Stir around quickly and add soya sauce and the fried chicken pieces. Mix well until the ingredients are well coated.
8. Keep sauteing until the chicken is cooked fully and the masala turns a lovely brown.

Serve Chicken Majestic as a starter or with rice and gravy. Tastes great either ways.
There's a secret to why the chicken pieces are super tender - it's because they are marinated in buttermilk for a few hours. The recipe is also a nice blend of Indo-Chinese and Indian with Chinese sauces and Indian spices and curry leaves. You can adjust the the spice levels to your preference and while the preparation time may seem quite long, it's a great make-ahead recipe which makes an amazing chicken starter for your guests when you are entertaining.
CHICKEN MAJESTIC RECIPE
Preparation time: 5 hoursCooking time: 20 minutes
Serves 4-6
Recipe adapted from: Vahchef
Ingredients:
200 gm of chicken breast, cut into long strips
2 tsp of coriander powder
2 tbsp of corn flour
1/2 tsp of cumin powder
1/4 cup of buttermilk
1 egg
1.5 tsp of ginger garlic paste
3-4 green chillies
1 tsp of soya sauce
A fistful of curry leaves
1 small bunch of mint leaves (I didn't have any)
1 tsp + 1 tbsp of oil
3 tbsp of plain yogurt / curd
2 tsp of minced garlic
1/4 tsp of turmeric powder
How to Make Chicken Majestic:
1. Marinate the chicken pieces in buttermilk and salt for 4 hours. Leave it in the refrigerator while you marinate.
2. To the same bowl, add the egg, corn flour, ginger garlic paste, 1 tsp oil and leave it to marinate for another hour.
3. When ready to cook, heat the 1 tbsp oil in a pan and add the chicken pieces. Saute until the pieces brown nicely and get fried. The original recipe calls for deep frying but I found saut�ing is quite effective too since the chicken is very tender after marinating.
4. After the chicken is browned and fried, drain and set aside.
5. In the same pan, add the minced garlic and green chillies. Saute until lightly browned and add the curry leaves and mint leaves, if using.
6. When the curry leaves are wilted, add all the masala powders - chilli powder, coriander, jeera, and turmeric.
7. Saute for 5 seconds without burning and add the plain curd. Stir around quickly and add soya sauce and the fried chicken pieces. Mix well until the ingredients are well coated.
8. Keep sauteing until the chicken is cooked fully and the masala turns a lovely brown.
Serve Chicken Majestic as a starter or with rice and gravy. Tastes great either ways.
Friday, May 31, 2013
Andhra Pesarattu Recipe - Pesarattu Dosa with Green Moong Dal
The first time I even heard the word Pesarattu was during my 2.5 year life in Hyderabad. We used to go to Chutneys, a popular south Indian vegetarian restaurant that had all kinds of (arguably overpriced) dosas and idlis, pesarattu with upma being one of their chefs recommendations. I don't care much for upma so if you give it to me wrapped in a pesarattu, a combination I was not even familiar with, it doesn't really make it more appealing.

However, a friend of mine was crazy about this. He would order upma pesarattu every time and then another dish that would rank last in my wishlist - idli! I would just order my oothappam or masala dosa and enjoy it with their delicious chutneys.

But one day I took a bite out of his pesarattu and liked it. I am sorry this story doesn't have a happier ending like "I was blown away with the first bite of my pesarattu". It was nice, I liked it. I like different kinds of dosas, ada dosa being my favourite move away from the conventional. I forgot all about the pesarattu until I was left with a large batch of whole green moong by a friend moving out of the country and I decided to soak some and make my first batch of pesarattu at home.

Paired with the tiffin sambar, coriander chutney and ginger chutney or Andhra allam pachadi (store-bought), it was quite a treat! Different from the usual dosa and quite nutritious, pesarattu will find its way into my dinner menu quite often now.
Cooking time: 15 minutes
Makes ~10 dosas
Recipe reference: Simply South by Chandra Padmanabhan
Ingredients:
How to Make Pesarattu:
1. Soak the moong dal and rice together for at least 4 hours or overnight if possible. Grind together with rest of the ingredients and some salt + water

2. The batter will be coarse and you can adjust the thickness to your preference, not making it too watery. I prefer spongier pesarattu so keep my batter a bit on the thicker side - more thicker than regular dosa batter.

3. Heat a tawa and spread one ladle-full of batter into a dosa.
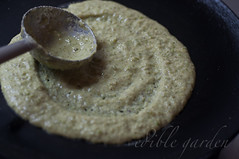
Spread it thinner for a crisper version, it's entirely up to you. Drizzle with some oil and spread the minced onions on top (if using).
Sidenote: since I always use my left hand now for making dosas and such (the right hand being occupied by the camera), I think I can safely say I am becoming ambidextrous! Ah, the joys of food blogging.

4. Flip over when the first side is cooked. You can also cover and cook the dosa without cooking, especially if you are serving the pesarattu with an upma filling (check notes).

When both sides are cooked, remove from tawa and serve hot with spicy andhra ginger chutney or allam pachadi. I love pesarattu with coconut-based chutneys like this coconut coriander chutney.
Notes:
However, a friend of mine was crazy about this. He would order upma pesarattu every time and then another dish that would rank last in my wishlist - idli! I would just order my oothappam or masala dosa and enjoy it with their delicious chutneys.
But one day I took a bite out of his pesarattu and liked it. I am sorry this story doesn't have a happier ending like "I was blown away with the first bite of my pesarattu". It was nice, I liked it. I like different kinds of dosas, ada dosa being my favourite move away from the conventional. I forgot all about the pesarattu until I was left with a large batch of whole green moong by a friend moving out of the country and I decided to soak some and make my first batch of pesarattu at home.
Paired with the tiffin sambar, coriander chutney and ginger chutney or Andhra allam pachadi (store-bought), it was quite a treat! Different from the usual dosa and quite nutritious, pesarattu will find its way into my dinner menu quite often now.
ANDHRA PESARATTU DOSA RECIPE
Preparation time: 4 hoursCooking time: 15 minutes
Makes ~10 dosas
Recipe reference: Simply South by Chandra Padmanabhan
Ingredients:
- 1 cup whole green moong
- 1/4 cup of raw rice
- A small piece of ginger
- A small bunch of coriander leaves (cilantro)
- 2 cloves of garlic (optional)
- 2 green chillies
- 2 tbsp of oil, for drizzling on dosa while cooking
- 1/4 cup of minced onions for garnish (optional)
How to Make Pesarattu:
1. Soak the moong dal and rice together for at least 4 hours or overnight if possible. Grind together with rest of the ingredients and some salt + water
2. The batter will be coarse and you can adjust the thickness to your preference, not making it too watery. I prefer spongier pesarattu so keep my batter a bit on the thicker side - more thicker than regular dosa batter.
3. Heat a tawa and spread one ladle-full of batter into a dosa.
Spread it thinner for a crisper version, it's entirely up to you. Drizzle with some oil and spread the minced onions on top (if using).
Sidenote: since I always use my left hand now for making dosas and such (the right hand being occupied by the camera), I think I can safely say I am becoming ambidextrous! Ah, the joys of food blogging.
4. Flip over when the first side is cooked. You can also cover and cook the dosa without cooking, especially if you are serving the pesarattu with an upma filling (check notes).
When both sides are cooked, remove from tawa and serve hot with spicy andhra ginger chutney or allam pachadi. I love pesarattu with coconut-based chutneys like this coconut coriander chutney.
Notes:
- Pesarattu is mostly served with a filling of rava upma. You can add a mound to the centre of the dosa after shaping the dosa and cooking it covered for a few minutes
- The batter keeps in the refrigerator for up to 2 days
- For a more nutritious pesarattu, use moong dal sprouts instead of the whole beans
- You can add rice flour instead of raw rice but grinding the rice along with the dal gives a coarse texture to the pesarattu which I personally love
Sunday, April 21, 2013
Green Chilli Chicken Recipe - Andhra Chilli Chicken Recipe
I love Chilli Chicken and Chilli Fish. Or wait, I should say I loved Chilli Chicken. I have been vegetarian for the past 2 months and going strong so far. It's easier than I thought and although I didn't want to talk about this too soon, 2 months is a good milestone. I know it's ironic I am "celebrating" by posting a Chilli Chicken Recipe but this one is from a couple months back and this Green Chilli Chicken came out so good that I couldn't keep it away from some of chicken lovers out there.

I had bookmarked Sig's Green Chilli Chicken Recipe ages ago and made it for a few friends finally. I didn't have enough green chillies to maker her super fiery version so compromised by adding some red chilli powder as well. The colour was beautiful and it was probably one of the easiest Indian chicken recipe I have made. A friend commented that this is how Andhra Chilli Chicken tastes so in case anyone is looking for a recipe for Andhra Chilli Chicken, well, here you go! Here's another great recipe if you are looking for an easy chicken curry recipe.
Cooking time: 30 minutes
Serves 4
Recipe adapted from: Live to Eat
Ingredients:
How to Make Green Chilli Chicken:
I had bookmarked Sig's Green Chilli Chicken Recipe ages ago and made it for a few friends finally. I didn't have enough green chillies to maker her super fiery version so compromised by adding some red chilli powder as well. The colour was beautiful and it was probably one of the easiest Indian chicken recipe I have made. A friend commented that this is how Andhra Chilli Chicken tastes so in case anyone is looking for a recipe for Andhra Chilli Chicken, well, here you go! Here's another great recipe if you are looking for an easy chicken curry recipe.
ANDHRA-STYLE GREEN CHILLI CHICKEN RECIPE
Preparation time: 15 minutesCooking time: 30 minutes
Serves 4
Recipe adapted from: Live to Eat
Ingredients:
- 400 gm of boneless chicken pieces, cubed
- 1/2 cup of sliced shallots or onions
- 4 green chillies, sliced
- 1/2 tsp of red chilli powder
- 1 tsp of ginger garlic paste (ideally freshly made)
- A few of curry leaves
- 1 tsp of coriander powder
- 1/4 tsp of fennel powder
- 3 tbsp of oil
- 2 tsp of lemon juice
- 1/4 tsp of turmeric powder
How to Make Green Chilli Chicken:
- Heat oil in a large pan and saut� the shallots till soft and slightly browned
- Add the chicken pieces and some salt and saut� on medium-high heat stirring frequently till the chicken pieces turn white on all sides. The chicken will give out water at this point
- Cook covered on low heat for about 12 mins until the chicken pieces are tender
- Uncover and stir in the green chilies, chilli powder, turmeric, ginger-garlic paste, coriander, fennel, and curry leaves
- Saut� on medium high heat for a few minutes, stirring frequently till the chicken pieces are cooked through and the pieces start to brown
- Remove from heat and stir in lemon juice and garnish with chopped coriander leaves if desired
Tuesday, March 12, 2013
Chutney Podi Recipe - Coconut Chutney Powder Recipe for Idli, Dosa, Rice
Coconut Chutney Podi is a staple in my home and is often called Thavana Podi. It's quite similar to the Kerala Chammanthi Podi that's mixed with rice but this Chutney Powder recipe has an Andhra twist to it too.Every visit back to Kottayam sees amma cooking up masala podis, dosa and idli podi, pulusu podi which I use for vatha kuzhambu, and this Thavana Podi or Chutney Podi which TH loves with curd rice. I can eat it with pretty much everything - dosa, idli, wheat dosa, and even chapati. Since the coconut releases oils when roasted, it's not necessary to add more oil to it while serving.
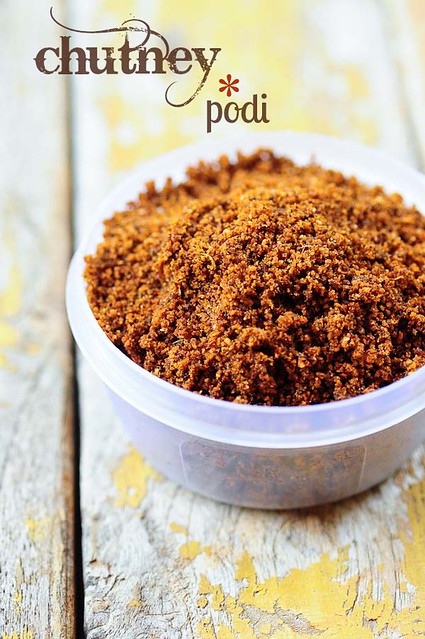
Amma says this chutney podi was surely invented to use up large amounts of coconut in the house. She uses week-old grated coconut for it when a fresh batch is grated for the following week. Of course, you can use freshly grated coconut for this Chutney Powder but the larger amount of moisture in it will take longer to roast.

If made correctly and roasted perfectly, this chutney podi will stay fresh for 1-2 months with no need for refrigeration. I bring back about a large packet and keep some out and refrigerate the rest since we don't consume chutney podi in large quantities. I haven't had issues with spoilt chutney powder so far even in very humid Singapore weather.
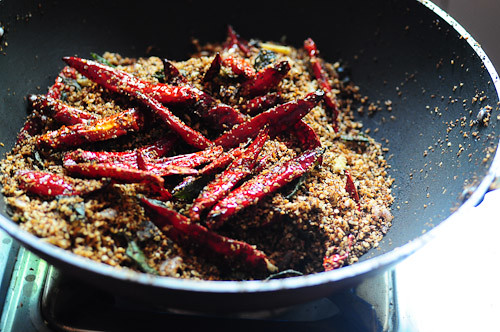
Make sure you set aside time to do the roasting since it's not ideal to leave the pan on the stove and wander around. The roasting needs to be uniform and done well so that the chutney podi tastes good and lasts longer.

CHUTNEY PODI {CHUTNEY POWDER} RECIPE
Preparation time: 10 minutesCooking time: 20 minutes
Makes ~ 2 cups chutney powder
Recipe source: Amma
Ingredients:
- 2 cups of grated coconut
- 15 dry red chillies
- 2" piece of ginger, sliced
- 3 strands of curry leaves
- 2 tsp of urad dal / ulutham paruppu / uzhunnu parippu
- 1 tsp of black pepper
- 1/2 cup of shallots / chinna vengayam / ulli, sliced
- 1/2 tsp of hing / asafoetida / kaayam
- 1 small piece of tamarind
- 2 tsp of salt
How to Make Coconut Chutney Powder:
- In a heavy-bottomed pan, roast the coconut, red chillies, ginger, shallots, urad dal, curry leaves, and pepper without any oil.
- The coconut should turn a dark brown and the red chillies should glisten and turn a darker shade (refer picture above)
- This will take about 10-15 mins. Keep flame low and stir continuously.
- When done, turn off flame and add the salt, hing, and tamarind. Mix and let cool completely. The coconut will be brittle to touch and almost-black.
- Once cooled, powder as fine or coarse as you prefer and store in an airtight container.
- This coconut chutney powder can be served with dosa, idli, rice, chapati, wheat dosa, etc.
You may also want to check out this Andhra paruppu podi for a spicy podi to serve with rice.
Subscribe to:
Posts (Atom)