ads1

Showing posts with label Reddiar Recipes. Show all posts

Monday, November 25, 2013

Jowar Dosa - Sorghum (Jonnalu) Dosa - South Indian Dosa Recipes

Sorghum, known as jowar, cholam, jonnalu, jola, etc in India is a grain we've been using for generations to make sorghum dosa. Sorghum has enough health benefits like cancer-fighting abilities, cholesterol prevention, insulin resistance, etc for you to be drawn to this sorghum dosa recipe but more than that, it's a welcome change from the regular plain dosa that's more popular. Most Reddiar households prepare what we call jonnalu dosa regularly, served best with coconut garlic chutney and spicy chilli chutney.


Sorghum requires a good amount of soaking time so you do need to prepare in advance to make the dosas. If you are looking for a quick recipe with sorghum then this is probably not it but it's still arguably simple to make and gives you a healthy homemade breakfast for your family to enjoy.

maize dosa-sorghum dosa-jonnalu dosa recipe

Other dosa recipes on Edible Garden you may like - instant rava dosa, instant wheat dosa, sago dosa, spring roll dosa, and of course the plain dosa recipe.

SORGHUM DOSA RECIPE

Preparation time: 8 hours
Cooking time: 20 minutes
Makes ~ 15 dosas
Recipe source: Amma

INGREDIENTS FOR BATTER:
2.5 cups of sorghum (cholam, jowar, jonnalu)
1/2 cup of idli rice or raw rice
1 cup of whole urad dal

INSTRUCTIONS:

1. Measure out your ingredients. I have the picture of sorghum or jowar below, in case some of you are unfamiliar with this grain.
maize dosa-sorghum dosa-jonnalu dosa recipe

2. Soak the sorghum and rice together overnight or at least 7-8 hours. Soak the urad dal separately for at least 3 hours.
maize dosa-sorghum dosa-jonnalu dosa recipe-2

3. Grind the urad dal first using adequate water. Check the idli post to see tips on how to grind the urad dal properly for maximum fermentation. Transfer the ground urad dal batter to a large container.
maize dosa-sorghum dosa-jonnalu dosa recipe-3

4. Now grind the soaked sorghum-rice mixture. This will take a while so keep checking, scraping down the sides, and adding water as required. Don't add too much water, just enough to keep the grinder moving and make the batter. It will not turn our smooth like regular dosa batter so don't fret too much about that either.
maize dosa-sorghum dosa-jonnalu dosa recipe-4

5. Once done, add to the urad dal batter. You will see specks of brown in the batter from the sorghum. Add salt, mix well, and keep aside for another 7-8 hours for fermenting.
maize dosa-sorghum dosa-jonnalu dosa recipe-5

6. Once fermented, gently mix and add water, if required, to make dosa batter of pouring consistency.
maize dosa-sorghum dosa-jonnalu dosa recipe-6

TO MAKE THE SORGHUM DOSA:

Heat a tawa and grease well with gingelly oil (sesame oil). Pour 1/4 cup of batter and spread into a dosa. You can make it as thick or thin as you like. Drizzle more oil over the doa.
maize dosa-sorghum dosa-jonnalu dosa recipe-7

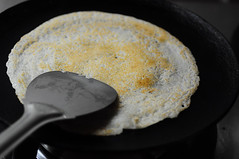
Flip around when the first side is golden brown. Cook the other side for a minute or so.
maize dosa-sorghum dosa-jonnalu dosa recipe-8

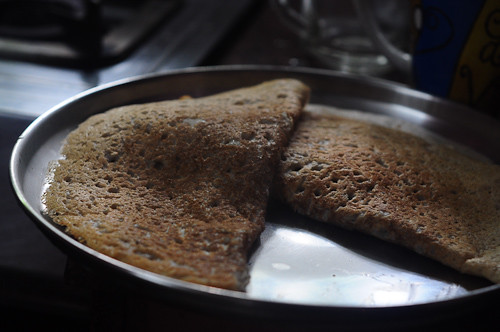
Stack the dosas as you cook them. Sorghum dosas are best served hot or warm.
maize dosa-sorghum dosa-jonnalu dosa recipe-9

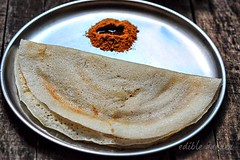
Serve jonnalu dosa with spicy chutneys like thick coconut chutney or spicy red chilli chutney.

I hope you like this different South Indian dosa recipe idea. For sorghum dosa recipe in Tamil, Hindi, Telugu, etc, please use the Google Translate button in the sidebar.

Monday, November 18, 2013

Plain Dosa Recipe - How to Make Dosa Batter at Home (Step by Step, Tips and FAQs)

Note: This is a long and detailed post on how to make plain dosa at home with lots of tips and FAQs at the end. 

Dosa is soul food for me. I often tell TH how I can make and eat dosa every day for a long time and still not be bored with it. It's probably because we ate a lot of dosa growing up. Our family, or rather the Reddiar community in Kerala, always has homemade dosa batter in the fridge, ready to whip up fresh dosas on demand or for the unexpected guests whom we always insist stay for dinner. My mom has been using an industrial sized wet grinder for many years now and it's run about twice a week to keep the idli/dosa batter supply ongoing and fresh. She makes idlis as soon as the batter ferments and then dilutes the batter further to make dosas for the next 3-4 days.

Plain Dosa Recipe - How to Make Dosa Batter at Home (Step by Step, Tips and FAQs)
Dosa with Sambar and Chutney from my Mom's kitchen

The batter we make is the same for idli and dosa and uses only whole skinned urad dal (ulutham paruppu or uzhunnu parippu) and idli rice or dobbi ari. Apart from salt, nothing else is added to this. The proportion of rice to dal remains almost constant in the batter, only altered if the dal is old or doesn't seem to do its job properly. This variable is successfully eliminated in most cases by sourcing the rice and dal from trusted grocery stores only (my dad ran one for many years so we directly sourced the best quality stuff from dealers in Andhra and Tamil Nadu directly).

Plain Dosa Recipe - How to Make Dosa Batter at Home (Step by Step, Tips and FAQs)

I don't know why I never shared this plain dosa recipe before since it's such a comfort food for us and a constant in our lives. So as I was saying, the idli-dosa batter is made about twice a week and idli is made immediately after the first round of fermenting. Nowadays, amma makes idlis in bulk and stores them but back in the day, idlis only made an appearance the day after the batter was ground. From day two onwards, it was dosa time - soft, fluffy and slight thick for the adults, roasted and crisp for the kids and young at heart (my grand mom loved her dosas crisp).

This would go on for about 4 days until the next round of batter was made. Dinner was almost always dosa with different kinds of chutneys and side dishes to shakes things up a bit.

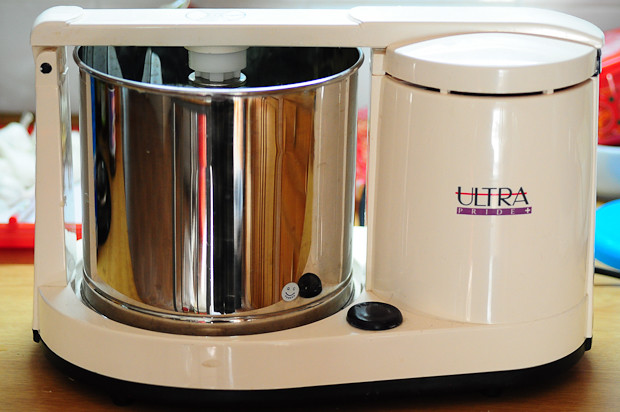
Ultra Grinder Plain Dosa Recipe - How to Make Dosa Batter at Home (Step by Step, Tips and FAQs)

As soon as I got settled in Singapore, I brought back a wet grinder from India - the Ultra tabletop one. It does a great job of grinding my batter and I have rarely bought batter from stores after buying it. It does take some planning to make your own dosa or idli batter at home but obviously is well worth the effort. You can check my detailed post on making idli batter at home for more info on that. Today we are going to look at how to prepare plain dosa at home. This is not a paper roast dosa or an uthappam, but somewhere in the middle, perfect for everyday breakfast or dinner with some dosa podi. I will share the method to prepare crispy hotel-style dosa soon.

HOMEMADE PLAIN DOSA RECIPE

Preparation time: 8 hours
Cooking time: 10 minutes

FOR THE DOSA BATTER
Ingredients:
1 cup whole skinned urad dal
3 cups idli rice*
Salt as needed (see notes)

Instructions:
  1. Soak the rice and dal separately for 3 hours
  2. Grind dal first into a smooth consistency adding enough water
  3. Grind rice into a smooth batter by adding just enough water to get it going
  4. Combine the two, add salt, and let it ferment in a large enough bowl lightly covered, for about 6-8 hours in a warm place
  5. * You can increase rice to four cups if using good quality urad dal but it takes experience and practice to tell if that's the case so go with these proportions as you start out

TO MAKE THE DOSAS (~8 Nos)
Ingredients:
4 cups of fermented dosa batter
1-1.5 cups of water
4 tbsp of gingelly oil (Indian sesame oil like Idhayam)

Instructions:

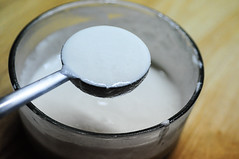
1. Add enough water to the fermented batter until you have a smooth, pouring consistency. Make sure the batter is not too watery though, it should be thick-ish but fall off your spoon easily.
dosa recipe-how to make dosa

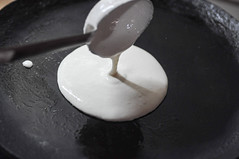
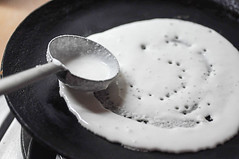
2. Heat a tawa or iron griddle and grease with the oil lightly. Pour about 1/2 cup batter to the centre of the tawa.
dosa recipe-how to make dosa-2

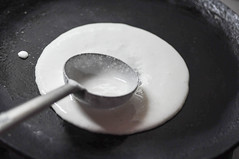
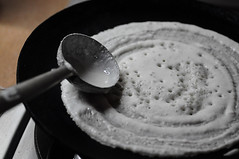
3. Using the back of your ladle, gently spread the batter with a circular motion from the centre towards the sides of the tawa.
dosa recipe-how to make dosa-3

This requires some practice but is not hard at all. As you can see, I have made dosas enough times to actually do a decent job with my left hand while taking pictures with my right. Ok, I'll stop showing off now.
dosa recipe-how to make dosa-4

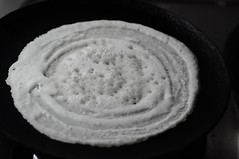
Since we are not making very crispy dosas, don't spread it too thin. The dosa should be more or less evenly thick.
dosa recipe-how to make dosa-5

4. Drizzle about 1 tsp of oil around the edges of the dosa and add a few sprinkles on the top as well.
dosa recipe-how to make dosa-6

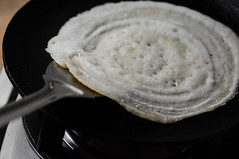
5. If your tawa is greased adequately and is not sticky, the edge of the dosa will start to come off the pan in about 1 minute or so. Use a spatula to gently lift the dosa
dosa recipe-how to make dosa-7

and flip it over. Cook the other side for another 40 seconds or so and remove from pan.
dosa recipe-how to make dosa-8

Serve with dosa podi, chutney, sambar, tiffin sambar, or anything that takes your fancy. I can eat dosa with pretty much anything!
dosa recipe-how to make dosa

NOTES and FAQs:

Q: Why does my dosa stick to the pan?

A: There are a few reasons for this:
Use a well-greased pan - if your tawa is new, you need to season it to make sure it's ready to make dosas. Using a non stick pan works but in my opinion, the dosas turn out dry. Use a pre-seasoned iron tawa and you will be fine.

To grease a dosa pan properly, use anything you can dip into oil - like a piece of onion, potato, a wooden spoon, etc. Dip into the sesame oil and rub generously all over the tawa. If you pour drops onto the tawa, then spreading the dosa will be difficult so always grease fully and don't pour the oil before spreading dosa.

Also, never use a dosa tawa to make rotis. Keep one tawa exclusively for dosa. I have noticed that people who are new to making dosas add way too little oil. Be generous, a few drops are not enough.

Batter has too much water - this makes cooking times longer. If you have more fermented thick batter in stock, add it to the batter you are using, or, just lower flame and be patient. Make sure your flame is not very high. Medium-low heat is perfect for cooking dosas and you may need to adjust this on and off as the pan gets hot and cold during the cooking process.

If the above two are checked, then it's possible that your batter is too old and sour. That's another reason why it would stick to the pan.

Q: Why is my dosa batter grainy?

A: You didn't grind the batter to a smooth consistency, that's why. Remember to soak the rice and dal for enough time and grind it to a very smooth consistency before fermenting. An Indian mixie is good to make small quantities but a food processor does not give you a smooth batter. A wet grinder is obviously the best option for making dosa batter at home.

Q: My dosa is white even after it is cooked. Why?

A: Couple of reasons that could be contributing to this - your batter is too cold - just bring it to room temperature before making the dosa* - or, the proportion of rice in your batter is too high. Adjust proportions next time you make the batter. Conversely, too much dal in your dosa batter will contribute to dosas that are too red in colour. Adjust accordingly in your next batch.

*We never follow this rule at home though. For years, we have been taking batter right out of the fridge and making dosas immediately with no issues.

Q: My dosas are very sour. Why?

A: Your batter is over-fermented or too old. If you have some wheat flour (atta), add it to the old batter and make semi-wheat dosas. Another trick is to add equal amounts of fresh batter and make dosas. Masala Paniyaram is another way to use up old dosa batter.

Q: How much salt should I add to the dosa batter?

A: I actually don't measure salt each time but noticed that I end up adding a heaped teaspoon of salt to the above-mentioned quantities of ingredients. You can taste the batter and see if it seems salty enough. Adding enough salt is important for right amount of fermentation.

Q: How do I ferment dosa batter in a cold place?

A: I didn't have to ask myself this question when living in India and Singapore but in Sydney, it's a whole different situation. I reached here late winter and have made 3 batches so far. Each time I tried a different method. The best option was to leave the batter in a bowl covered with a plate in the oven with the light turned on. Do not turn on the oven itself. The heat from the light is enough to give it that extra push.

Once, I just left the batter on the kitchen counter overnight. It didn't rise at all but was bubbly and seemed fermented. I didn't risk making idlis with the batter and dosas turned out just fine.

It also helps if you mix the batter for 2-3 mins with your hand. Just don't investigate too much into the science of that ;)

Q: How do I use store-bought dosa/idli batter?

A: The quality of store-bought batter really varies a lot. I have tried a few different brands in Singapore and have had different experiences. One thing that's common is, although they all claim to also make good idlis, they don't. So don't waste your time making idlis with store-bought batter. Dosas, however, have turned out good for me. Most batters need you to add some water to bring it to the right consistency. Use up all batter within 3 days, they don't last as much as homemade batter.

Q: What about variations to the dosa batter - like adding poha, cooked rice, quinoa, brown rice, etc?

I make dosa batter the plain and simple way as mentioned above. I do plan to experiment a bit though but be patient with me, will share them as I get to it.

If you have any more questions on making dosa at home, please leave it below in the comments and I will get back to you. Between my mom and me, we should be able to answer them :) The above questions were compiled after a short poll I did on my Facebook page and hopefully they represent most of your personal questions on making dosa at home.

If you found this post useful, please pin it or share it with friends. Thanks!
To learn how to make dosa or dosa batter in Hindi, Tamil, Telugu, Marathi, Urdu, etc, please use the Google Translate button in the sidebar. 

Thursday, August 15, 2013

Ullipaya Pulusu - Quick Andhra Style Onion Pulusu Recipe in 30 Minutes


 ullipaya pulusu recipe (reddiar vatti pulusu)

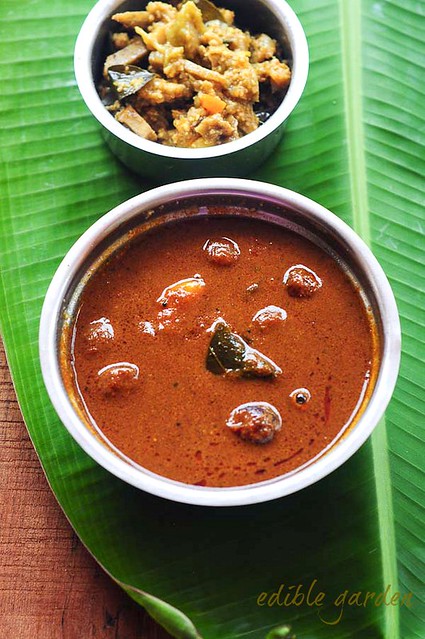
Ullipaya Pulusu is a name I figured out from Google search. The Reddiars in Kerala who migrated from Andhra and Tamil Nadu generations back - the small community that I am part of - call this Vatti Pulusu. We have our own version of Telugu that we speak and the names of food are, well, our own versions! Ullipaya Pulusu or vatti pulusu is probably the most common of all pulusu (kuzhambu) dishes we make to go with rice. Our pulusu is tangy, thick, contains no thickening agents like rice flour, uses lots of oil, and keeps well for days.

As with most pulusu recipes, the proportion of ingredients is the key here, much like for rasam. Traditionally, ullipaya pulusu is made by roasting coriander seeds and red chillies to perfection, making a spice powder, and then cooking it down in tamarind water along with shallots or pearl onions. Amma has a super quick version of this pulusu though - she uses spice powders that roast up much quicker and you can make a beautiful tangy pulusu in not more than 30 mins. While the full-fledged pulusu recipe intimidates me, this quick version is super easy and I can make it in my sleep now.

Check out more Reddiar Recipes if you have time to browse around. If you are looking for a good South Indian kulambu recipe, I recommend , Kara Kuzhambu, Paruppu Urundai Kuzhambu, or this Poricha Kuzhambu. Or, just browse all kuzhambu recipes in the site and pick your favourite.

ULLIPAYA PULUSU RECIPE (REDDIAR VATTI PULUSU)

Preparation time: 10 minutes
Cooking time: 20 minutes
Serves 4-6
Recipe source: Amma

INGREDIENTS:
1 cup of shallots or pearl onions, peeled and washed
2 heaping tbsp of coriander powder
2 tsp of red chilli powder (add more or less to taste)
8 cloves of garlic
A few curry leaves
1/2 tsp of cumin or jeera powder
1/2 tsp of turmeric powder
3 tbsp of gingelly oil (Indian sesame oil)
1/2 tsp of black mustard seeds
1/2 tsp of hing or asafoetida powder
1 lime-sized ball of tamarind soaked in some water
A few fenugreek seeds

INSTRUCTIONS:

1. Heat 2 drops of oil in a pan and add the coriander and chilli powders. Roast on a low flame until dark brown and nearly burnt (but please don't burn it, that's no fun). If you add too much oil at this stage, the powders won't roast well so take care.
 ullipaya pulusu recipe (reddiar vatti pulusu)

2. Once the spice powders are a dark brown, turn off flame and add some curry leaves, 4-5 shallots or pearl onions, 4 garlic cloves, jeera powder, and turmeric powder.
 ullipaya pulusu recipe (reddiar vatti pulusu)

3. Mix well and let them warm up in the heat.
 ullipaya pulusu recipe (reddiar vatti pulusu)

4. Add enough water to this and grind to a very smooth paste.
 ullipaya pulusu recipe (reddiar vatti pulusu)

5. In the same pan used for the spices, heat the gingelly oil. Add mustard seeds, fenugreek seeds, and hing. When the mustard seeds pop, add the remaining shallots or pearl onions and saute for a couple minutes.
 ullipaya pulusu recipe (reddiar vatti pulusu)

6. Throw in some curry leaves and the remaining cloves of garlic. Saute a while longer.
 ullipaya pulusu recipe (reddiar vatti pulusu)

7. As this fries up a bit, squeeze the juice out of the soaking tamarind. Add up to 2 cups water and extract as much juice as possible and discard the pulp. Add this tamarind extract to the cooking onions.
 ullipaya pulusu recipe (reddiar vatti pulusu)

8. Bring to boil and let it simmer. Then add the ground spice paste.
 ullipaya pulusu recipe (reddiar vatti pulusu)

9. Add salt and continue to simmer for 5-8 mins until the pulusu thickens. You can adjust flavours at this point, like add more tamarind, chilli powder, salt, etc. The shallots should also be cooked soft by this time.
 ullipaya pulusu recipe (reddiar vatti pulusu)

Notes:

  1. This pulusu tastes better the longer it stays. You can store it at room temperature but remember to re-heat and bring to boil every day before serving
  2. Don't add too much water while grinding the spices or with the tamarind. The pulusu is meant to be on the thicker and intense side and a little bit goes a long way. However, if you feel the 2 cups tamarind water is too less, add more water as the pulusu boils
  3. You can add vathal to this pulusu if you like but we don't add anything beyond pearl onions or shallots (which taste better) and garlic
  4. Don't skimp on the oil, it's important for the flavour. Other oils won't work as well as gingelly oil
  5. We eat this ullipaya pulusu with rice, dosa, idli, and even puttu (ok that's just me). It's delicious and a wonderful accompaniment to coconut-based side dishes like aviyal and thoran

Tuesday, February 26, 2013

Idli Dosa Milagai Podi Recipe | Dosa Podi Recipe | Idli Podi Recipe

There must be as many Idli Dosa Milagai Podi (Spicy Chutney Powder mixed with oil and eaten with Idli and Dosa) as there are number of homes in South India. Every family has their own recipe for Idli and Dosa Milagai Podi and so does ours. In fact, amma makes Idli Dosa Podi different from her sister who makes it different from my dad's sister, and on it goes. They sometimes exchange the Idli Podi if they feel like tasting somebody else's for a change. Usually just referred to as "podi" or "dosa podi" in our home, this is an ever-present item next to the pickles and snacks. A fresh batch is roasted and powdered when the current batch is almost over.

Idli Dosa Milagai Podi-Idli Podi-Dosa Podi Recipe

No matter how many different types of idli podi I have tasted in my life, my favourite will always remain my Amma's. She roasts the spices a tad longer it gives the podi a deeper colour and flavour. I have never made Dosa podi myself but rather bring it back during my trips to Kottayam. Since she always makes it the day before I land and keeps it all packed and ready, I wasn't able to take step by step pictures for making this Idli podi but will update this post if and when I manage that. Generally, since we tend to sneeze and cough a lot when amma fries the red chillies, she avoids making it when the house is full of people.

Idli Dosa Milagai Podi-Idli Podi-Dosa Podi Recipe

Growing up, none of us kids liked Idli much (which is blasphemous since Amma and Aatha, her mom, make the softest idli you would ever taste!) and the only thing that made it bearable for me was this idli podi and sambar. I love the combination of Kerala Sambar and Dosa podi when eating dosa too, nothing beats that! If I have these two for dosa, I don't even care for chutney much.
Idli Dosa Milagai Podi-Idli Podi-Dosa Podi Recipe

For best results, use Indian Gingelly Oil (Sesame Oil) to mix the podi in and serve with idli and dosa. TH loves milagai podi mixed with curd for dosa and idli. While I find that combination unacceptable and have never tried it, he swears by it. He can eat curd with anything so I am not going to trust him on this. I will stick to my pod + nallennai combo, thank you very much!

Idli Dosa Milagai Podi Recipe


Preparation time: 5 minutes
Cooking time: 15 minutes
Makes ~ 1 cup podi
Recipe source: Amma

Ingredients:
15 dry red chillies
1 cup of split urad dal (ulutham paruppu, uzhunnu parippu)
1/4 cup of whole coriander seeds (dhania, malli)
2 strands of fresh curry leaves
1 tsp of oil
1/4 tsp of asafoetida powder (hing, perungaayam, kaayam)
1/2 tsp of salt
6 cloves of garlic, chopped (optional, but highly recommended)

How to Made Dosa Idli Milagai Podi:

  • Heat the oil in a pan and add the dal, coriander seeds, and curry leaves. Roast until the dal begins to turn a darker shade of brown.
  • Add the red chillies and keep roasting on low flame until the dal turns a golden brown. How dark you want it to be is up to you but Amma roasts it until a deep golden. Keep stirring and don't let it burn.
  • Switch off flame when done, remove the pan from fire, and add the hing, salt, and chopped garlic (if using). Mix well and set aside to cool completely in the same pan.
  • Once cool, powder and store in an airtight container. How fine or coarse you want the powder to be is up to you. Generally, we grind it fine.

Notes:
- The amount of garlic mentioned here is the small variety we get in India. If using the larger variety, maybe around 2 cloves would be sufficient.
- The red chillies are added at a later stage so as not to over-roast them.
- Always keep the fire on low and keep stirring continuously for even roasting.
- After grinding, cool (the mixture may be warm) and store in an airtight container.
- Keeps well at room temperature for up to 2 months. I keep it for longer in the refrigeratore, but it's better to make this podi in small batches since the flavour dwindles as you keep it longer.
- The colour of Idli Podi in the first and second picture looks a bit different due to lighting. The second and third pics are more representative of the actual colour of Dosa Podi.

Tuesday, November 20, 2012

Chicken Thoran-Kozhi Thoran-How to Make Chicken Thoran

Chicken thoran is one of those dishes from my childhood that aatha (amma's amma used to make). It was not everyday fare because you need boneless pieces of chicken to make it and you need a lot to feed a family of 8.

Chicken Thoran-Dry Chicken Recipe with Coconut

Although generally thoran is a Kerala preparation (pretty much any vegetable can be made into thoran using grated coconut, shallots, cumin, and green/red chillies), I am led to believe this is a Reddiar recipe that first originated in Thirunelveli when the Reddiar community was concentrated there. Maybe they decided to call it thoran after moving to Kerala and being introduced to the concept.

Either ways, this is a delicious chicken recipe and very easy to make even for beginner cooks. If you want to check out more chicken recipes, my favourites are - chilli chicken dry, chicken iguru, pepper chicken masala, and chicken biryani.

Chicken Thoran - How to Make Chicken Thoran

Preparation time: 15 minutes
Cooking time: 30 minutes
Serves 6-8
Recipe source: Amma

Ingredients:
500 gm of chicken, cleaned, deboned, and cut into small chunks
1 tbsp of butter
2 tsp of red chilli powder (adjust to taste)
1/2 tsp of turmeric powder
2 strands of curry leaves
1 cup of grated coconut
3/4 cup of sliced shallots (chinna vengayam, ulli)
2 tsp of garlic-shallot paste (grind together some garlic and shallots)
1 tsp of salt (adjust to taste)
1 tbsp of oil
1 tsp of black mustard seeds
1 tsp of urad dal (ulutham paruppu, uzhunnu parippu)

How to Make Chicken Thoran:

1. We need to cook the chicken first so add the pieces to a pan.
Chicken Thoran-Dry Chicken Recipe with Coconut
The chicken pieces are cooked in butter and my mom being her true self, whipped up some fresh butter for the dish.
Chicken Thoran-Dry Chicken Recipe with Coconut
2. Add the butter and red chilli powder and turmeric to the chicken pieces.
Chicken Thoran-Dry Chicken Recipe with Coconut
3. Stir well and add the curry leaves.
Chicken Thoran-Dry Chicken Recipe with Coconut
4. Turn on heat to medium-low and cook stirring occasionally for about 10-15 mins until the chicken is cooked and the water it lets out has evaporated. If there's more water left, cook on high flame until it's all absorbed.
Chicken Thoran-Dry Chicken Recipe with Coconut
5. Meanwhile, get read with your sliced shallots, grated coconut, and shallot-garlic paste.
Chicken Thoran-Dry Chicken Recipe with Coconut
6. Remove the cooked chicken to a bowl and heat oil in the same pan. Add the mustard seeds and broken urad dal.
Chicken Thoran-Dry Chicken Recipe with Coconut
7. When the mustard pops and the dal turns golden, add the sliced ulli or shallots.
Chicken Thoran-Dry Chicken Recipe with Coconut
8. Fry until it turns golden and add the shallot-garlic paste. Fry for another few seconds.
Chicken Thoran-Dry Chicken Recipe with Coconut
9. Next, add the cooked chicken pieces to this along with salt. Mix well.
Chicken Thoran-Dry Chicken Recipe with Coconut
10. Finally, add the coconut, mix well and let the thoran simmer for 3-4 mins until the ingredients come together and there's no excess moisture left in the chicken thoran.
Chicken Thoran-Dry Chicken Recipe with Coconut
Done! This is a fabulous accompaniment to rice and vatha kuzhambu or rasam. In fact, pretty much any kuzhambu without coconut goes very well with it.
Chicken Thoran-Dry Chicken Recipe with Coconut
Huge thanks to amma's patience while I clicked the step by step chicken thoran pictures in her kitchen. I really got in the way ;)