ads1

Thursday, October 11, 2012

12 Easy Recipes for Navratri (Navaratri) 2012

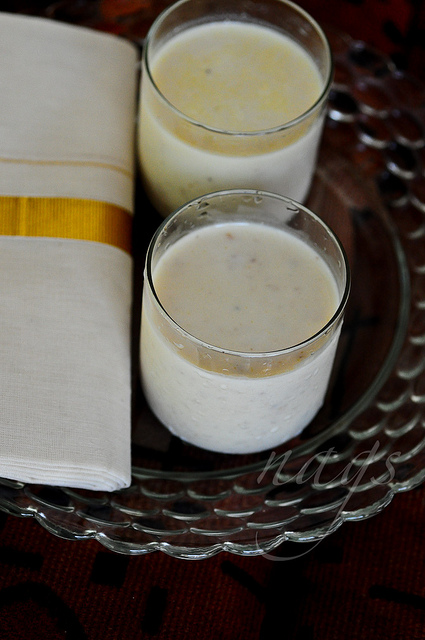
I have vague memories of amma celebrating Navarathri (or Navratri) when I was a child. We would make a few types of sundal, some vadai, and payasam for the festival and for me, it was all about the food anyway. 

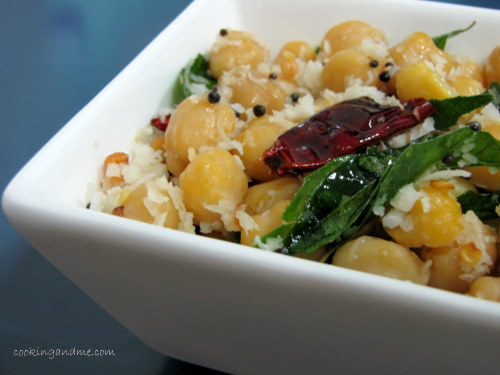
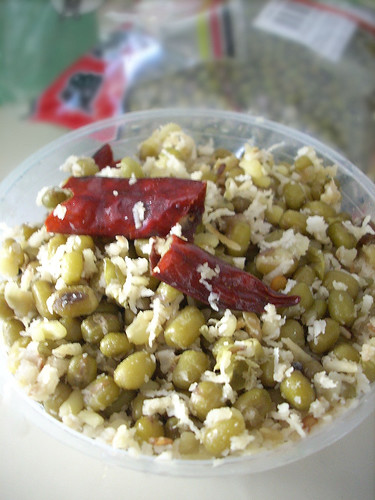
TH's family, being Brahmins, celebrate in a different way with golu and one type of sundal for each of the 9 days of navarathri. Golu is a very special thing that the entire family comes together for and on the final day, more food is made - like vadai and payasam and snacks for distribution. Married women are also given small tokens or gifts as blessings. I have especially been interested in the golu that's done for navarathri, having never really seen one or arranged one in person. One day... :) 

Anyway, here's a list of easy Navarathri recipes for 2012 from Edible Garden. Navarathri dates for 2012 is from Oct 16 to Oct 24th. Festive greetings to all of you celebrating.  

navaratri sundal recipe

{Imagine a beautiful picture of mochakkottai sundal here that amma made. 
Picasa albums gobbled it up because it was that pretty}

navaratri sundal recipe

navaratri recipes

navaratri recipes

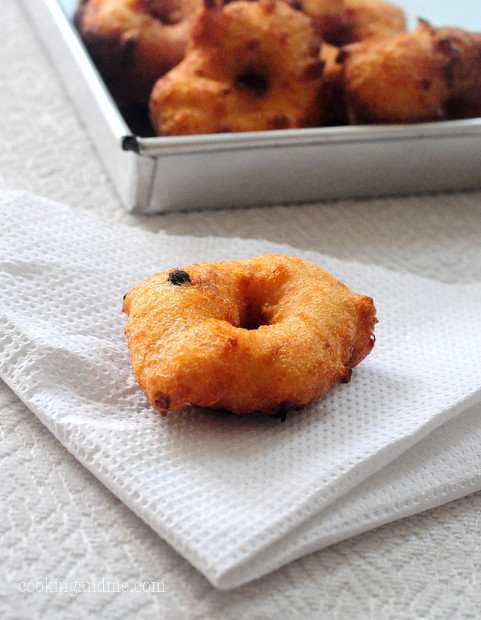
     6. Aval Vadai
navaratri recipes

navaratri recipes


navaratri recipes


navaratri recipes

Wishing all reader of Edible Garden a wonderful Navratri (Navarathri) Festival 2012.

Wednesday, October 10, 2012

Eggless Pesto Pull-Apart Rolls Recipe

The garlic pull-apart rolls I posted around 2 years back is probably the recipe most people tried from this site. I got so many notes and feedback saying it worked out great, good, and delicious. A couple of people had issues but nobody sent me stinkers so I guess it's a winner. Must thank Suhaina again for the original recipe.

Eggless Pesto Pull-Apart Rolls Recipe

I love basil pesto and had been wanting to try the same rolls with a basil pesto filling. Finally managed to do it for a potluck a couple months back. Everything came together less than 2 hours (including rising time) and I wrapped the warm rolls, baking dish and all in aluminium foil and headed to my friend's place. Nothing like freshly baked warm rolls to wow your friends, I tell you.

Eggless Pesto Pull-Apart Rolls Recipe

Preparation time: 1 hour 30 minutes
Cooking time: 20 minutes
Makes 8 rolls (recipe can be easily doubled)

Ingredients:
1.5 cups of all-purpose flour or maida (I used wholemeal flour this time)
1/2 cup + 1 tbsp of warm water
1/2 tbsp of dry yeast (instant or active dry will work)
1.5 tsp of salt
1 tbsp of sugar
1 tbsp of olive oil
2 tbsp of milk
1 cup of basil pesto (make your own basil pesto or use store-bought pesto)

How I Made It:

1. Combine flour, warm water, yeast, salt and sugar together until you get a smooth, slightly stick dough. I used the Kitchenaid and mixed on low for about 3 mins to get the dough but you can mix by hand too.
Eggless Pesto Pull-Apart Rolls Recipe
2. Dip your fingertips in some oil and knead until the dough springs back when you press with your fingers -about 4 mins. Oil the bowl you wish to use and keep it covered with cling wrap or a wet cloth in a warm place.
Eggless Pesto Pull-Apart Rolls Recipe
3. In about 45 mins to an hour, the dough should've doubled in size.
Eggless Pesto Pull-Apart Rolls Recipe
4. Lightly punch down with your fingertips and divide the dough into two. Place one half on a lightly floured surface and shape roughly into a rectangle with your fingertips.
Eggless Pesto Pull-Apart Rolls Recipe
5. Then, use a rolling pin to get a long rectangle of about 1/2" thickness. Spread half the pesto on the dough evenly and start rolling it from the short side in tightly.
Eggless Pesto Pull-Apart Rolls Recipe
6. Cut into four pieces. Repeat with the other half of the dough. Place in a lightly oiled baking pan barely touching each other. If you leave too much space, the rolls will be flat and hard and if you press them too tight together, they won't have pace to rise again and will be... hard. So yeah, just place them barely touching each other and we are good. Oh, and place them cut side up so they are even on top.
Eggless Pesto Pull-Apart Rolls Recipe
7. Allow to rise for another 20 mins. In the mean time preheat the oven to 180C / 375F.

Once risen, the rolls will be super soft if you touch them now. Don't be tempted to squish them down because they are oh-so-soft.
Eggless Pesto Pull-Apart Rolls Recipe
8. Bake until the top turns golden brown (it took me ~20 mins) and the rolls sound hollow when you tap them on top. As soon as they are out of the oven, brush the top with milk so soften the crust, otherwise the rolls will be too hard.
Eggless Pesto Pull-Apart Rolls Recipe
That's it! Let them cool down enough for you to handle and serve. Also be ready for all the compliments :) Tastes amazing with a cup of hot coffee or tea.

Eggless Pesto Pull-Apart Rolls Recipe
Notes:

1. The amount of water needed for the pesto rolls depends on the type of flour you are using. Use your judgment to get a slightly sticky dough that behaves when you apply oil. I used about the same amount of water for both regular flour and the wholemeal flour I used this time.

2. The amount of yeast can be reduced if you don't like the flavour of yeast to be too strong. It didn't really bother me but if it's an issue, you can add just 1 tsp yeast and let the dough double over a couple of hours, slowly.

3. I don't have pics of the inside of the rolls because I was taking this to a friend's place and didn't want to break it up before reaching her place. Check out the garlic rolls post to see how soft these rolls are inside.

4. They keep well for up to 2 days but beyond that will start getting a bit stale and hard. You can steam them up again and they will be super soft. Microwaving is not advised to re-heat bread.

Tuesday, October 9, 2012

Idli Batter for Soft Idli - Idli Recipe, Tips for Soft Idli | Step by Step

Wondering how to make soft idli with homemade idli batter? Look no further for the perfect formula and tips for making soft idlis!
Idli and dosa is a staple meal for Reddiars in Kerala. We always have the batter ready in our fridge and amma is always prepared to feed multiple people for breakfast or dinner at minutes' notice, thanks to this.

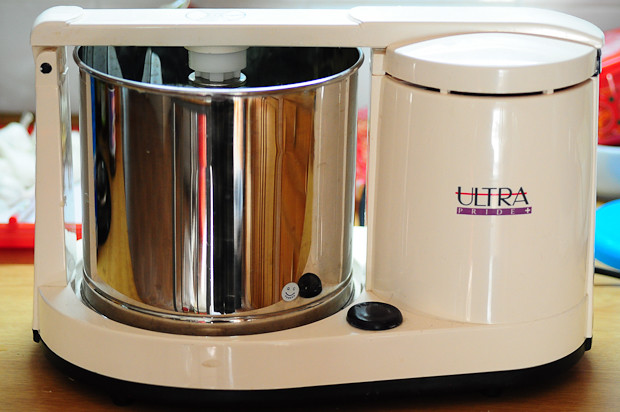
Amma has a large, old-fashioned grinder which we've had ever since I can remember. In my childhood, we moved houses 6 times and this grinder came with us from house to house, year by year, doing it's job as expected. Ok, I will stop now, don't want to jinx it!

Idli Batter for Soft Idli-Idli Recipe

So yeah, back to idli and dosa. My maternal grand mom, as long as she was able, oversaw the grinding of the idli-dosa batter and she did it with a hawk-eye. The help will handle the measuring and soaking and actual grinding and the heavy-lifting (quite literally) of using the stone insert in the middle of the grinder, and finally the onerous task of cleaning the thing once the batter is ground. Needless to say, except for passing by a couple of times and wondering how it would feel to dip my finger into the creamy batter, I have had nothing to do with this grinding business.

Idli Batter for Soft Idli-Idli Recipe

When I moved to Hyderabad for my first job, I started buying the batter. Making idlis with store-bought batter is a bad idea. I have tried a few times always knowing it will fail and it always has. Making dosa is easier since it's more forgiving. But idlis are demanding. For all this, I am not even that fond of them!

Once I got married and moved to Singapore, I was ready to grow up and start making my own batter. I brought back a small, table-top wet grinder from back home (Trichy, to be exact) and it was a proud day I ground my first batch of idli batter.

Idli Batter for Soft Idli-Idli Recipe

It was a disaster! The batter didn't ferment at all and I should have taken that as a sign but it smelled fermented so I impatiently brought out the idli moulds and went the whole way. The idlis were rock hard. Dosas the next day turned out fine but the soft, pillowy idlis of my childhood had evaded me the first time and I was determined to not let that happen again.

But it did. I got it wrong about 3-4 more times. I did get marginally better at it each time but the idlis were nowhere near soft and barely edible if not dunked in litres of sambar.

I changed everything I could - the urad dal (I brought back a kilo from amma's stash), the rice, adding salt at different times, fermenting spot, everything!

Then I realised the answer was really simple. It's water. Yes, water. Not the kind of water but the amount. I was not adding enough. It was a revelation when I realised this and since then, there has been no looking back. I make idli batter every 2 weeks and steam batches of idlis and either chill them or freeze them for later use during those weekend mornings and too-tired-to-cook weeknights.

Also check out the Murugan Idli Kadai Idli Recipe

Idli Batter for Soft Idli {Recipe and Learnings}


Preparation time: 3 hours
Cooking time: 10 minutes
Makes ~ 30 idlis

Ingredients:
1 cup of whole, skinned urad dal / ulutham paruppu / uzhunnu parippu
4 cups of idli rice
Salt

Step by Step Pictures to Make Idli:

1. Wash the rice until the water runs clear. Soak in enough water to cover it by 3 inches and leave aside for 3-4 hours.
Idli Batter for Soft Idli-Idli Recipe
2. Once the rice has been soaking for 2.5 to 3 hours, wash the urad dal and soak it for 30 mins or so. Amma tells me soaking urad dal for too long is not necessary and it may lose its "potency". Make sure there's enough water for it to absorb and swell - the urad dal requires more water than the rice.
Idli Batter for Soft Idli-Idli Recipe
3. Wash and prepare your grinder. Add the soaked urad dal...
Idli Batter for Soft Idli-Idli Recipe
... and a generous amount of water to get it started. I usually add about 1 cup and see how that goes but this will totally depend on the quality of urad dal you use. My recurrent mistake was always not adding enough water to grind the urad dal.

It will take about 15 mins for the urad dal to be ground smooth. When you take a little batter and rub between fingers, it should be smooth and flowy. As the urad dal grinds, it will rise and turn fluffy. This is perfect.
Idli Batter for Soft Idli-Idli Recipe
4. Transfer the urad dal batter to a large enough container and set aside. You don't have to wipe the grinder clean of the batter. When you grind rice, it will automatically get 'cleaner'.
Idli Batter for Soft Idli-Idli Recipe
5. In goes the soaked rice next.
Idli Batter for Soft Idli-Idli Recipe
Rice doesn't need as much water as the dal so add about 1 to 1.5 cups and see if it gets thick as you grind. When rice grinds, it will absorb the water so test in between and keep adding water as you go, a little at a time. Grind rice to a smooth pate too and this takes me around 25 mins or so in my grinder.
Idli Batter for Soft Idli-Idli Recipe
6. Once done, add this to the urad dal batter and top off with some salt. Mix gently so that the rice and dal get combined well.
Idli Batter for Soft Idli-Idli Recipe
The consistency should be fluffy and the batter should fall down easily from your spoon as you mix it.
Idli Batter for Soft Idli-Idli Recipe
Set aside this batter in a container that is only filled halfway with the batter to allow room for rising during fermentation. Singapore is warm enough for us to leave it aside in the kitchen and it will ferment in about 6-8 hours. In colder places, you can either leave it inside the microwave (don't turn it on!), or inside the oven with the oven light on. This is how most people I know in the US do it.

Once fermented and risen, mix very gently to combine. The urad dal would have risen to the top leaving the heavier rice batter at the bottom so you need to mix it uniformly before making idlis.

Pour into greased (I use gingelly oil) idli moulds and steam for 10-12 mins for super soft and spongy idlis.
Idli Batter for Soft Idli-Idli Recipe
A few tips, notes, and learnings from me:

- I can't stress the importance of adding enough water while grind the dal and rice. This is the single most important thing that separates you from soft idlis.

- You can add some fenugreek seeds / methi seeds when soaking the rice. It gives a nice fragrance to the batter.

- I have tried soaking and grinding the rice and dal together (because I get immensely lazy sometimes). I got mixed results. Sometimes it worked ok and sometimes not. Again, dosa always turns out fine so if you don't intend to make idlis, you can take this shortcut. Jey follows the same method but adds poha to the batter. I want to try that once too. Will update here once I have.

- Once you have scraped out all the rice batter, wash the grinder with little water and collect this in a separate bowl. After a few hours, the batter in the water will sink leaving almost-clear water on top. I add this to the batter before making dosa because for dosa we need to water down the batter anyway. My grand mom was very frugal when it came to cooking and she would do this so that we don't even waste the batter sticking to the grinder.

- Always use a wet spoon to remove idlis from the mould and do it after the idlis have cooled down a bit.

- Once the batter is fermented and you have made idlis, store the batter in the refrigerator. You can make dosas from day 2 onwards by diluting the batter to the right pouring consistency. On day 4 and 5, if I still have batter left, I make masala kuzhi paniyaram.

- I make idlis in bulk and store in them steel containers in the chiller (if I plan to use them within the week) or in the freezer (for longer storage). Before serving, the best thing to do is to re-steam them for a quick 5 mins but if you don't want to do that, re-heat them in the microwave with some water sprinkled on top. These have to be served immediately, otherwise they will turn hard and rubbery.

- If using a mixie or blender for grinding idli-dosa batter, remember that it won't get you the same results as a wet grinder. Also, reduce the quantity of rice:dal and use 3:1. I use my rice cooker cup to measure, you can use any cup or tumbler as long as you use the same one to measure both rice and dal.

- If your idlis are too flat, it could be due to two reasons. One, there's too much urad dal in the batter and two, the batter is too watery. Even if you end up adding too much urad, if your batter is thick, the idlis will be fine but too much water will create flat idlis and there's really no way to fix this. The idlis will still turn out soft in most cases though.

- UPDATE: If any of you are using a mixie or mixer-grinder to grind your idli-dosa batter, then here's a note from Vini who does the same in her Preethi mixer-grinder. The proportions are as I mentioned, 3:1 rice:urad dal  but see how important the addition of enough water is. Read her note below. For anyone wondering "can you grind idli-dosa batter in a mixie or mixie-grinder?"Here's your answer.

"Hey Nags,

I am glad I came across this post! I have only a mixer ever since I shifted to the US. The ladies of my house gave me several tips to make idli-dosa batter in a mixie including 3:1rice dal, mixing with hands, switching on then oven light but no one ever told me the importance of adding enough water! I always used to get ok-ok idlis and I blamed it on the mixie and was waiting to ge a grinder soon. But but I saw this awesome post and immediately soaked rice and dal..made sure I added sufficient water while grinding..the batter fermented beautifully and voila my idles where super soft just like how mom makes it back home :):) I jumped in joy when hubby told they were the best idles he had eaten since he came to the US :) Thank you so much for this important tip which no other blog post on idlis stressed about. And you can tell everyone that soft idles are possible with preethi mixer grinder :)"

How do you make idli-dosa batter at home? What do you do differently and what has worked? Please leave a comment with your idli and dosa tips please!
Monday, October 8, 2012

Choc Khoya Kalakand-Kalakand Recipe-Diwali Sweets

I made this double-layered kalakand almost a year back with the khoya leftover after making gulab jamuns. I had about 1 cup of crumbled khoya and wasn't sure what to use it for and then saw this idea on some site, which I've totally forgotten now (apologies!).

Chocolate Khoya Kalakand-Diwali Sweets
I love milk sweets but kalakand is probably one of my favourites. Dadu's in Hyderabad sells a mean kalakand that's grainy and a single bar of it will have shades of brown depending on how much the milk has cooked. It's absolutely delicious! During Diwali every year, Google Hyderabad would give out boxes of sweets from Dadu's and I would eat the kalakand first - no sharing!

Chocolate Khoya Kalakand-Diwali Sweets

Traditionally, kalakand is made by gently adding some sort of splitting agent to milk but not letting it completely curdle. The gently curdling results in the grainy texture that's so popular in kalakand. The texture of kalakand made with mawa is a bit different and smoother but it's still delicious and takes not more than 15 mins to make. A definite win when you are making a whole suite of sweets (hah) for Diwali.

Choc Khoya Kalakand-Kalakand Recipe-Diwali Sweets

Preparation time: 5 minutes
Cooking time: 10 minutes
Makes 12 pieces

Ingredients:
1 cup of grated khoya / mawa (unsweetened)
1/2 cup of sugar (adjust to taste)
1 heaping tbsp of cocoa powder
2-3 tbsp of milk
Chopped nuts for garnish

Instructions:

0. Mix the chocolate powder and milk to form a thick-ish paste. Set aside.
Double-Layer Chocolate Kalakand-Diwali Sweets
1. Add the grated khoya and sugar to a wide pan kept on low flame. I used brown sugar because that's all I had in hand. White sugar works well too.
Double-Layer Chocolate Kalakand-Diwali Sweets
2. Gently heat this through and keep mixing until the khoya thickens and starts rolling around your spatula. It will not stick to the pan anymore. This will take not more than 3-4 mins.
Chocolate Khoya Kalakand-Diwali Sweets
3. Take half of this mixture and pat it firmly at the base of a greased plate. You can use a regular steel plate or whatever you have in hand. I used my glass pie dish greased with a teeny bit of ghee.
Chocolate Khoya Kalakand-Diwali Sweets
4. Don't let the rest of the mixture sit there too long unattended! Quickly add the chocolate powder+milk mixture and stir to combine. After a min, remove.
Chocolate Khoya Kalakand-Diwali Sweets
5. Pat the chocolate mixture firmly and evenly on the previous layer.
Chocolate Khoya Kalakand-Diwali Sweets
6. Add chopped nuts (I used pistachios) and gently press so that it gets embedded into the kalakand.
Chocolate Khoya Kalakand-Diwali Sweets
7. Cool to room temperature and refrigerate for an hour before cutting into squares. Keeps well for up to a week in the refrigerator. Warm slightly before serving for maximum deliciousness.
Chocolate Khoya Kalakand-Diwali Sweets

I am on the look out for easy Diwali sweets recipes. If you have any ideas or regular ones you cook, please leave me a comment with the recipe or send me an email. Thanks! :) Also, check here for 12 easy Diwali sweets under 20 mins.

For Kalakand recipe in Hindi, Tamil, Telugu, Urdu, Marathi, etc, please use the Google Translate button in the sidebar.