ads1

Saturday, March 3, 2012

Kadhi Pakora Recipe | Khadi Pakoda Recipe Punjabi-Style

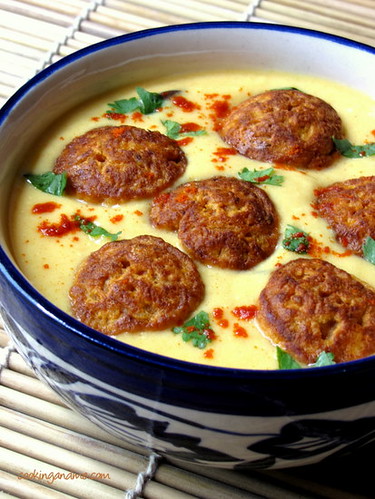
I like dumplings in gravies. Its nice to have a curry base and have these cute balls floating in it. This goes for anything, actually, and Punjabi Khadi Pakora has been in my head since forever. I had bookmarked the recipe on many sites but finally ended up making an adapted version from Nita Mehta's Punjabi Recipes book, the same one I made the Paneer Peas Curry from.

Since a lot of you may feel this is a bit of work, I took step-by-step pictures. Its not that difficult actually. The recipe has two distinct sections - making the khadi and making the pakoras. Let's make the pakoras first.
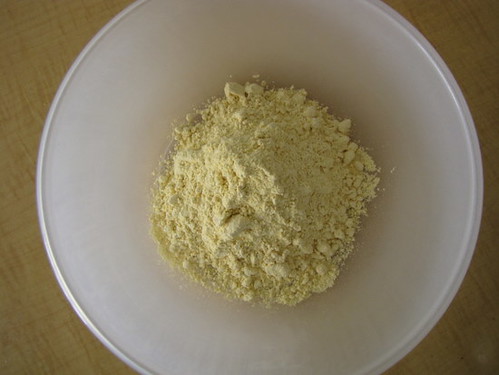
Take 1.5 cups of besan in a bowl.

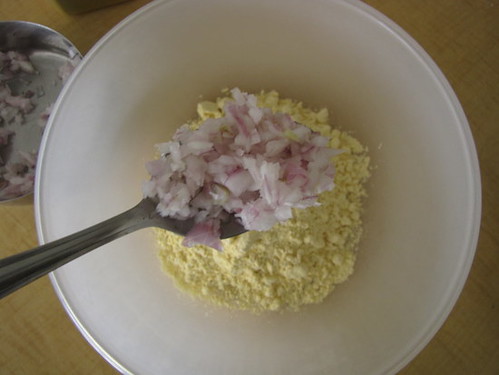
Add 1 finely chopped onion of medium size.


Then add 1 finely chopped potato. I used my chopper that I used in the Gobi Paratha Recipe to chop the onion and potato so fine but you can do it by hand too, just takes longer.
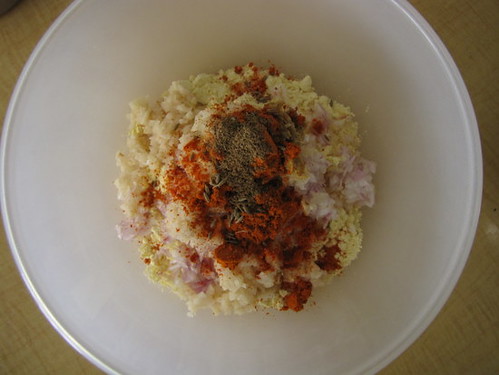
Throw in 1 tsp red chilly powder, 1 tsp jeera, salt and a pinch of hing.
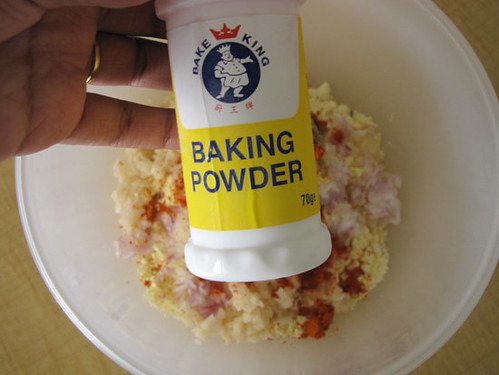
Next comes baking powder. This helps to make the pakoras crisp. You can avoid this but use it if you have it.
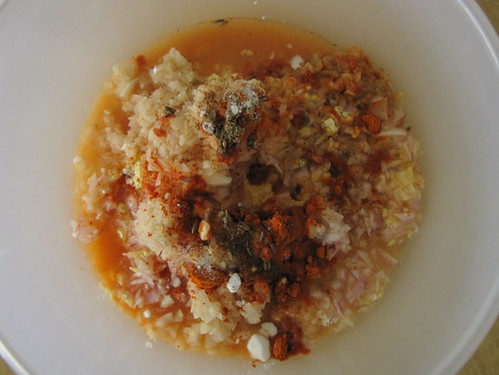

Almost done. Add in 1 cup water.


And mix well to get a batter of dropping consistency. Make sure the batter is not too lose.


I used my spanking new paniyaram chatti / aebleskiver pan to fry the pakoras. You can also deep fry them in a kadai by dropping them in using a spoon.
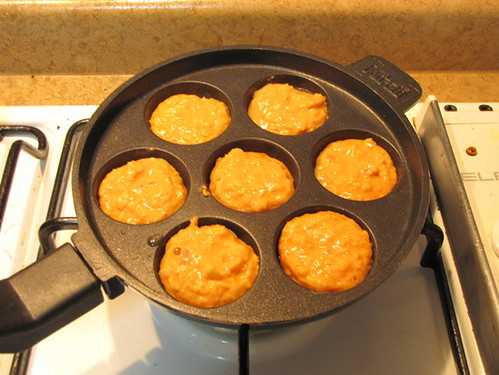

Excuse the super bright pic! Its my kitchen light :D So, the paniyaram chatti is nice to use for mainly two reasons. You use very little oil in the process, especially if the chatti is non stick and also, the pakoras come out very uniformly shaped.
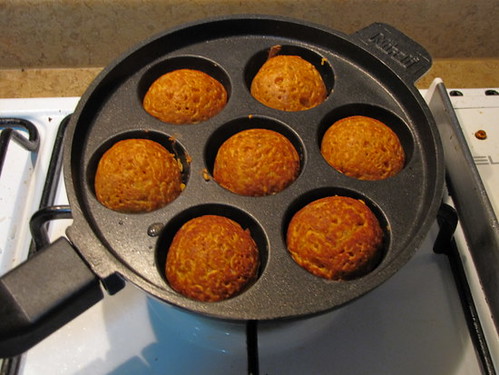
See, nicely browned and very pretty. Set them aside on a kitchen napkin.

Now for the khadi.

Take 2 cups of curd / plain yogurt in a bowl.
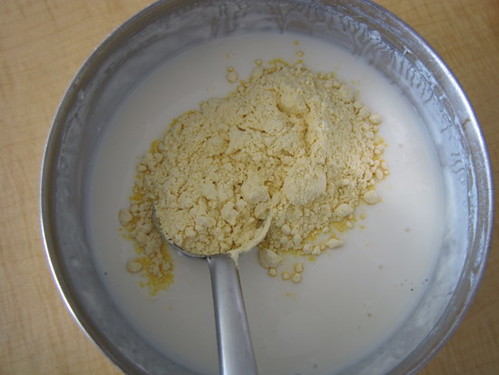

Add 1/3 cup besan to the curd.


Throw in 1/2 tsp turmeric powder, 1 tsp red chilly powder and salt. Mix well.
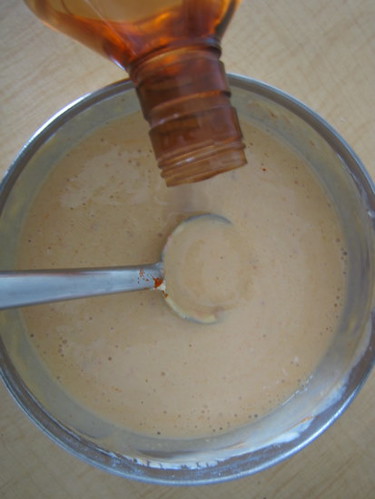

Add 1 cup water to this mixture.

Mix well and get ready to temper this.
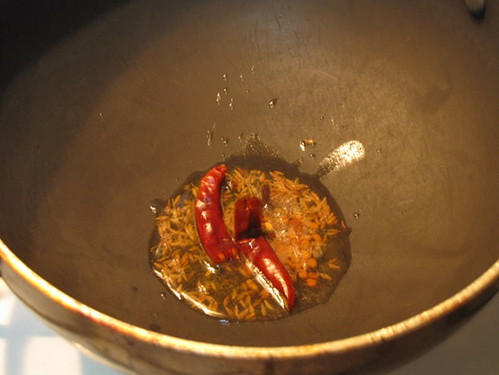
For tempering, heat 2 tsp oil in a kadai. Add 1 tsp jeera and 1 red chilly torn into pieces.
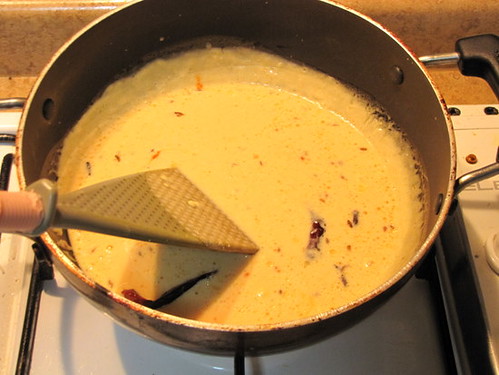

When the jeera splutters and turns brown, lower the fire to sim and add the curd mixture. Mix well for about 5 mins until the khadi thickens. Adjust salt. Set aside.

Add the pakoras to the khadi just before serving. Garnish with coriander leaves and some red chilly powder.

Here's the recipe again, all in one place.

Punjabi Khadi Pakora Recipe
Source: Nita Mehta's Punjabi Recipes
Serves: 4 as a side
Preparation time: 45 mins

For the Khadi:
2 cups curd / plain yogurt
1 cup water
1/3 cup besan / kadala maavu / gram flour
1/2 tsp turmeric powder
1 tsp red chilly powder

For tempering:
1 red chilly, broken into half
1 tsp jeera
2 tsp oil
Salt

For the Pakoras:
1.5 cups besan / kadala maavu / gram flour
1 onion, finely chopped
1 potato, finaly chopped
1 tsp red chilly powder
1 tsp jeera
A pinch of hing
1/2 tsp baking powder
Salt
1 cup water

How to Make Punjabi Kadhi Pakora:

1. Mix the ingredients for the pakoras to form a batter. The consistency should be that of bajjis, not too loose.

2. Deep fry the pakoras in hot oil or use a paniyaram chatti / aebleskiver pan. This should help reduce the usage of oil and give you uniformly shaped pakoras.
Set aside.

3. Beat the curd well. Add besan and other ingredients and beat well.

4. Heat oil and add the jeera and halved red chilly. When the jeera splutters and turns brown, lower heat to minimum and add the curd mixture. Bring to boil stirring continuously. After 5 mins, remove from fire.

5. When you are ready to serve the kadhi, add the dumplings, mix once through and serve.

Garnish with chopped coriander leaves and serve with chapatis / roti.

Wednesday, February 29, 2012

Methi Leaves Sambar-Vendhaya Keerai Sambar Recipe

Learn how to make Methi Sambar with this easy recipe using methi leaves and a great and fresh Sambar recipe. 
Today is a leap day, a once-in-4-years type thing that I didn't want to miss so although I am in KL living out of a suitcase for the next couple days, I wanted to share something here using the very wonky Internet from my hotel room.

Methi Sambar (Fenugreek Leaves Sambar)

Any recipe that amma sends me, especially if it's along with 'styled' pictures that my uncle Radha mama takes, is special. Methi, or fenugreek leaves, are not very common in Kerala and you don't often see it in every vegetable stall. So amma grew her own (but of course). Then she made sambar with it and I think her argument was "if you can make dal with it, I can make sambar with it". Well of course you can amma. The cherry tomatoes you see in the pic are also from her small garden.

Here's the recipe, from her kitchen to yours.

Amma's Methi Sambar (Vendhaya Sambar) Recipe

Preparation time: 15 mins
Cooking time: 40 mins
Serves: 4

Ingredients:
1 bunch fresh methi (fenugreek leaves), cleaned and chopped
1/2 cup toor dal, (pressure) cooked until soft and mushy
1 carrot, chopped (optional)
1 tomato, chopped (or a few cherry tomatoes, halved)
A handful of shallots, peeled
1 lemon-sized ball of tamarind
2 tbsp sambar powder
1/4 tsp turmeric powder
A pinch of sugar
Salt to taste

For tempering:
1 tsp ghee or oil
1/4 tsp mustard seeds
1/4 tsp powdered jeera / cumin
A generous pinch of hing / asafoetida
A few shallots, sliced long

How to Make Vendhaya Keerai Sambar:

1. Soak tamarind in 1 cup warm water for 15 mins. Extract juice and discard the pulp. Transfer this to a pan along with the sambar powder, salt, turmeric powder, tomato, shallots, carrot and chopped methi leaves. In Kerala, a typical sambar consists of a few vegetables all added in together and this is how amma makes her sambar. You can omit the carrot if you want to keep it simple but the tomato is definitely recommended.

2. Bring the above mixture to boil with 2-3 cups of added water for about 15 mins. Add sugar and the cooked dal. Bring to boil and mix well. Adjust salt. Remove from fire.

3. Heat a small pan and add the ghee along with the rest of the ingredients for tempering. When the mustard seeds pop and the shallots turn a light brown, remove from fire and dunk straight into the cooked sambar. Mix well.

Methi Sambar (Fenugreek Leaves Sambar)

Note: Don't add curry leaves or coriander leaves to this sambar. This is to ensure that the flavour of the methi is dominating. I know the picture has some coriander leaves but that's just amma trying to make the sambar look pretty for the picture :)

Huge thanks, as always, to Amma and Radhmams for the Vendhaya Keerai Sambar pictures and recipe :)

Sunday, February 26, 2012

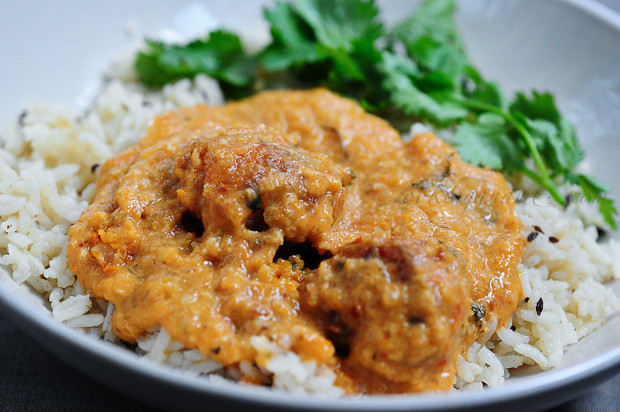
Malai Kofta - Easy Malai Kofta Recipe, Step by Step

TH loves Malai Koftas and they are a regular whenever we eat out (that or Palak Paneer!). I have eaten the whole range of Malai Koftas you can come across - the good, the bad, and the downright rubbery balls in goop.

Malai Kofta Recipe | Paneer Recipes

I've been wanting to try some of my own and finally got around to it couple of months back. It's not a short and easy recipe, let me be honest, but it's all worth it at the end, trust me.

The first step is to make the aloo paneer koftas so go on ahead and do that, I'll wait.

Ready?

Ok now to the gravy to complete the Malai Kofta Recipe.

Malai Kofta Recipe

Preparation time: 20 mins
Cooking time: 1 hour

Ingredients:
1 batch of aloo paneer koftas
1 large onion, pureed
1 tomato, pureed
12 cashew nuts, soaked in warm water for 30 mins and ground to a paste
1 tsp of red chilli powder
1 tsp of coriander powder
1/4 tsp of turmeric powder
A generous pinch of hing / asafoetida
1 tbsp of kasuri methi / dried fenugreek leaves
1 tbsp of tomato sauce (optional)
2 tbsp of cream
Salt to taste
2 tbsp of oil
1 tsp of ginger garlic paste
1/2 tsp of jeera / cumin, powdered
1/2 cup of milk

How to Make Malai Kofta Recipe:

1. Heat oil and add the cumin powder. Fry for 5 seconds. Add the tomato and onion puree. Saute for 2-3 mins until the raw smell disappears.

2. Add the chilli powder, coriander powder, salt, turmeric, ginger garlic paste, and hing.

Malai Kofta Recipe | Paneer Recipes

3. Fry for another 2 mins. Now add the kasuri methi and the tomato sauce (if using). Top it off with the ground cashew pate. Mix well and let it cook for 5 mins on low flame.
Malai Kofta Recipe | Paneer Recipes

4. Add the milk. Bring to boil and simmer for a minute.
Malai Kofta Recipe | Paneer Recipes

5. Finally add the cream and mix well. Test for salt.
Malai Kofta Recipe | Paneer Recipes

6. Gently drop in the koftas and cover with the sauce. Turn off fire and let it sit for some time for the gravy to soak through.

Malai Kofta Recipe | Paneer Recipes

Serve with warm jeera rice or rotis, with a garnish of grated paneer or fresh coriander leaves. I

Notes:

- If you prefer a white base for your malai kofta, skip the tomato and tomato sauce and add more cream and cashew paste.

- Some prefer to omit the onion, and that's fine too but I feel like it gives the gravy a nice base. I also wanted to avoid using too much cream.

Thursday, February 16, 2012

Food Photos Prop Shopping - Robinson's Singapore

The magic words that lured me in!

Food Photo Prop Shopping in Robinson's Singapore

Lovely riot of colours at the entrance. This is the Robinson's at Raffles City Mall. 

Food Photo Prop Shopping in Robinson's Singapore

Adorable Katie Alice tins for coffee, sugar, and tea. I bought ramekins from this collection which were very cute too.

Food Photo Prop Shopping in Robinson's Singapore

Drool-worthy stoneware in shapes and sizes

Food Photo Prop Shopping in Robinson's Singapore

Korean style soup pots of stone and ceramic. Love the colourful lids

Food Photo Prop Shopping in Robinson's Singapore

Who doesn't love Le Creuset. These were tiny, ramekin-sized ones. I bought a few to gift people because I suddenly felt guilty for being a selfish shopper

Food Photo Prop Shopping in Robinson's Singapore

White tableware. A food photographer's favourite colour. Mine, anyway.

Food Photo Prop Shopping in Robinson's Singapore

Oh yes, I bought that black bowl down there. Gorgeous textured ceramic table-ware from Japan.

Food Photo Prop Shopping in Robinson's Singapore

The cheaper more colourful kind from China. I have a set of those striped ones on the right and one floral one not shown here which sadly cracked the other day. 

Food Photo Prop Shopping in Robinson's Singapore

I wasn't sure if they would mind pictures being taken in the store so I was in stealth mode. I wish I could've taken more but if you are visiting Singapore and love kitchen things, definitely pay Robinson's a visit.

Check out this previous post from when I visited Fishs Eddy in New York