ads1

Showing posts with label Kerala Recipes. Show all posts

Sunday, October 26, 2014

Kerala Egg Roast Recipe, Nadan Egg Roast Step by Step

Egg roast with appam or idiyappam is the quintessential Kerala-style breakfast. Egg roast or mutta roast is one of those recipes that has a few different variations especially in spice levels and consistency. We prefer our egg roast with some gravy while restaurant-style Kerala egg roast tends to have a richer, thicker gravy. No matter how you prefer to make egg roast, it uses the same basic ingredients and is very easy to prepare.

Kerala egg roast mutta roast recipe

Egg roast has a very strong tie to my brother. During his time in Dubai, he'd land in the Cochin airport and before even saying hello, would start with "let's get mutta roast on the way home". It's a 2-hour drive from Cochin airport to our home in Kottayam and all the way, we'd be on the hunt for the perfect egg roast. Sometimes, you find them in the smallest roadside stalls where a chettan and his family would be making hot Kerala breakfast items like appam, puttu, idiyappam and such with a big bowl of kadala curry and egg roast to go with these. Such deliciousness!

Kerala egg roast mutta roast recipe

After we get a hot steaming breakfast on the way, my mom would declare that she can make an equally good egg roast a home, if not better. And so during the 1-2 week customary stay, we would get to taste her homemade version of mutta roast with either appam or idiyappam. This is my amma's recipe, the way we love it.

For more Kerala recipes from my hometown, check out Malabar egg curry recipe, Kerala kadala curry, kothu roti recipe, and this spicy egg curry recipe.

KERALA EGG ROAST RECIPE

Preparation time: 10 minutes
Cooking time: 30 minutes
Serves 4
Recipe source: Amma
Note: I have scaled down the recipe to serve 4, the portion in the pictures below was for 10 people

INGREDIENTS:
4 eggs
2.5 cups of onions, sliced thin, tightly packed
1 cup of ripe tomatoes, cut into small cubes
A fistful of fresh curry leaves
2 tbsp of coconut oil
1/2 tsp of red chilli powder (adjust to taste)
1/2 tsp of cumin powder (jeerakam powder)
1 tsp of coriander powder (malli powder)
1/4 tsp of turmeric powder
1/4 tsp of black pepper powder
2 green chillies (split - optional - adjust red chilli powder quantity accordingly)
3 tbsp of finely chopped coriander leaves (cilantro) for garnish
1/2 tsp of mustard seeds
1 tsp of freshly crushed garlic
1 tsp of grated fresh ginger

INSTRUCTIONS:

To Boil the Eggs:

Here's how I make perfect boiled eggs after seeing the instructions on Martha Stewart's website.

Wash the eggs thoroughly under running water and add to a pan of tap water. Use a large enough pan so that the eggs are not on top of each other and make sure there's enough water to cover the eggs completely.

Place on medium heat and bring the water to a rolling boil. Once it starts boiling well, turn off heat and cover the pan. Set aside for 30 mins or so while you prepare the gravy for egg roast.

To Make Kerala Egg Roast Gravy

In a large pan (we use cast iron pan usually and this gives the gravy a darker colour), add the coconut oil and mustard seeds. When the mustard seeds start to pop, add the sliced onions and curry leaves.
Kerala egg roast mutta roast recipe-9

Roast the onions on low heat until uniformly light brown in colour. The key here is to not overcook or fry the onions too much. We are looking for cooked yet soft onions for the gravy. Keeping flame low makes sure the sides of the onions don't get burned.

Now add the ginger and garlic and saute for 30 seconds until fragrant. Then add all the spices - chilli powder, jeera powder, coriander powder, turmeric, and pepper. Fry for a minute on low heat.
Kerala egg roast mutta roast recipe-10

Next, add the cubed tomatoes and green chillies (if using) along with 1 cup water. Remember to adjust the level of heat you'd prefer. We like our egg roast on the spicy side. Cook this gravy until the tomatoes are soft. This takes about 7 mins or so. Add more water if the gravy becomes too thick but too not too much. Egg roast is meant to have a thick non-watery gravy.
Kerala egg roast mutta roast recipe-3

When the gravy is cooked and mushy, add chopped coriander leaves and salt. A pinch of sugar is a good idea too.
Kerala egg roast mutta roast recipe-4

Now go back to our pan of boiled eggs and shell them carefully. Make small slits on the side of the eggs and pour the gravy on top.
Kerala egg roast mutta roast recipe-6

Give the egg roast a gentle mix and let it sit for 10-15 mins for the eggs to soak up the gravy a bit.
Kerala egg roast mutta roast recipe-7

All done! Serve Kerala egg roast with any side of your choice.

Wednesday, May 28, 2014

How to Make Spongy Appam with Yeast - Kerala Appam Recipe


Kerala appam or aappam is a thing of beauty. It's the perfect embodiment of what Kerala breakfast recipes are all about - rice flour, some fermenting, light on the stomach, easily digestible, and also, a bit time-consuming to prepare than pouring cereal into a bowl. I rarely make appam at home and so, the different variations of appam recipes you see in here including this appam recipe without yeast are all from my mom's kitchen. Served with Kerala kadala curry or this Kerala egg roast, appam is quite a breakfast treat!

kerala appam recipe with yeast-appam recipe

Preparing appam at home is not the easiest thing but the steps to make them are quite straight-forward. If you follow them systematically and also ensure optimum fermenting environment (this can be a challenge in colder places), then you will be rewarded with spongy, soft, lacy appams. I have resorted to instant appam powders for my appam needs many times and while it's not exactly the real deal, it saves me from the occasional appam craving satisfactorily. There's also a quick way to make appam from rice flour but that's a recipe for another day.

You need coconut milk to make appam and it's best if you make coconut milk at home, fresh. However, store-bought ones work as a decent substitute. Please don't use the coconut milk powder though. The flavour of those things is way off, in my opinion.

You may also like to check out how to make dosa batter, how to make appam without yeast, easy idli batter recipe, and how to make poori.

KERALA APPAM WITH YEAST

Preparation time: 4 hours
Cooking time: 30 minutes
Makes ~15 appam
Recipe source: my mom

INGREDIENTS
2 cups raw rice
3 cups grated coconut (or 4 cups coconut milk)
1/2 tsp instant yeast (or 1 tsp active dry)
2 tbsp sugar
Salt to taste

INSTRUCTIONS:

1. Soak 2 cups of raw rice for 1-1.5 hours.
kerala appam recipe with yeast-appam recipe

2. In the meantime, prepare your coconut milk if you are making it fresh. Start with 3 cups of grated coconut and add enough water to extract 4 cups coconut milk from this. There's no need to separate out into first milk, second milk, etc. Check the coconut milk recipe post if you are unsure what I am talking about.

3. Reserve 1 cup coconut milk aside. Add the remaining to the soaked raw rice and grind to a smooth paste. You can use a wet grinder or a blender/food processor. If you feel the quantity of coconut milk is not enough to grind the rice, add required amount of water.
kerala appam recipe with yeast-appam recipe-3

4. Once the rice mixture is smooth, take 2 tablespoon of it and add to the reserved coconut milk + 1 more cup of water. Bring this mixture to boil and let it thicken into a paste (sorry, I don't have a picture of this!). Let it cool down completely.

5. Once that mixture is completely cooled, turn your blender/grinder back on and add it to the ground rice flour mixture along with 1/2 tsp instant yeast (1 tsp if using active dry or any other kind) and grind for another couple minutes.
kerala appam recipe with yeast-appam recipe-2

6. Transfer batter to a vessel and keep covered at room temperature (between 26C to 32C) for about 4 hours and then refrigerate until you need it.
kerala appam recipe with yeast-appam recipe-4

7. Before cooking the appam, add salt to taste and 2 tbsp sugar as soon as it�s out of the fridge. If the batter is too thick, add water to bring it to the right consistency and let it come to room temperature before use.
kerala appam recipe with yeast-appam recipe-5

Appam batter should be quite light so that when you use the swirling technique, the edges are light and crisp. If your batter is thicker, you get appam of more uniform thickness and sponginess. We like it somewhere in between.
kerala appam recipe with yeast-appam recipe-6

Check this video if you are unfamiliar with how to make appam in an appam pan or kadai with the swirling technique.
kerala appam recipe with yeast-appam recipe-7

Remember to cook covered until the appam is cooked through and spongy. There's no need to flip them. Keep flame medium-low at all times.
kerala appam recipe with yeast-appam recipe-8

It's best to use up all the batter once you have added salt and sugar. If you want to reserve some for later, add salt and sugar only to the amount of batter you require to use up immediately and refrigerate the rest. Serve with Kerala kadala curry for appam which is a spicy version with coriander and chillies, a nd sweetened coconut milk,. Delicious Kerala breakfast ready!

Saturday, November 23, 2013

Kerala Chicken Curry Recipe - Nadan Kozhi Curry Recipe (No Coconut Milk)

This Kerala-style chicken curry is special. I love any gravy with a roasted coconut and spices and this chicken curry uses just that (but no coconut milk). There are tons of different variations to how chicken curry is prepared in Kerala but this is type of chicken masala is probably the most common and loved by all. The gravy is spicy and intense and goes great with milder mains like appam, idiyappam, chapati, dosa, parotta, rice, and pathiri. I also love this chicken curry with a simple vegetable pulao.


This chicken curry was prepared lovingly by our very good family friend Deepa Chechy. Her husband, Rajesh anna, wanted his wife's famous chicken curry to appear on Edible Garden so she made it and brought it over exactly as you see it in the picture above, in the same iron cheenachatti used to make it in. I didn't change a thing in the picture, not even the placement of the curry leaves. The chicken curry was steaming hot as I took pictures. So, huge thanks to Deepa chechy and Rajesh anna for this extra special dish :)

kerala chicken curry-nadan chicken curry kerala style

Note: Store-bought chicken masala (or meat masala) has been used in this recipe and it really makes the job simpler and tasty. You can make chicken masala at home too and I have left a note on how you can do that but if you get Eastern Chicken Masala or Meat Masala where you live, use it.

Other Kerala chicken recipes on Edible Garden - chicken biryani, pepper chicken, Kerala chicken roast, chicken thoran.

KERALA (NADAN) CHICKEN CURRY RECIPE

Preparation time: 20 minutes
Cooking time: 25 minutes
Serves 4-6

INGREDIENTS:
500gm of chicken pieces, with bone
1.5 cups of sliced onions
1 cup of chopped tomatoes
1 tbsp of minced ginger
1 tbsp of minced garlic
3/4 tsp of chilli powder (adjust to taste)
1/4 tsp of turmeric powder
2 tsp of Eastern meat or chicken masala*, heaped
1 cup of grated coconut
2 tbsp of coconut pieces
2 cloves
1" piece of cinnamon
1/2 tsp of fennel seeds (perumjeerakam)
A fistful of curry leaves
4 tbsp of coconut oil

INSTRUCTIONS:

1. Heat oil in large wok or pan and saute the onions, ginger, and garlic together. Using an iron wok will give the curry a deeper colour as you see in the pics above.

2. Meanwhile, dry roast the coconut until golden brown. Switch off heat and add the whole spices - fennel, cloves, cinnamon - and mix together so they get some heat from the coconut. Cool and grind to a smooth paste with water. Set aside.

3. Once the onions turn a dark brown, add the meat masala, turmeric, and chilli powder and fry for a minute. Then add the chopped tomatoes and saute for another minute.

4. Add the coconut paste, coconut pieces, and washed chicken pieces to the above mixture, top up with 1 cup water and cook covered on low flame for about 20 mins or the chicken pieces are cooked soft. If the gravy is too thick, you can add more water and bring to boil.

5. Add salt and curry leaves on top. Mix again.

* If you want to make your own meat masala powder, I have noted the main ingredients in Eastern meat masala here. Dry roast the following and powder - 1 tbsp coriander seeds, 1/2 tsp cumin seeds, a few fenugreek seeds, 1 bay leaf, 2 cloves, 2 cloves of garlic, 1/2 tsp whole black pepper, small piece of cinnamon, nutmeg powder, curry leaves.

Serve chicken curry hot with Kerala appam, chapatis, or rice.

Monday, November 18, 2013

Plain Dosa Recipe - How to Make Dosa Batter at Home (Step by Step, Tips and FAQs)

Note: This is a long and detailed post on how to make plain dosa at home with lots of tips and FAQs at the end. 

Dosa is soul food for me. I often tell TH how I can make and eat dosa every day for a long time and still not be bored with it. It's probably because we ate a lot of dosa growing up. Our family, or rather the Reddiar community in Kerala, always has homemade dosa batter in the fridge, ready to whip up fresh dosas on demand or for the unexpected guests whom we always insist stay for dinner. My mom has been using an industrial sized wet grinder for many years now and it's run about twice a week to keep the idli/dosa batter supply ongoing and fresh. She makes idlis as soon as the batter ferments and then dilutes the batter further to make dosas for the next 3-4 days.

Plain Dosa Recipe - How to Make Dosa Batter at Home (Step by Step, Tips and FAQs)
Dosa with Sambar and Chutney from my Mom's kitchen

The batter we make is the same for idli and dosa and uses only whole skinned urad dal (ulutham paruppu or uzhunnu parippu) and idli rice or dobbi ari. Apart from salt, nothing else is added to this. The proportion of rice to dal remains almost constant in the batter, only altered if the dal is old or doesn't seem to do its job properly. This variable is successfully eliminated in most cases by sourcing the rice and dal from trusted grocery stores only (my dad ran one for many years so we directly sourced the best quality stuff from dealers in Andhra and Tamil Nadu directly).

Plain Dosa Recipe - How to Make Dosa Batter at Home (Step by Step, Tips and FAQs)

I don't know why I never shared this plain dosa recipe before since it's such a comfort food for us and a constant in our lives. So as I was saying, the idli-dosa batter is made about twice a week and idli is made immediately after the first round of fermenting. Nowadays, amma makes idlis in bulk and stores them but back in the day, idlis only made an appearance the day after the batter was ground. From day two onwards, it was dosa time - soft, fluffy and slight thick for the adults, roasted and crisp for the kids and young at heart (my grand mom loved her dosas crisp).

This would go on for about 4 days until the next round of batter was made. Dinner was almost always dosa with different kinds of chutneys and side dishes to shakes things up a bit.

Ultra Grinder Plain Dosa Recipe - How to Make Dosa Batter at Home (Step by Step, Tips and FAQs)

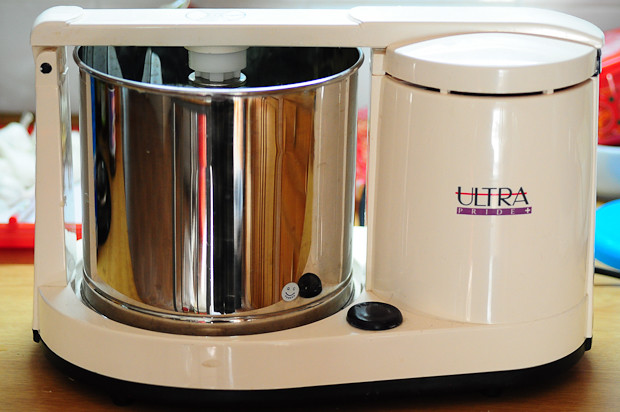
As soon as I got settled in Singapore, I brought back a wet grinder from India - the Ultra tabletop one. It does a great job of grinding my batter and I have rarely bought batter from stores after buying it. It does take some planning to make your own dosa or idli batter at home but obviously is well worth the effort. You can check my detailed post on making idli batter at home for more info on that. Today we are going to look at how to prepare plain dosa at home. This is not a paper roast dosa or an uthappam, but somewhere in the middle, perfect for everyday breakfast or dinner with some dosa podi. I will share the method to prepare crispy hotel-style dosa soon.

HOMEMADE PLAIN DOSA RECIPE

Preparation time: 8 hours
Cooking time: 10 minutes

FOR THE DOSA BATTER
Ingredients:
1 cup whole skinned urad dal
3 cups idli rice*
Salt as needed (see notes)

Instructions:
  1. Soak the rice and dal separately for 3 hours
  2. Grind dal first into a smooth consistency adding enough water
  3. Grind rice into a smooth batter by adding just enough water to get it going
  4. Combine the two, add salt, and let it ferment in a large enough bowl lightly covered, for about 6-8 hours in a warm place
  5. * You can increase rice to four cups if using good quality urad dal but it takes experience and practice to tell if that's the case so go with these proportions as you start out

TO MAKE THE DOSAS (~8 Nos)
Ingredients:
4 cups of fermented dosa batter
1-1.5 cups of water
4 tbsp of gingelly oil (Indian sesame oil like Idhayam)

Instructions:

1. Add enough water to the fermented batter until you have a smooth, pouring consistency. Make sure the batter is not too watery though, it should be thick-ish but fall off your spoon easily.
dosa recipe-how to make dosa

2. Heat a tawa or iron griddle and grease with the oil lightly. Pour about 1/2 cup batter to the centre of the tawa.
dosa recipe-how to make dosa-2

3. Using the back of your ladle, gently spread the batter with a circular motion from the centre towards the sides of the tawa.
dosa recipe-how to make dosa-3

This requires some practice but is not hard at all. As you can see, I have made dosas enough times to actually do a decent job with my left hand while taking pictures with my right. Ok, I'll stop showing off now.
dosa recipe-how to make dosa-4

Since we are not making very crispy dosas, don't spread it too thin. The dosa should be more or less evenly thick.
dosa recipe-how to make dosa-5

4. Drizzle about 1 tsp of oil around the edges of the dosa and add a few sprinkles on the top as well.
dosa recipe-how to make dosa-6

5. If your tawa is greased adequately and is not sticky, the edge of the dosa will start to come off the pan in about 1 minute or so. Use a spatula to gently lift the dosa
dosa recipe-how to make dosa-7

and flip it over. Cook the other side for another 40 seconds or so and remove from pan.
dosa recipe-how to make dosa-8

Serve with dosa podi, chutney, sambar, tiffin sambar, or anything that takes your fancy. I can eat dosa with pretty much anything!
dosa recipe-how to make dosa

NOTES and FAQs:

Q: Why does my dosa stick to the pan?

A: There are a few reasons for this:
Use a well-greased pan - if your tawa is new, you need to season it to make sure it's ready to make dosas. Using a non stick pan works but in my opinion, the dosas turn out dry. Use a pre-seasoned iron tawa and you will be fine.

To grease a dosa pan properly, use anything you can dip into oil - like a piece of onion, potato, a wooden spoon, etc. Dip into the sesame oil and rub generously all over the tawa. If you pour drops onto the tawa, then spreading the dosa will be difficult so always grease fully and don't pour the oil before spreading dosa.

Also, never use a dosa tawa to make rotis. Keep one tawa exclusively for dosa. I have noticed that people who are new to making dosas add way too little oil. Be generous, a few drops are not enough.

Batter has too much water - this makes cooking times longer. If you have more fermented thick batter in stock, add it to the batter you are using, or, just lower flame and be patient. Make sure your flame is not very high. Medium-low heat is perfect for cooking dosas and you may need to adjust this on and off as the pan gets hot and cold during the cooking process.

If the above two are checked, then it's possible that your batter is too old and sour. That's another reason why it would stick to the pan.

Q: Why is my dosa batter grainy?

A: You didn't grind the batter to a smooth consistency, that's why. Remember to soak the rice and dal for enough time and grind it to a very smooth consistency before fermenting. An Indian mixie is good to make small quantities but a food processor does not give you a smooth batter. A wet grinder is obviously the best option for making dosa batter at home.

Q: My dosa is white even after it is cooked. Why?

A: Couple of reasons that could be contributing to this - your batter is too cold - just bring it to room temperature before making the dosa* - or, the proportion of rice in your batter is too high. Adjust proportions next time you make the batter. Conversely, too much dal in your dosa batter will contribute to dosas that are too red in colour. Adjust accordingly in your next batch.

*We never follow this rule at home though. For years, we have been taking batter right out of the fridge and making dosas immediately with no issues.

Q: My dosas are very sour. Why?

A: Your batter is over-fermented or too old. If you have some wheat flour (atta), add it to the old batter and make semi-wheat dosas. Another trick is to add equal amounts of fresh batter and make dosas. Masala Paniyaram is another way to use up old dosa batter.

Q: How much salt should I add to the dosa batter?

A: I actually don't measure salt each time but noticed that I end up adding a heaped teaspoon of salt to the above-mentioned quantities of ingredients. You can taste the batter and see if it seems salty enough. Adding enough salt is important for right amount of fermentation.

Q: How do I ferment dosa batter in a cold place?

A: I didn't have to ask myself this question when living in India and Singapore but in Sydney, it's a whole different situation. I reached here late winter and have made 3 batches so far. Each time I tried a different method. The best option was to leave the batter in a bowl covered with a plate in the oven with the light turned on. Do not turn on the oven itself. The heat from the light is enough to give it that extra push.

Once, I just left the batter on the kitchen counter overnight. It didn't rise at all but was bubbly and seemed fermented. I didn't risk making idlis with the batter and dosas turned out just fine.

It also helps if you mix the batter for 2-3 mins with your hand. Just don't investigate too much into the science of that ;)

Q: How do I use store-bought dosa/idli batter?

A: The quality of store-bought batter really varies a lot. I have tried a few different brands in Singapore and have had different experiences. One thing that's common is, although they all claim to also make good idlis, they don't. So don't waste your time making idlis with store-bought batter. Dosas, however, have turned out good for me. Most batters need you to add some water to bring it to the right consistency. Use up all batter within 3 days, they don't last as much as homemade batter.

Q: What about variations to the dosa batter - like adding poha, cooked rice, quinoa, brown rice, etc?

I make dosa batter the plain and simple way as mentioned above. I do plan to experiment a bit though but be patient with me, will share them as I get to it.

If you have any more questions on making dosa at home, please leave it below in the comments and I will get back to you. Between my mom and me, we should be able to answer them :) The above questions were compiled after a short poll I did on my Facebook page and hopefully they represent most of your personal questions on making dosa at home.

If you found this post useful, please pin it or share it with friends. Thanks!
To learn how to make dosa or dosa batter in Hindi, Tamil, Telugu, Marathi, Urdu, etc, please use the Google Translate button in the sidebar. 

Wednesday, October 23, 2013

Challas or Sarlas - Kerala Onion Salad for Biryani, Parotta, Cutlet

Challas or Sarlas is a very Kerala thing and I wouldn't be surprised if many people outside have never heard of it. Challas is basically thinly sliced red onion that's soaked in vinegar, salted, spiced, and served commonly with Kerala biryani, cutlets, parotta, fried rice, etc. It has a wonderful tangy-sweet flavour from the vinegar and onions and I am sure is a Keralised version of some anglican dish introduced by foreign visitors many years ago.

onion challas-kerala sarlas salad recipe

I have made challas a few times but never thought of sharing the recipe, mainly because it's so ridiculously simple. So this is not much a recipe-sharing exercise but more of me introducing something possibly new to you all :) There are a few different variations to Challas across Kerala but this is how we Kottayam folks make it. It's a variation of raita in a way, but curd is not added to this onion salad.

onion challas-kerala sarlas salad recipe
Challas with Egg Biryani

Try some challas the next time you make biryani and you'll fid how addictive it really is. The onions turn very soft and the pink-purple gets distributed through the salad making it look really pretty. The challas in my pictures above hasn't soaked for too long so it still holds its colours well but in time, it gets softer and pinker overall. A cucumber tomato raita is another excellent accompaniment to Biryani.

CHALLAS OR SARLAS RECIPE


A Kerala-style onion salad popularly served with biryani and cutlets.

Prep Time: 15 minutes
Yield: 1 cup

Ingredients:
- 1 cup red or purple onions, sliced thin
- 1 green chili, chopped
- 2 tsp vinegar
- 1/3 tsp salt (adjust to taste)

Instructions:

Mix all ingredients together and set aside for 30 mins. The onions will let out water during this time. Squeeze out the water and place in another bowl. Add more salt if required.

Serve challas with biryani or cutlet for optimum taste! Be sure to hand out some mint afterwards, because true to their nature, the onions will cause some bad breath ;)

Variations: Add 2 tbsp of grated carrot and/or 1/4 tsp of grated ginger to the challas for a different flavour.

Friday, September 13, 2013

Instant Mango Pickle - Spicy Kerala Mango Pickle Recipe

This Kerala-style instant mango pickle is super easy to prepare, spicy, and uses sour raw mangoes which give it an amazing flavour. This mango pickle or manga curry is an important condiment addition to the Onam sadya or Kerala wedding sadya along with the lime pickle or naranga curry. While different parts of Kerala and different communities prepare this simple mango pickle differently, the base recipe remains the same and you can add or subtract ingredients to your preference. While I love the sweet mango pickle that amma makes, this instant spicy mango pickle does hold a special place in my heart.

kerala mango pickle-instant mango pickle-manga curry

I made this mango pickle a few months ago when raw mangoes were in season in Singapore and distributed it to a few friends who loved it! I don't make pickles at home often since I have a few favourite brands of pickles I buy from the stores and amma makes some for me when I visit her. Since our consumption is so low, making pickles at home in bulk is hardly necessary.

kerala mango pickle-instant mango pickle-manga curry

However, after making this mango pickle with just one mango, I regretted not making more since it came out so nice and flavourful. Use the ingredient and amounts as guidelines and check the notes for some additional customizations you can make to suit your palates. Check out the Onam Sadya Menu here and also notes on how to serve an Onam Sadya.

KERALA-STYLE INSTANT MANGO PICKLE RECIPE

Preparation time: 30 minutes
Cooking time: 5 minutes
Makes 2 cups
Recipe source: Amma

INGREDIENTS:
2 cups of raw mangoes, with skin, cut into cubes
2 tbsp of salt (you may need to adjust this)
1/4 cup of oil
2.5 tsp of black mustard seeds (kaduku)
1/2 tsp of fenugreek seeds (uluva)
2 strands of curry leaves
2-3 tsp of red chilli powder
2 tsp of vinegar (optional)

INSTRUCTIONS:

1. Add salt to the cut mango pieces and set aside for 20-30 mins.
kerala mango pickle-instant mango pickle-manga curry

2. Combine 2 tsp mustard seeds and fenugreek seeds together...
kerala mango pickle-instant mango pickle-manga curry-2

... and powder it together. You can make it a finer powder or leave it a bot coarse like I did.
kerala mango pickle-instant mango pickle-manga curry-3

3. Heat oil in a pan and add the mustard seeds. When they pop, turn off the flame and add the powdered mustard+fenugreek.
kerala mango pickle-instant mango pickle-manga curry-5

4. Quickly follow with the chilli powder and curry leaves and stir vigorously for 5 seconds.
kerala mango pickle-instant mango pickle-manga curry-6

5. Tip in the salted mangoes and mix well, adding salt and vinegar (if using).
kerala mango pickle-instant mango pickle-manga curry-7

The entire mixture will come together in the residual heat of the pan. That's it! The mango pickle is ready.
kerala mango pickle-instant mango pickle-manga curry-8

Let it sit in the same pan until completely cooled and then transfer to a dry glass jar. Store refrigerated and use up within a week. Always use a dry spoon to serve the pickle.

Notes:
  1. You can make customizations to this pickle by adding 1/2 powdered jaggery, a few garlic cloves, green chillies instead of red chilli powder (my favourite!), etc
  2. I generally add the vinegar if the mangoes are not sour enough. It also helps to preserve the pickle longer. I didn't add any for this batch
  3. Leave the skin of the mangoes on, especially if they are too sour, otherwise the pickle will become mushy and too sour
  4. Adjust chilli powder and salt to your preference. Don't be stingy on the salt though, it acts as a preservative. Also, if you like a fiery red pickle but not the heat, add Kashmiri chilli powder like I did
  5. Take care not to burn the spices, that's why we turn the heat off adter initially heating the pan well

Tuesday, September 10, 2013

Avial Recipe - Kerala Style Aviyal - Onam Sadya Recipes

Avial or Aviyal is one of the first recipes I shared on Edible Garden. Since Onam 2013 is fast approaching, I wanted to revisit this Onam Sadya essential. Avial has many variations since it's a South Indian recipe and even within Kerala, it's made in a few different ways. Personally, I prefer the semi-dry avial that amma makes without adding curd. We add sour raw mangoes for tartness and that works perfectly without making the avial too dilute or watery. This is probably the South Kerala style of making avial.

avial recipe-kerala aviyal recipe-onam sadya recipes

Like many many dishes around the world, avial was born out of the need to use up leftover vegetables, I am sure. There are many different variations to avial like this raw cashew avial, tomato avial, and the more popular mixed vegetable aviyal. We generally use the same list of vegetables but it's ok if one or two of them is missing due to seasonality or non availability.

avial ingredients
Vegetables for Kerala Avial

I must, however, that the fresher the vegetables, the better. I once made aviyal with a frozen bag of vegetables and it was just average-tasting although my coconut was fresh. Using a mix of frozen and fresh vegetables, whatever is available where you live, is better than using just a bag of frozen ingredients for this dish.

avial recipe-kerala aviyal recipe-onam sadya recipes

Here's an almost-complete list of Onam Sadya Recipes. I will add on more as we come closer to Onam 2013. Excited!

Preparation notes: It's important to cut the vegetables the same way for even cooking. Generally, the vegetables are cut into 3"long 1/2" wide strips and cooked in a staggered manner, clubbing the ones that have same cooking time together. I have referred to them as "strips" in the ingredients list. have also added more details on cooking time in the instructions below.

KERALA-STYLE AVIAL RECIPE

Preparation time: 15 minutes
Cooking time: 20 minutes
Serves 4-6
Recipe source: Suma, our cook

INGREDIENTS:
1/2 cup of carrots strips
1/2 cup of snake gourd strips
1/2 cup of brinjal strips
1/2 cup of raw banana strips
1/2 cup of jackfruit seeds, quartered lengthwise
1/2 cup of elephant yam strips
1/2 cup of old cucumber strips
6 3" long drumstick pieces
1/2 cup of raw mango strips
2 cups of grated coconut
1 tsp of powdered jeera (cumin, jeerakam)
1 tsp of red chilli powder
2-3 green chillies
1/2 tsp of turmeric pwoder
2 tbsp of coconut oil
A few curry leaves

INSTRUCTIONS:

1. Add all the cut vegetables except mangoes to a large cooking pot (we use the traditional kal chatti or stone pot to make aviyal at home). Top off with half the turmeric powder, jeera, curry leaves, and chilli powder. Add about 1/2 to 3/4 cup water and mix well.

The vegetables we used have more less less the same cooking time except mangoes which cook much quicker. So we add them later when adding the coconut mixture.

avial recipe-kerala aviyal recipe-onam sadya recipes-2

2. Cook covered on a low flame for about 10-12 mins or until the vegetables are cooked yet hold their shape. Take care not to cook them to a mush, I would suggest checking every 5 mins to confirm this.
avial recipe-kerala aviyal recipe-onam sadya recipes-7

3. Meanwhile, grind together - coconut+green chillies+ remaining turmeric+some more curry leaves to a coarse paste without adding water.
avial recipe-kerala aviyal recipe-onam sadya recipes-3

4. Check that your vegetables are almost cooked through. They would have let out a fair amount of water while cooking and this is good.
avial recipe-kerala aviyal recipe-onam sadya recipes-8

5. Add the ground coconut mixture on top along with requirement amount of salt and the mango strips. Without mixing, cook covered for another 3-4 mins.
avial recipe-kerala aviyal recipe-onam sadya recipes-5

6. That's it! Mix the coconut mixture in gently and remove from flame. The avial will be a bit watery still but it will dry up as the vegetables absord it as they sit. Drizzle the coconut oil on top and mix gently. Set aside covered loosely for an hour before serving.
avial recipe-kerala aviyal recipe-onam sadya recipes-9

Notes:
  1. If you don't have raw mangoes in hand or they are not sour enough, you can add 1 tbsp tamarind water or sour curd. Mangoes lend a much better flavour to aviyal though
  2. Note that avial is not tempered so it's important to add the oil at the end
  3. It's important to cook the vegetables in a low flame so as to retain the moisture level and so that it doesn't start burning from the bottom
  4. You can adjust the amount of coconut to your preference
  5. Our version of Aviyal is a no-onion no-garlic recipe