It's been 5 years since I entered the crazy world of food blogging. Only, back then I didn't know it was a world out there, or that it was crazy. I saw this nice little blog with recipes and pictures (it's invite-only now) and decided my sister should do the same (
and she did). She is a wonderful cook and I knew she would do full justice to it. But I loved the whole idea of it so much that I started my
own blog a couple weeks later although I was barely cooking back then and knew all of 3 dishes to make without checking on a recipe online or in a book or through a phone call to my mom.
And so, this little blog was born. Although there were four blog-birthdays (or anniversaries, or whatever you want to call it) before this, I never celebrated them. I just took it as another day and trudged on, I have no idea why.
 |
| The first food picture taken for this blog - April 2007 |
But, it has been a whirlwind ride for sure and I want to share some of the highlights with you at least this year of completing 5 years. That's half a decade. That's how long it takes for a baby to be born, topple over, sit up, start talking, start walking, go to play school, start kindergarten, and learn ABCs (or start teaching in a college, I don't know, I am told babies are extremely bright these days). That's how long it takes for someone to become a doctor. That's one whole year more than I have been married!
So yeah, it's a pretty important milestone and I am glad I stuck with it and found the passion from within to continue on this journey. This is a LONG post so bear with me.
Some StatsThere are 646 posts in here of which ~600 are recipes
18,000 comments were posted, excluding mine
The site has been viewed over
8 Million times in 5 years with a current average of
16,000 page views per day.
That's a
lot of views. I am overwhelmed every single day that people are enticed enough to click in and collectively view the pages in here 16,000 times a day. It makes me constantly worry that my pictures are not good enough, that I don't ever proof read my posts and I have hilarious typos in here, and that some recipe may not work for some people for whatever reason. Then I just tell myself to stop obsessing and go back to my day job, the one that pays the rent and for the shoes and bags I love to hoard, you know.
 |
| The picture that won me 200 USD in a contest. The camera I used cost less than that. |
Talking about money, I monetized the site around a year after I started it, I think. Money flowed in very slowly (read: about a dollar a month) but steadily. Today, I make an average of USD 700 per month through this site. I know it's probably like shouting out my own salary from the top of the roof but I figured at least some of you may want to know, just in case you want to monetize your site and the going is slow and you are discouraged. Don't be. It takes time but it will happen if you just concentrate on the content.
BUT.
More than this, more than any of this, the true magic moments of blogging for me are defined by the people. Don't believe me? Read on.
Embarrassing MomentsI am seen as "the food blogger person" at work. A lot of my colleagues and friends from work check out the blog regularly, cook from it, and talk to me about food all the time. One instance went beyond that though. Edible Garden and I was mentioned in a Google Analytics event in Malaysia by the country head. There were 500 people in the audience (I was there to speak too) and I had no clue he was going to do this!
Video here.
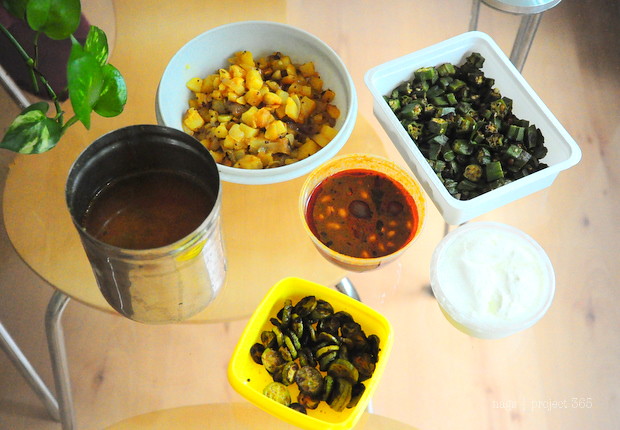
True Story 1One random day I came across this food blog and started going through it because I liked what I saw. In the most bizarre of coincidences, I found that the owner of that blog was leaving comments on mine at the same time! We started talking through comments. We clicked, literally and otherwise. I emailed her, she emailed me back. We added each other on gtalk. After our second online conversation, she invited me to her home in Los Angeles. I didn't even know where that was on a map but I said yes, sure. Almost a year later, I went to Mountain View, California on work and she told me LA is in California and I should go see her. I agreed, made plans to visit her for 3 days, and booked flights. So there I was, one chilly spring morning outside the LA airport, waiting with my 2 huge suitcases for this person I have never met in my entire life, half across the globe from my home and family and life. If she (or he, who knew) turned out to be a serial killer or a rapist or a no-show, I was doomed. I would've redefined the word stupid. But she did turn up and did turn out to be a she (thank God!). I had the best time of my life without even going to any of the tourist attractions in LA, not even one.
Anu - high five!
 |
| The meal Anu made for me the day I landed in LA |
True Story 2During the above-mentioned trip to Mountain View, I met Sakshi in real life for the first time but I felt like I'd known her much longer. She is a crazy energy-ball and insisted on driving me to every shoe shop in the Bay Area and also trudge along the ups and downs of San Francisco on a particularly bad-weather day. She waited endless hours outside fitting rooms as I shopped for clothes, steered me away from the gorgeous but oh-so-expensive goodies in Anthropologie and fully supported my interest and addiction to Lush Products, obligingly becoming a convert herself.
Sakshi, you rock.
The Incident that was Mentioned in this Video During that trip (again, ahem), I was in one of the cafes at the Google MV campus with another colleague-friend when this Googler walked by. He looked at me, looked at my friend, and then came towards us. And, AND, he went "are you Nags?". While I contemplated if I should admit to being said person, he gushed a bit and said "my wife and I are huge fans of your blog. We learnt a lot of dishes from there." I died, went to heaven, sent them heavenly blessings and wished them eternal happiness. Then I came back to earth and thanked him with words. I think I did, I don't remember really.
Random FactI bought a camera and a whole bunch of lens solely with the money earned from this blog. It was a very proud moment. It also funded our Egypt trip, one of TH's dream destinations.
 |
| TH and I in Egypt |
Meeting PeopleWe had 3 Singapore food blogger meets where I met some great ladies with similar minds. I am especially close to two of them and we meet regularly to gossip about our
in-laws people in general!
Jey and Raks, when is the next meet up and most importantly, what are you bringing me to eat?
True Story 3A girl adds me on Facebook. I add her back. I land in Mountain View this year for trip number 2 and she emails me saying we should meet. I feel shy but I agree. She brings along a friend. We have so much fun that we meet again and again during the span of one week and I come back to Singapore and feel pissed with TH because he is not them and I want
them.
Sindhu and Kavya, I am coming back soon!
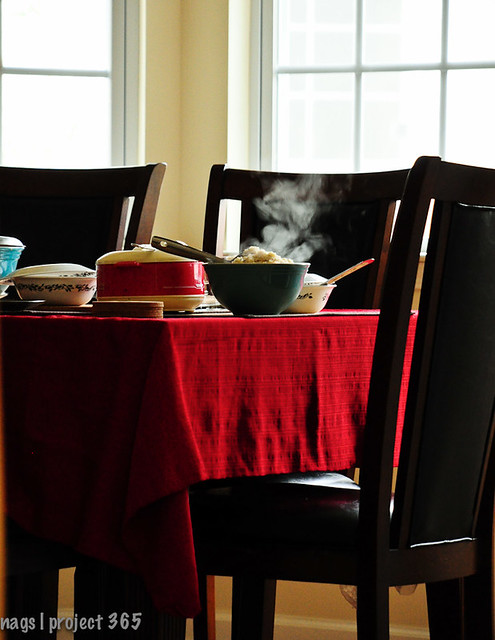
Meeting More PeopleDeepti, CL, Mittu, RV and I meet in New York. RV (her mom, rather) feeds us a hot South Indian breakfast and I go into a pongal-induced-coma after that. Also, I express a desire to show TH around New Jersey and Deepti immediately offers to drive us around. For almost an entire day she did just that and we saw places we'd have never seen without a local person and a car.
 |
| Steaming hot breakfast at RV's place in New Jersey |
Exploiting Friendship-
Sia made a header for this blog. All I had to do was email her and ask for it.
- Around 4 years back, during a trip to Gurgaon, I called Deeba to have a chat. It was our first time talking on the phone and since I was roaming and had a prepaid connection, my money ran out after about 30 mins. Before I could even think about getting a recharge card, Deeba had done it. Just like that. That's probably the most generous thing anyone has ever done for me.
- Kannan made a
tool that makes posting recipes a breeze if you use Flickr as the back-end. I use it for all my posts now.
Meeting Even More People-
Sharmi and I met in Coimbatore. She brought gifts and a daughter. I brought one sister and some ramekins. We bonded over pizza and a greasy food court table. Fun was had.
- I also met
Siri, the mysterious
DK,
Sridevi and
Sakshi in Mountain View last year. We had good Indian food, very strong-tasting lavendar kulfi and a major gossip session and we spoke about all of you behind your backs. Ok, kidding, but we
did talk about some of you.
Getting Free ThingsSala was giving away an autographed book by Paula Deen and although I have lousy luck with these things, I won! She sent me a big package and I have some of those cupcakes liners still, not because they are bad but because they are so good that I don't want to ever run out of them.
And since I was on a winning spree, I won a beautiful clutch purse from
Shaheen who has also put up with a lot of random emails from me. We've had good conversations, she and I.
Talking about conversations,
Sig and I clicked at some point too. She is my muse or at least a favourite one and I want to be her when I grow up. Oh
wait...
Did I mention that
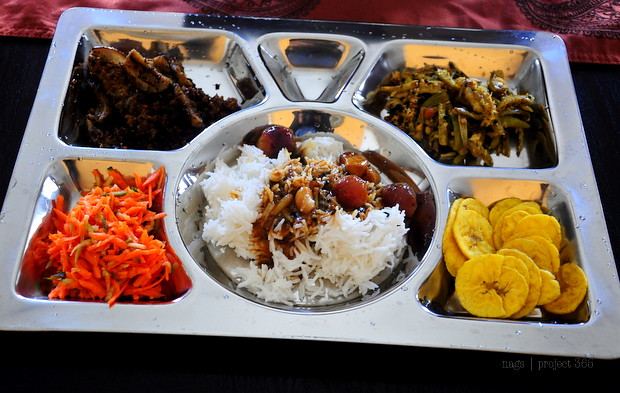
Jey cooked an entire meal for me the day I landed after a 19-hour flight ravenous and totally jet lagged. Yeah, that happend. Magic moment, see?
 |
| The meal Jeyashri cooked up for me that made me believe in humanity and the healing powers of vatha kozhambu |
I get
love letters all the time. More than I ever did as a teen and looked the best I ever will in my life for a whole of 3 weeks somewhere in there. It humbles me like you wouldn't believe. It also wants to me to drop my work, run into my kitchen, and cook dish after dish and take photo after photo so I can blog about it that instant.
Although I have typed out a ginormous post that took me 3 evenings to finish, I am sure I have missed out something or someone in here. Apologies for that. You all rock my life and this site is now an integral part of me that I can't severe. It took me 5 years to say this but yeah,
I LOVE being a food blogger and I take total pride in the fact that I make hungry people wait while I photograph their food.
Here's to the next five years. *Clink*