ads1

Wednesday, April 4, 2012

Pure Komachi Knives Review

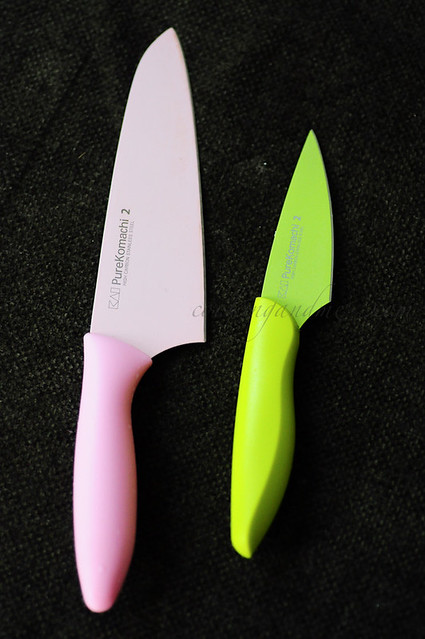
This post is long over due. I have wanted to share more about these amazing knives I use every day in my kitchen - the Pure Komachi knives.
Pure Komachi Knives Review

They were first recommended by Anu when I was visiting her in LA. We came across the larger pink chef knife at TJ Maxx and she grabbed one and put them in my shopping cart before I could even protest. I am so grateful for her insistence because otherwise I'd have totally missed this awesomeness in my life.

Ok, so why are Pure Komachi Knives great?

Pure Komachi Knives Review

A few reasons why I love Pure Komachi Knives:

- They are super light and very sharp. The weightlessness particularly appeals to me because I don't always use a chopping board. And well, I am guessing we all like our knives sharp. I've been using the pink one for over a year now and the green one for about 6 months now and both are as good as new.

- They are colourful and pretty. Yes, that matters. But beyond the visual appeal, they make it colourful so that you can easily tell them apart especially if you use specific knives for specific items like meat or garlic or fruits or whatever.

- The paring knife (smaller green one) is perfect for peeling garlic and shallots and chopping herbs fine. I do these three things heavily for my cooking and it's perfect for the job.

- They don't cost a bomb. In fact, compared to other options I have seen out there, these knives are cheap!

Pure Komachi Knives Review

Since I like to balance my reviews a bit, a couple of negatives I can think of:

- The lighter colours tend to stain if you don't wash them immediately after use. I used the pink knife to chop up vazhakka a few times and if I don't wash and scrub them immediately, the brown stains don't go for a long time. As you can see, they do go off eventually but it takes away from the beauty of the knife for a while. That said, my ergo knife got stained the same way but it was impossible to wash out so it's permanently scarred now.

- They are not easily available unless you live in the US. I have seen a set of Pure Komachi knives in Takashimaya in Singapore but they are way too expensive.

I bought the green paring knife and this purple slicing knife from Amazon when I was in New York last year. I have been using the paring knife as my primary one since then with excellent results. The slicing knife is a tad too long for me for every day use and it's still in its box for now. I have too many knives out in the kitchen anyway.

As you can see, I can't stop gushing about them because they are brilliant and you must ask your friends/family/whoever-offers, to bring them back for you from the US.

Buying them off of Amazon is the easiest and best method I can think of. I would love to get my hands on the Pure Komachi 2 Series Hollow-Ground Santoku Knife too. I mean, look at that colour!


Disclaimer: This is not a paid review. I bought the knives, used them, and absolutely loved them. However, if you follow the links above and purchase these from Amazon, I will get enough money for half of a Starbucks coffee. Or maybe not even that, I am not sure.

Sunday, April 1, 2012

Pav Bread Recipe - The Indian Burger Bun for Pav Bhaji

I think any self-respecting cook would harbour the desire to bake her or his own pav (the soft white dinner rolls-type-thing that goes with bhaji to create the delicious combo of pav bhaji).

I did too, for a really long time. Then I went and did something about it.

Pav - The Indian Burger Bun - Recipe

I had bookmarked DK's recipe from Chef in You ages ago and kept going back to it hoping to recreate it soon. Then one rainy day I decided it has to happen today!

It could be the humidity or the yeast or the kind of flour I used but her measurements did not work for me. I had to add a lot more flour and still ended up with a super sticky dough. I improvised, gulped a few times expecting all that flour and other ingredients to go into the bin, but magically, it turned out great! You may also like this pizza base recipe and melon pan bread, a popular Japanese bread.

I am sharing the proportions I used with a heavy disclaimer that you may need to adjust the ingredients and their quantities as you go. Ready?

Indian Pav Bread Recipe

Preparation time: 2 hours
Cooking time: 25 minutes
Makes 10-12 rolls
Loosely adapted from Chefinyou

Ingredients:
3 cups of all purpose flour
3/4 cup of atta / chapati flour
2 1/4 tsp of instant yeast (one sachet)
1 cup of milk
1 of egg
1 tsp of salt
1 tbsp of sugar
3 tbsp of butter
2 tsp of melted butter (for brushing on pav before baking)
1/4 cup of warm water

How to Make Pav Bread

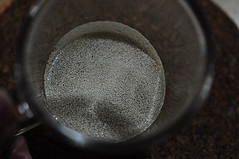
1 Add the yeast and sugar to the warm water and set aside until it turns bubbly and froths up - about 15 mins or so. If your yeast mixture doesn't froth up like below and smell awful, you need to buy new stock.

Pav - The Indian Burger Bun - Recipe

Pav - The Indian Burger Bun - Recipe

2. Warm the milk and add the butter and egg to it. Beat until combined. Add salt and the yeast mixture to this.

Pav - The Indian Burger Bun - Recipe

3. Add the flour a little at a time to this mixture and mix gently.

Pav - The Indian Burger Bun - Recipe

Once all the flour has been added, knead gently until the mixture comes together. I used my stand mixer for this but you can also do this by hand. Flex those muscles, that's the best part of bread-making, I am told!

Pav - The Indian Burger Bun - Recipe

4. I got a pretty sticky dough at the end of this. If you notice DK's pics, her dough is very smooth. Either ways, it's going to turn out fine so don't worry. Transfer this dough to a lightly oiled bowl, cover with a cloth or cling wrap and set aside to rise.
Pav - The Indian Burger Bun - Recipe

After about 2 hours, my dough looked like this. Gorgeous, eh?
Pav - The Indian Burger Bun - Recipe

5. Punch it down gently...
Pav - The Indian Burger Bun - Recipe

... and pinch off large tennis-ball-sized balls and place on a greased baking dish, barely touching each other. Leave some space for the rolls to rise, but not too much.
Pav - The Indian Burger Bun - Recipe

6. Set side until doubled in size - about 30 mins to an hour. Brush with melted butter.
Pav - The Indian Burger Bun - Recipe

7. Bake in an oven pre-heated at 350F/180C for ~ 25 mins. The top should turn a nice golden brown. My oven has temperature variations inside so that's why one side is slightly overdone than the other. Rotating the pan while baking will help minimize the effect of this. I am just lazy to do that, don't be like me.
Pav - The Indian Burger Bun - Recipe

You can brush some more butter on top when it's fresh out of the oven.

Pav - The Indian Burger Bun - Recipe

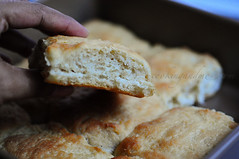
Super soft rolls are ready to be devoured along with your favourite bhaji (pav bhaji) recipe.

Pav - The Indian Burger Bun - Recipe

I want to leave you with some stuff I learned while baking pav so the pics below are your reference on what not to do while baking pav. I had laid out most of the rolls in a square baking tray. However, I left too much space between the rolls. After rising, they spread out too much resulting in flat (although delicious) pav. Don't make that mistake, ok? Leave not more than 1" max between the rolls before you let them rise before baking.

Pav - The Indian Burger Bun - Recipe
Too much space between the rolls before baking

Pav - The Indian Burger Bun - Recipe

Pav - The Indian Burger Bun - Recipe
Too flat
Don't you love it when you can learn from others' mistakes and not have to go through the same yourself? Yeah, me too.

Tuesday, March 27, 2012

Chow Chow Chutney Recipe | Chow Chow Thogayal Recipe

Chow chow chutney is tough to imagine, right? I mean, there's this vegetable, and I am saying I made chutney with it. It looks fine but you have no idea how it tastes. I know, I understand. But trust me when I say it was delicious. I had my moments of doubt too, but in the end, it turned out fabulous. What's more, this is a chutney recipe that uses no coconut!

Chow Chow Chutney Recipe

I like chow chow and make chow chow sambar or chow chow kootu very regularly since it's easily available in the vegetable markets here. But a chutney? Let's see how that goes.

Chow Chow Chutney (Thuvaiyal) Recipe

Chow Chow Chutney Recipe

Preparation time: 10 minutes
Cooking time: 15 minutes
Makes ~2 cups chutney Serves 4-6
Adapted from: Dakshin by Chandra Padmanabhan

Ingredients:
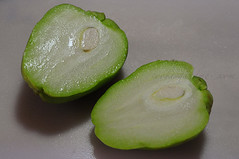
1 medium-sized chow chow
1 tomato
1 tbsp of oil
green chilly
1 small bunch of coriander leaves (cilantro)
2 tbsp of toor dal
1 tbsp of skinned urad dal
2-3 dry red chillies
1/2 tsp of hing/asafoetida/perungaayam
Salt to taste

How to make Chow Chow Chutney:

1. Peel and grate the chow chow. Chope the tomatoes into small pieces and roughly chop up the coriander leaves.
                                     Chow Chow Chutney Recipe
Chow Chow Chutney Recipe

2. in 1/2 tbsp oil, fry both the dals along with the hing and dry red chillies.
Chow Chow Chutney Recipe

When the dals turn golden brown, remove from pan and set aside to cool.
Chow Chow Chutney Recipe

Grind the cooled dal mixture to a fine powder. MIne wasn't super fine, and that's just fine. Heh.
Chow Chow Chutney Recipe

3. In the same pan, add 1/2 tbsp more oil and add the grated chow chow, chopped tomatoes, and the green chilly.
Chow Chow Chutney Recipe

4. The chow chow will let out water and turn a duller colour. Cook until the water has evaporated and the tomatoes turn softy and mushy - around 5-6 minutes. Set aside to cool.
Chow Chow Chutney Recipe

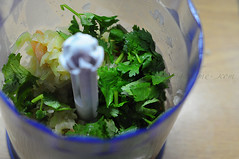
5. Once cooled, transfer the chow chow mixture to a blender, add the coriander leaves, and blend to a paste without adding any water.
Chow Chow Chutney Recipe

Add the dal mixture and some salt and blend again scraping down the side a couple of times. Don't add any water.
Chow Chow Chutney Recipe

Done! Goes super well with plain white rice and ghee. I served it with rice and kadala kozhambu.

Chow Chow Chutney Recipe

In case you want to take a look at the book I got the recipe from, check it out on Amazon or Flipkart.

Wednesday, March 14, 2012

Kerala-Style Peas Masala Recipe | Green Peas Masala Recipe

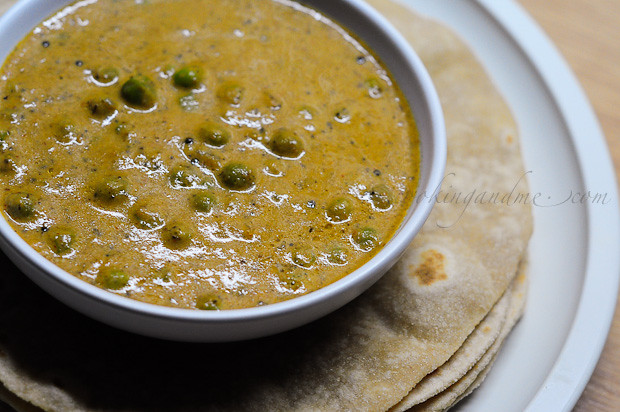
I've been wanting to try a good Kerala Style Peas Masala recipe for ages now. I rarely make appam or puttu and that's what this goes best with but it went beautifully with chapatis too, I must say.

Kerala-Style Peas Masala Recipe

Now, I really don't want to give you more reasons to think I am weird but in the interest of full disclosure, I want to admit that when I went to Delhi on work for a week earlier this month, I brought back fresh vegetables from the farmer's market. There, I said it. And before you ask, no, the Singapore customs didn't mind.

Kerala-Style Peas Masala Recipe

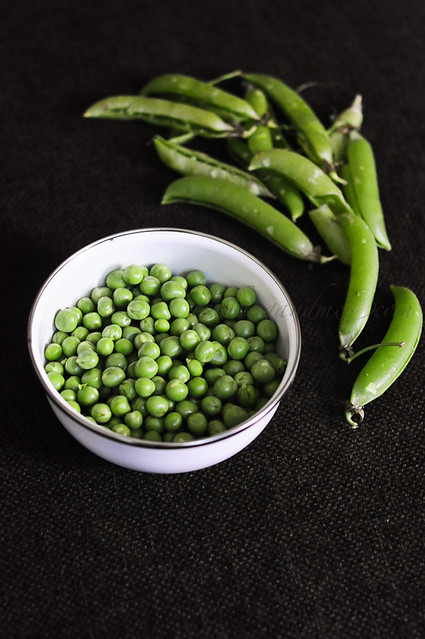
I can never ever resist fresh peas. I think I am wired exactly like my mom in that aspect. Fresh vegetables make us go weak in the knees and from the very early days, she managed to plant this idea in my head that frozen vegetables are just not vegetables anymore. So I rarely buy frozen peas but jump at the fresh ones if I can get my hands on them.

Kerala-Style Peas Masala Recipe

It was Sunday and I was talking to amma and as it often does, our conversation turned to food and recipes. I asked her for typical Kerala restaurant-style peas masala. The watery, spicy, peas-laden side-dish served with Kerala parotta in almost every restaurant. She boo-ed me. In her exact words "why do you want to make that at home? They add maida and who-knows-what-else to make it golu-gola" (referring to thickening of the gravy). I said fine, tell me your version.

And she did.

And it changed my life.

I am not kidding when I say this is the best side dish I have ever made for chapatis. Ever. It's a bit of grinding and saut�ing and stuff, but by God, it's worth it.

I have two types of appam recipes in the blog  - Kerala appam without yeast and spongy appam with yeast. Either would go really well with this peas curry. You can also serve it with rotis or chapatis like I did. This idiyappam recipe may be another good idea.

Kerala-Style Peas Masala Recipe


Source: Amma gave recipe verbally, I adapted it
Preparation time: 15 minutes
Cooking time: 30 minutes
Serves 4

Ingredients:
2 cups of shelled peas, fresh or frozen (thawed)
2 tbsp of coriander seeds
3 dry red chillies
1 tsp + 1 tsp of oil
1/4 tsp of turmeric powder
2 large onions, chopped
2 tomatoes, chopped
2 cloves of garlic
A small piece of ginger
1 cup of thick coconut milk
1 tsp of garam masala or any curry powder
Salt to taste

For tempering:
1 tbsp coconut oil (or any oil you prefer)
1/4 tsp mustard seeds
A few curry leaves

How to Make Peas Masala:

1. In a small pan, heat the 1 tsp oil and fry the coriander seeds and red chillies until nicely browned. In fact, mine turned almost black, just short of burning, and that's perfect. Take care not to burn it because that will obviously spoil the peas masala. Set this aside to cool.

Kerala-Style Peas Masala Recipe

2. In a larger pan, heat another tsp of oil and add the chopped onions. Once they brown, add the tomatoes, garlic and ginger. Saute some more until the mixture cooks up and looks mushy - about 4-5 mins. Remove from fire, transfer to a bowl and set aside to cool.

Kerala-Style Peas Masala Recipe

3. In the same pan, add the peas and enough water to cover it completely. Add the turmeric powder and bring to boil, then lower fire to a simmer.

Kerala-Style Peas Masala Recipe

4. Grind the roasted coriander-chilli mixture with some water (just to get it ground up nicely, doesn't need to be a super smooth paste) and add to the peas.

Kerala-Style Peas Masala Recipe

Mix well and continue to cook on low flame.

Kerala-Style Peas Masala Recipe

5. In the same mixer jar you used for the coriander-chilli mixture, grind the onion mixture to a smooth paste. Don't add water.

Kerala-Style Peas Masala Recipe

Kerala-Style Peas Masala Recipe

6. Add this mixture to the peas and continue to cook for another 5 mins or until the peas are cooked and turn mushy when you apply pressure. Don't overcook them though.

Kerala-Style Peas Masala Recipe

7. Add the coconut milk next along with salt. Mix and let it come to boil.

Kerala-Style Peas Masala Recipe

8. As soon as it comes to boil, add the garam masala or any curry powder you like and remove from fire. If you think the gravy is too thick, you can add some water along with the coconut milk. Mine turned out perfect with these proportions.

Kerala-Style Peas Masala Recipe

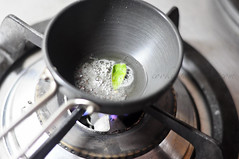
Time for tempering. Heat the coconut oil in a small pan and add the mustard seeds and curry leaves.

Kerala-Style Peas Masala Recipe

When the mustard seeds start to pop, add to the cooked peas curry and mix well.

Kerala-Style Peas Masala Recipe

Serve Kerala peas masala hot with chapatis, appam, puttu, or parotta. It's delicious!