Of late, I am getting a LOT of questions from beginner bakers on how to get started on baking, what are the first few essentials, ingredients and their substitutes, ovens and types of ovens, pre-heating, etc. This is a 2-part series on the basics of baking.
Needless to say, I am definitely no expert and these notes and observations are based on my personal experiences or what I have seen work for others. Feel free to contest, share, or add in your thoughts in the comments section.
Basics of Baking - Part I - Getting Started with the Essentials of Baking
Of course, the first thing you need to get is an oven. I have already done a lot of research and posted about it types of oven and how to choose an oven.
The next thing is definitely baking trays and pans. There are lots of variety here in terms of what you can get and it can get confusing. However, the basic must-haves according to me, are below:
- Square and round cake pans, preferably Springform Pans, since it's very easy to get the cake out of the pan after baking

Round springform pans are easier to get and may be slightly more expensive than normal pans but its definitely worth it and you will find yourself reaching out for one of these most often. An 8" or 9" diameter is the most versatile.
The material for regular cake pans doesn't really matter but stay away from glass (pyrex type ones) as your first pan. The baking time will increase and the texture may differ too. Aluminium, non stick or silicon pans are your best bet.
- Baking trays or Baking Pans
Most ovens come with one of these, so you may not need to buy one. Very handy when it comes to baking cookies or potato fries. I have a round baking tray for pizza which has holes at the bottom for more even baking. If you plan to bake a lot of pizza, this may be handy. You can also lay a baking sheet or parchment over it and use it to bake cookies. Check out Baking Trays here.
- A good mixing bowl, whisk and rubber / silicon spatula

You can definitely use the bowls you have in hand currently but there's something special about having one just for your baking. I have a regular steel mixing bowl from Ikea that I use only for mixing during baking and it's just fantastic. These glass mixing bowls are fabulous too and have been on my wish list for a while now (in case any of you feel like sending me some!)

A whisk is very handy when you don't want to invest in an electric beater just yet. There are a lot of recipes that come out very well without beating your hands out of their sockets so don't worry about starting with just a plain old whisk. There are lots of options now for whisks too, like silicon, metal, or rubber. Browse whisks here.

A silicon spatula makes life so so easy and I insist you get one. It scrapes the sides of the bowl very efficiently and spotlessly. I got my first as a gift and have since bought 2 more - very very handy during baking. Wilton makes some good ones and so does Kitchenaid. Browse them here.
- Measuring cups and spoons

Baking is more a science than art. When you are a beginner, its better not to experiment too much with quantities because the first few failures may deter you from continuing. Trust me, I have seen that happen. Stick with simple, easy, no-fail recipes and soon you can start concocting your own. Buy a good set of measuring cups and spoons, you get lots of different kinds, find the cheapest ones if you are not sure if this hobby will stick. You can graduate to kitchen scales later. Even if a recipe you really like has measurements by weight, you can easily convert them online - Google has all the answers.
These are the measuring spoons I use and absolutely love.
- Ingredients
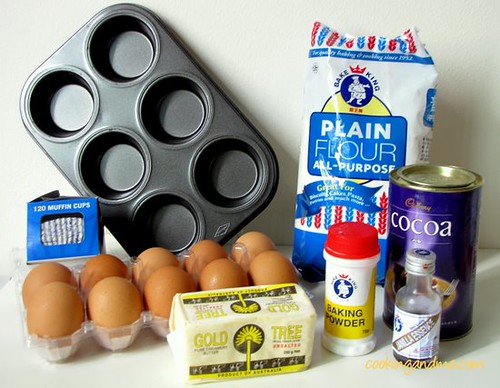
Again, as a beginner, its best to start your journey with easy recipes that don't have hard-to-find ingredients or even expensive ones. Stick to the same ingredients as mentioned in the original recipe, once you get a hang of this baking thing, you can let your creativity run wild.
I started baking at the age of 10 and one of my first successes wast the Apple Crumble Recipe. Since its not an ordinary cake or cookie, there's a wow factor in spite of the ease of baking it.
Here are some very basic and easy recipes you can start out with:
Eggless Chocolate Melting Moments
Easy Basic Chocolate Brownies
Toblerone Candy Bar Shortbread
Banana Bread
Part II - How to Pre-Heat an Oven
Needless to say, I am definitely no expert and these notes and observations are based on my personal experiences or what I have seen work for others. Feel free to contest, share, or add in your thoughts in the comments section.
Basics of Baking - Part I - Getting Started with the Essentials of Baking
Of course, the first thing you need to get is an oven. I have already done a lot of research and posted about it types of oven and how to choose an oven.
The next thing is definitely baking trays and pans. There are lots of variety here in terms of what you can get and it can get confusing. However, the basic must-haves according to me, are below:
- Square and round cake pans, preferably Springform Pans, since it's very easy to get the cake out of the pan after baking
Round springform pans are easier to get and may be slightly more expensive than normal pans but its definitely worth it and you will find yourself reaching out for one of these most often. An 8" or 9" diameter is the most versatile.
The material for regular cake pans doesn't really matter but stay away from glass (pyrex type ones) as your first pan. The baking time will increase and the texture may differ too. Aluminium, non stick or silicon pans are your best bet.
- Baking trays or Baking Pans
Most ovens come with one of these, so you may not need to buy one. Very handy when it comes to baking cookies or potato fries. I have a round baking tray for pizza which has holes at the bottom for more even baking. If you plan to bake a lot of pizza, this may be handy. You can also lay a baking sheet or parchment over it and use it to bake cookies. Check out Baking Trays here.
- A good mixing bowl, whisk and rubber / silicon spatula
You can definitely use the bowls you have in hand currently but there's something special about having one just for your baking. I have a regular steel mixing bowl from Ikea that I use only for mixing during baking and it's just fantastic. These glass mixing bowls are fabulous too and have been on my wish list for a while now (in case any of you feel like sending me some!)
A whisk is very handy when you don't want to invest in an electric beater just yet. There are a lot of recipes that come out very well without beating your hands out of their sockets so don't worry about starting with just a plain old whisk. There are lots of options now for whisks too, like silicon, metal, or rubber. Browse whisks here.
A silicon spatula makes life so so easy and I insist you get one. It scrapes the sides of the bowl very efficiently and spotlessly. I got my first as a gift and have since bought 2 more - very very handy during baking. Wilton makes some good ones and so does Kitchenaid. Browse them here.
- Measuring cups and spoons
Baking is more a science than art. When you are a beginner, its better not to experiment too much with quantities because the first few failures may deter you from continuing. Trust me, I have seen that happen. Stick with simple, easy, no-fail recipes and soon you can start concocting your own. Buy a good set of measuring cups and spoons, you get lots of different kinds, find the cheapest ones if you are not sure if this hobby will stick. You can graduate to kitchen scales later. Even if a recipe you really like has measurements by weight, you can easily convert them online - Google has all the answers.
These are the measuring spoons I use and absolutely love.
- Ingredients
Again, as a beginner, its best to start your journey with easy recipes that don't have hard-to-find ingredients or even expensive ones. Stick to the same ingredients as mentioned in the original recipe, once you get a hang of this baking thing, you can let your creativity run wild.
I started baking at the age of 10 and one of my first successes wast the Apple Crumble Recipe. Since its not an ordinary cake or cookie, there's a wow factor in spite of the ease of baking it.
Here are some very basic and easy recipes you can start out with:
Eggless Chocolate Melting Moments
Easy Basic Chocolate Brownies
Toblerone Candy Bar Shortbread
Banana Bread
Part II - How to Pre-Heat an Oven